36 (2720)A
REPAIR GUIDE
■■
■■
■
Fig. 1Fig. 1
Fig. 1Fig. 1
Fig. 1
■■
■■
■
Fig. 2Fig. 2
Fig. 2Fig. 2
Fig. 2
■■
■■
■
Fig. 3Fig. 3
Fig. 3Fig. 3
Fig. 3
16701670
16701670
1670
±±
±±
±
30mm30mm
30mm30mm
30mm
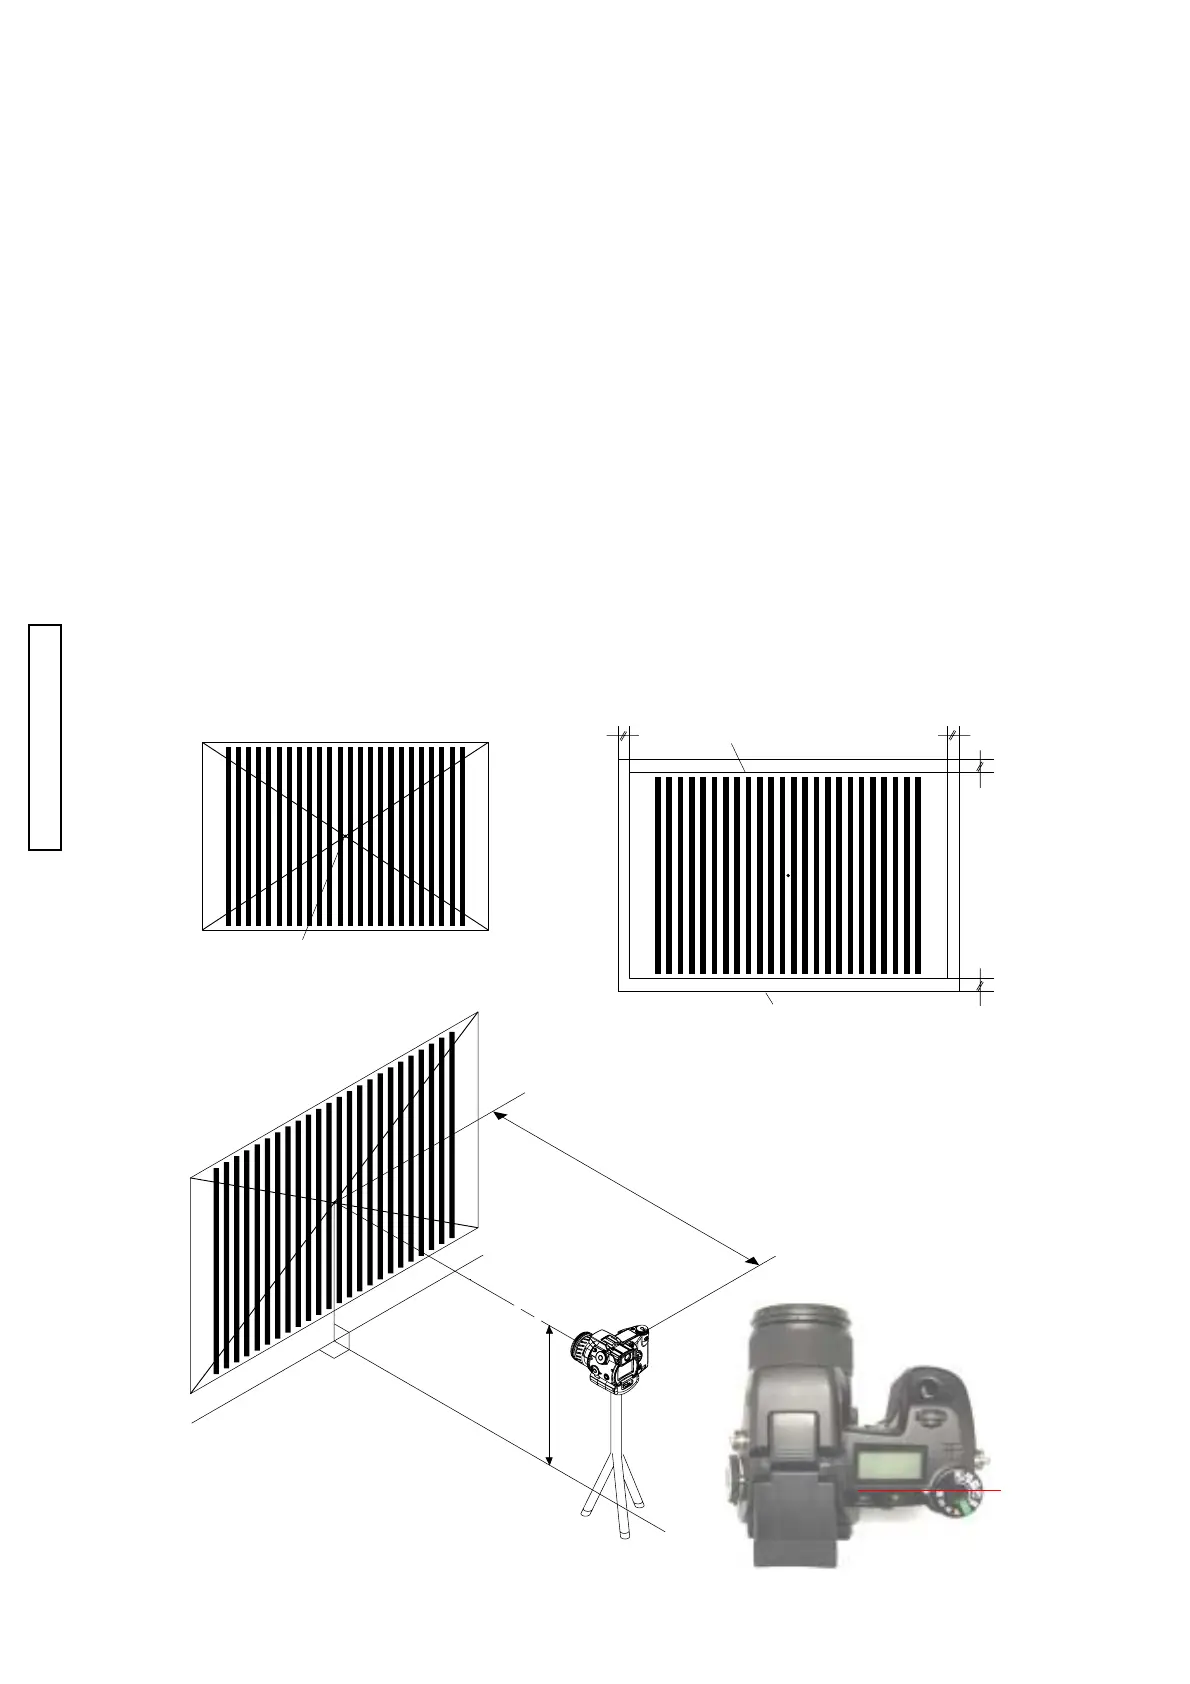
2. In case of using a tripod
Required equipment
Tripod
Siemens star chart (see P.51 Measuring instrument)
LB adjustment chart II for 2766
Setting the camera and the chart
1. Mark in the center of the chart (siemens star chart or LB adjustment chart II for 2766) (Fig.1).
2. Stick the chart onto the wall.
3. Check the point where the straight line from the center of the chart, "marking" meets the floor surface
(Fig.2).
4. Stick the line or tape measure in the angle of "90 degrees" from the checked point on the floor to the
chart (Fig.2).
5. Align the heights of the center of the chart and the camera lens (Fig.2).
6. Align the line of the floor and the center of the camera lens to set the distance, from the CCD surface of
the camera to the chart, to "1670•} 30mm" (Fig.2).
7. Turn the power of the camera on.
8. Look into the EVF, and adjust the camera to let the 2 charts be in the center of the finder.
Zoom roughly to let the vertical and horizontal spaces of the chart and the EVF finder be equal (Fig.3).
However, three adjustment screws for the CCD holder must be tighten to the end.
9. When 5, 6 and 8 are aligned, the setting of the camera and the chart is completed.
ChartChart
ChartChart
Chart
ChartChart
ChartChart
Chart
EVF Finder FrameEVF Finder Frame
EVF Finder FrameEVF Finder Frame
EVF Finder Frame
ChartChart
ChartChart
Chart
Marking the centerMarking the center
Marking the centerMarking the center
Marking the center
90 degrees90 degrees
90 degrees90 degrees
90 degrees
90 degrees90 degrees
90 degrees90 degrees
90 degrees
Align the hights of the centerAlign the hights of the center
Align the hights of the centerAlign the hights of the center
Align the hights of the center
of the chart and the lens.of the chart and the lens.
of the chart and the lens.of the chart and the lens.
of the chart and the lens.
CCD positionCCD position
CCD positionCCD position
CCD position