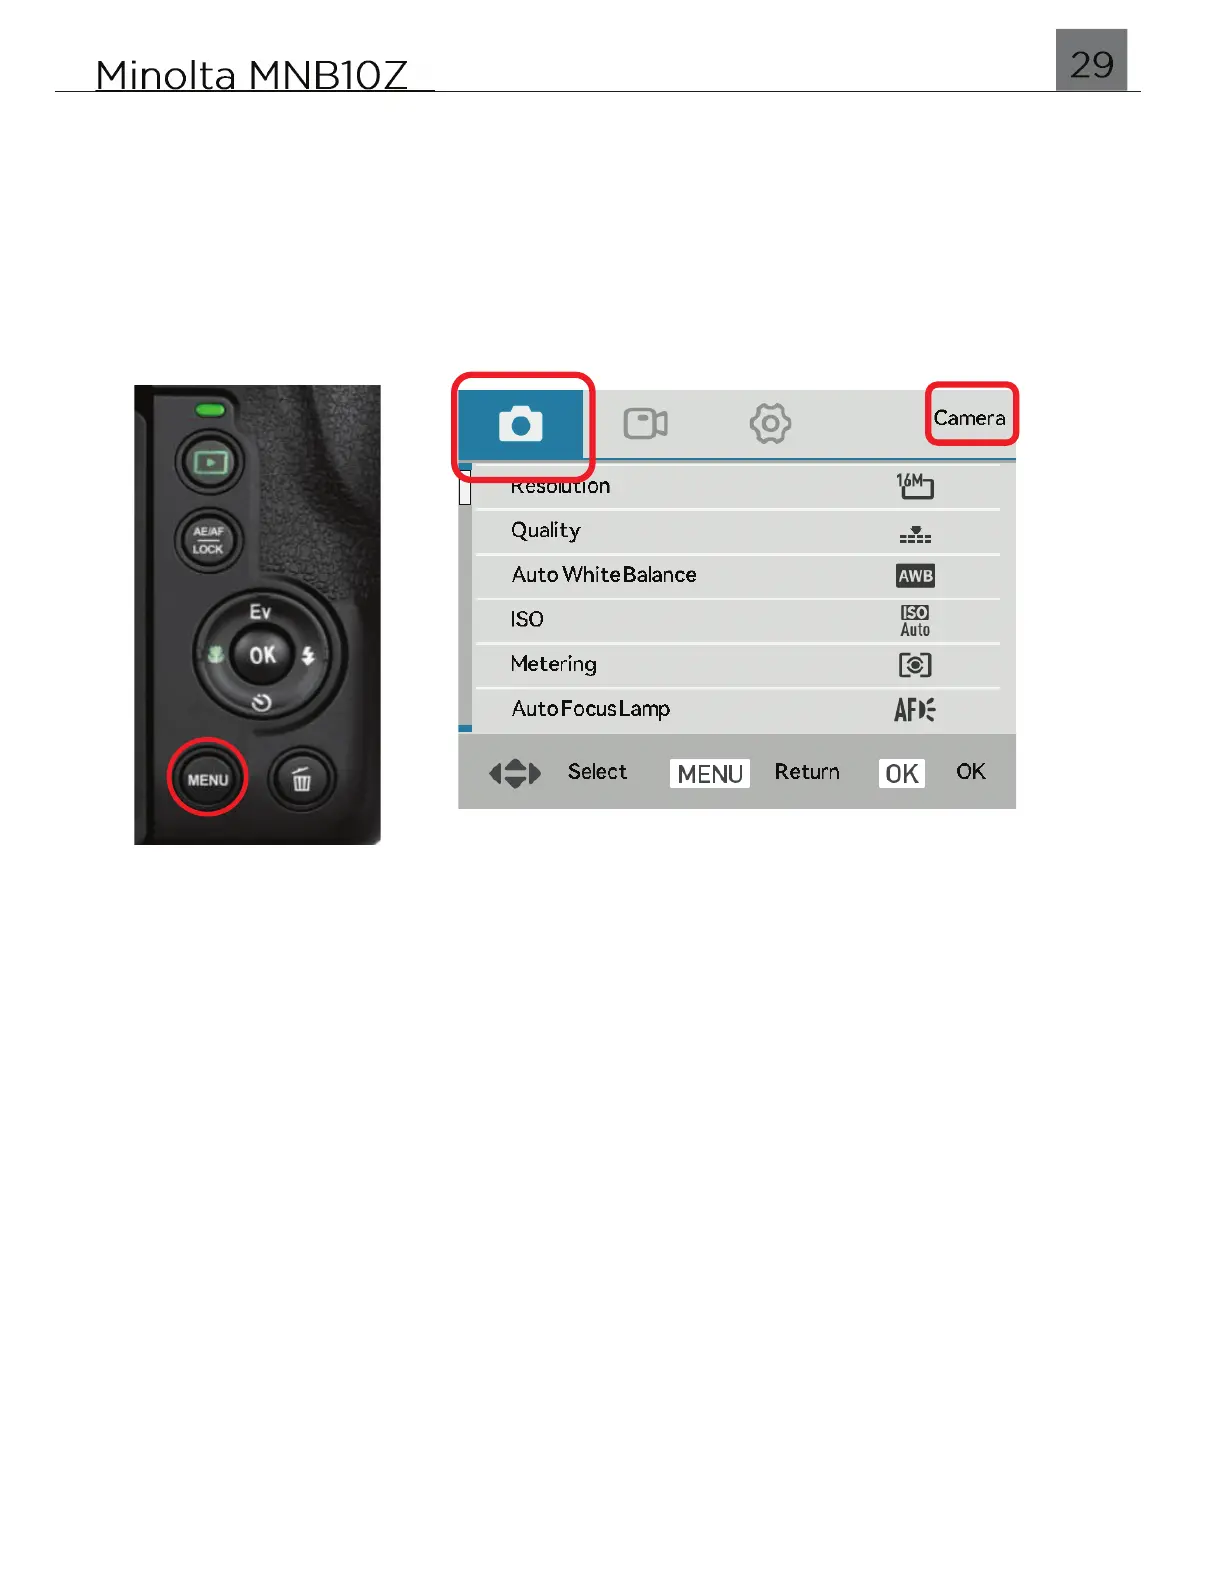
3.0 Camera Settings Menu
All settings in this menu will affect the photos being captured. To access this menu,
press the MENU button. Once in the menu, press the UP and DOWN buttons to
navigate. Pressing the LEFT and RIGHT buttons will switch the menu from Camera
settings to Video or System settings.
The highlighted screenshot below shows the Photo settings. The Photo mode icon
selected, and “Camera” is displayed at the top right corner.
Each setting in the menu is explained in further below in the manual.
NOTE: Not all settings below are available in all shooting modes. If a menu is not
visible in the menu, change the shooting mode dial to another applicable shooting
mode.
3.1 Resolution
This setting sets the photo resolution. The higher the resolution, the greater the
photo quality and the larger the file size of the photo.
1.
To access this menu, press the MENU button.
2.
Once in the menu, press the UP and DOWN buttons to navigate. Pressing the LEFT
and RIGHT buttons will switch the menu from Photo settings to Video or System
settings.
3.
Select ‘Resolution’ and press the OK button to enter the submenu.
4.
You may select from 64 Mega Pixels, 32 Mega Pixels, 16 Mega Pixels, and
8 Mega Pixels.
5.
Highlight your selection and press the OK button to confirm.
6.
Press the MENU button to exit the settings menu and return to shooting.
 Loading...