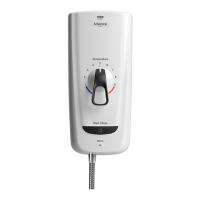
Test Procedure
This procedure should be conducted by qualied, competent personnel only.
WARNING, LIVE ELECTRICAL WIRES ARE EXPOSED WHEN THE COVER IS
REMOVED!
1. Turn the temperature control fully anti-clockwise.
2. Start the shower and allow it to run for at least two minutes
3. Stop the shower and isolate the electrical and water supplies.
4. Remove the inlet filter and record the incoming water temperature. The
temperature of the water must be within the range of 5 - 20º C.
5. Clean, or if necessary renew, and ret the inlet lter.
6. Switch on the electrical supply and record the voltage at the terminal block. The
voltage must be in the range 230V ±10%. Isolate the electrical supply.
7. Turn on the water supply and check for leaks. Hold down the air bleed button to
prime the shower (see Installation - Priming the Shower).
8. Remove the showerhead from the hose. Position the end of the hose to allow
water to drain safely while the shower is running, if necessary secure the hose
in this position. Ensure the ribbon cable is connected to the cover.
9. Turn the temperature control fully clockwise.
10. Switch on the electrical supply. Start the shower and allow it to run for at least
10 seconds, then record the supply voltage at the terminal block.
11. Stop the shower and isolate the electrical supply.
12. Ret the showerhead to the hose and reattach to its holder.
13. Switch on the electrical supply to the shower and start the shower.
14. Using a plastic funnel, catch all the water owing from the showerhead and record
the temperature of the water owing from the funnel. Using a ow measure cup,
record the rate of water ow from the funnel.
15. Slowly restrict the water supply to the shower by closing the isolating valve
gradually until the shower shuts down.
16. Switch off the electrical supply and open the isolating valve by a small amount.
Hold down the air bleed button to expel all hot water from the tank.
17. Switch on the electrical supply to the shower. Run the shower for at least two
minutes, then record the water temperature and rate of ow as described in step
14. If the shower will not run continuously, return to step 16.
18. When all tests have been performed and recorded, stop the shower. Isolate the
electrical supply and open the isolating valve fully. Ensure the cover is correctly
tted and secured with screws then set the temperature control to position 5.

 Loading...