NOTE
l
Be
sure to remove the roof antenna in the fol-
lowing cases:
• When using an automatic car wash.
• When placing a car cover over the vehicle.
l
Before driving into a structure that has a low
ceiling, fold down the antenna to prevent it
from hitting the ceiling.
Digital clock*
E00711800497
Automatic mode and manual mode is available for
digital clock adjustment:
Select the automatic mode or the manual mode by
performing the following operations:
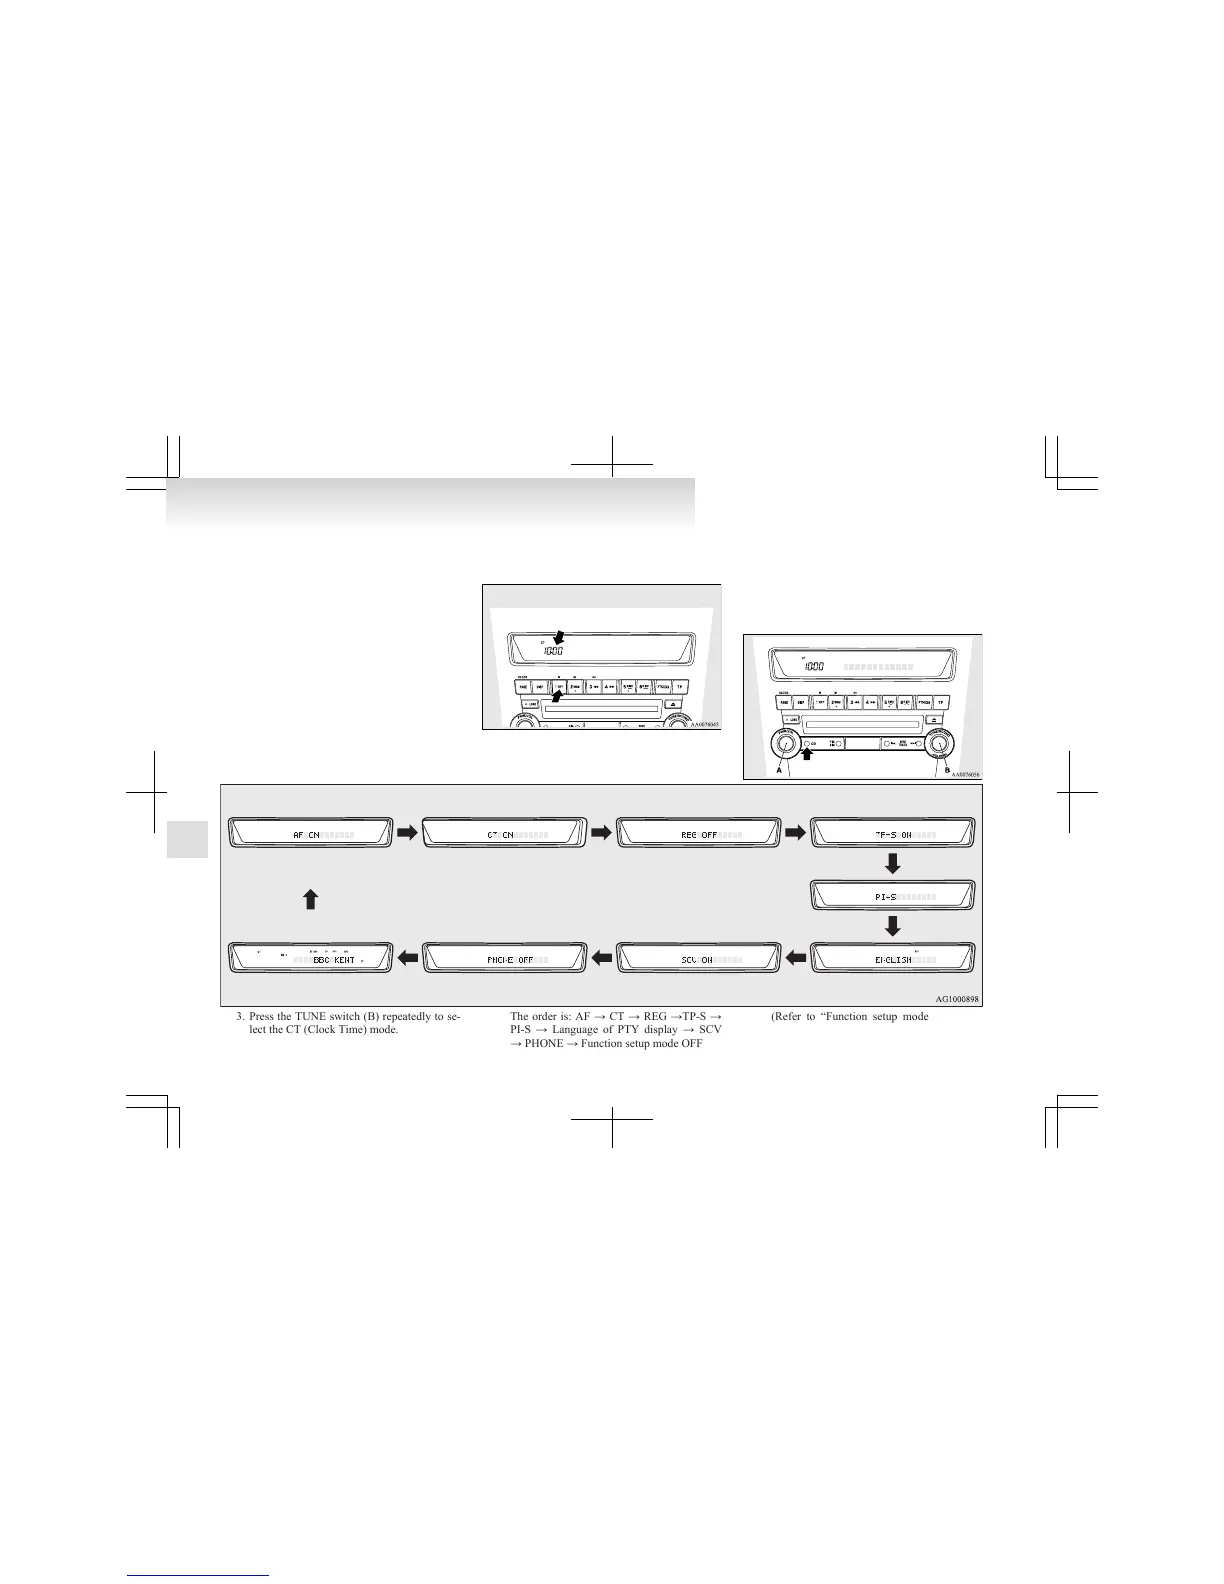
1. Press the PWR switch (A) to turn ON the au-
dio system.
2. Enter the function setup mode by pressing
the TUNE switch (B) for 2 seconds or longer.
3. Press
the TUNE switch (B) repeatedly to se-
lect the CT (Clock Time) mode.
The order is: AF → CT → REG →TP-S →
PI-S → Language of PTY display → SCV
→ PHONE → Function setup mode OFF
(Refer to “Function setup mode” on pages
5-17, 5-31.)
For pleasant driving
5-62
5