11. Holding the sealant bottle upside-down,
squeeze it again and again to inject all of the
sealant into the tyre.
NOTE
l
When
injecting the sealant, position the
valve away from the bottom, i.e., away from
the point where the tyre touches the ground.
If the valve is near the point where the tyre
touches the ground, the sealant may not go in-
to the tyre easily.
12. After injecting the sealant, pull the hose off
the valve, remove any residual sealant from
the valve, rim and/or tyre.
Fit the valve insert (I) into the valve (G), and
screw
the valve insert securely into place us-
ing the valve remover (H).
NOTE
l
When
removing and screwing in the valve in-
sert using the valve remover, turn the valve
remover by hand. Using a tool to turn the
valve remover could damage it.
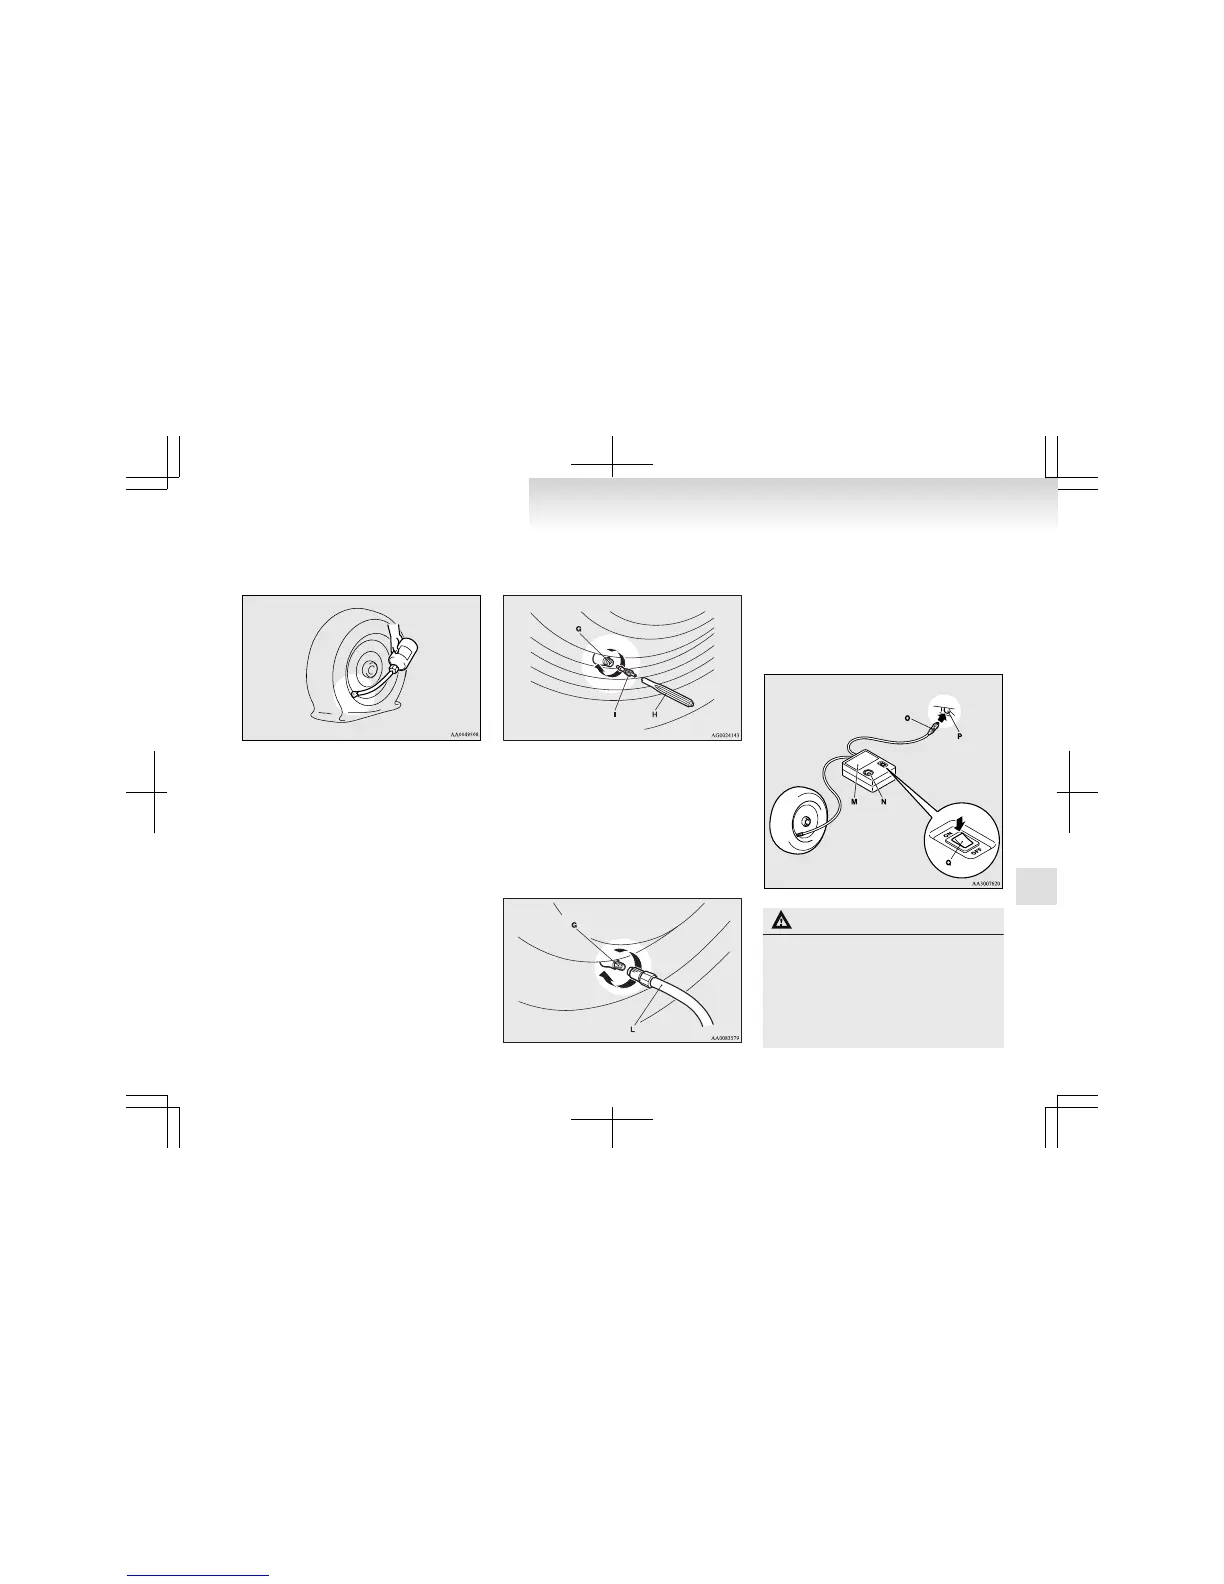
13. Pull out the compressor hose (L) from the
side of the tyre compressor, and then secure-
ly attach the hose to the tyre valve (G).
14. Place the compressor (M) with its air pres-
sure gauge (N) on top.
Pull out the compressor’s power cord (O), in-
sert the plug on the cord into the accessory
socket or cigarette lighter socket (P), and
then turn the ignition switch to the “ACC” po-
sition.
Turn ON the compressor switch (Q) and in-
flate the tyre to the specified pressure.
CAUTION
l
The
supplied compressor is designed only
for inflation of passenger vehicle tyres.
l
The compressor is designed to run on a ve-
hicle’s 12 V power supply. Do not connect
it to any other power source.
l
The compressor is not waterproof. If you
use it in rain, make sure water does not
get on it.
For emergencies
6-09
6