WARNING
l
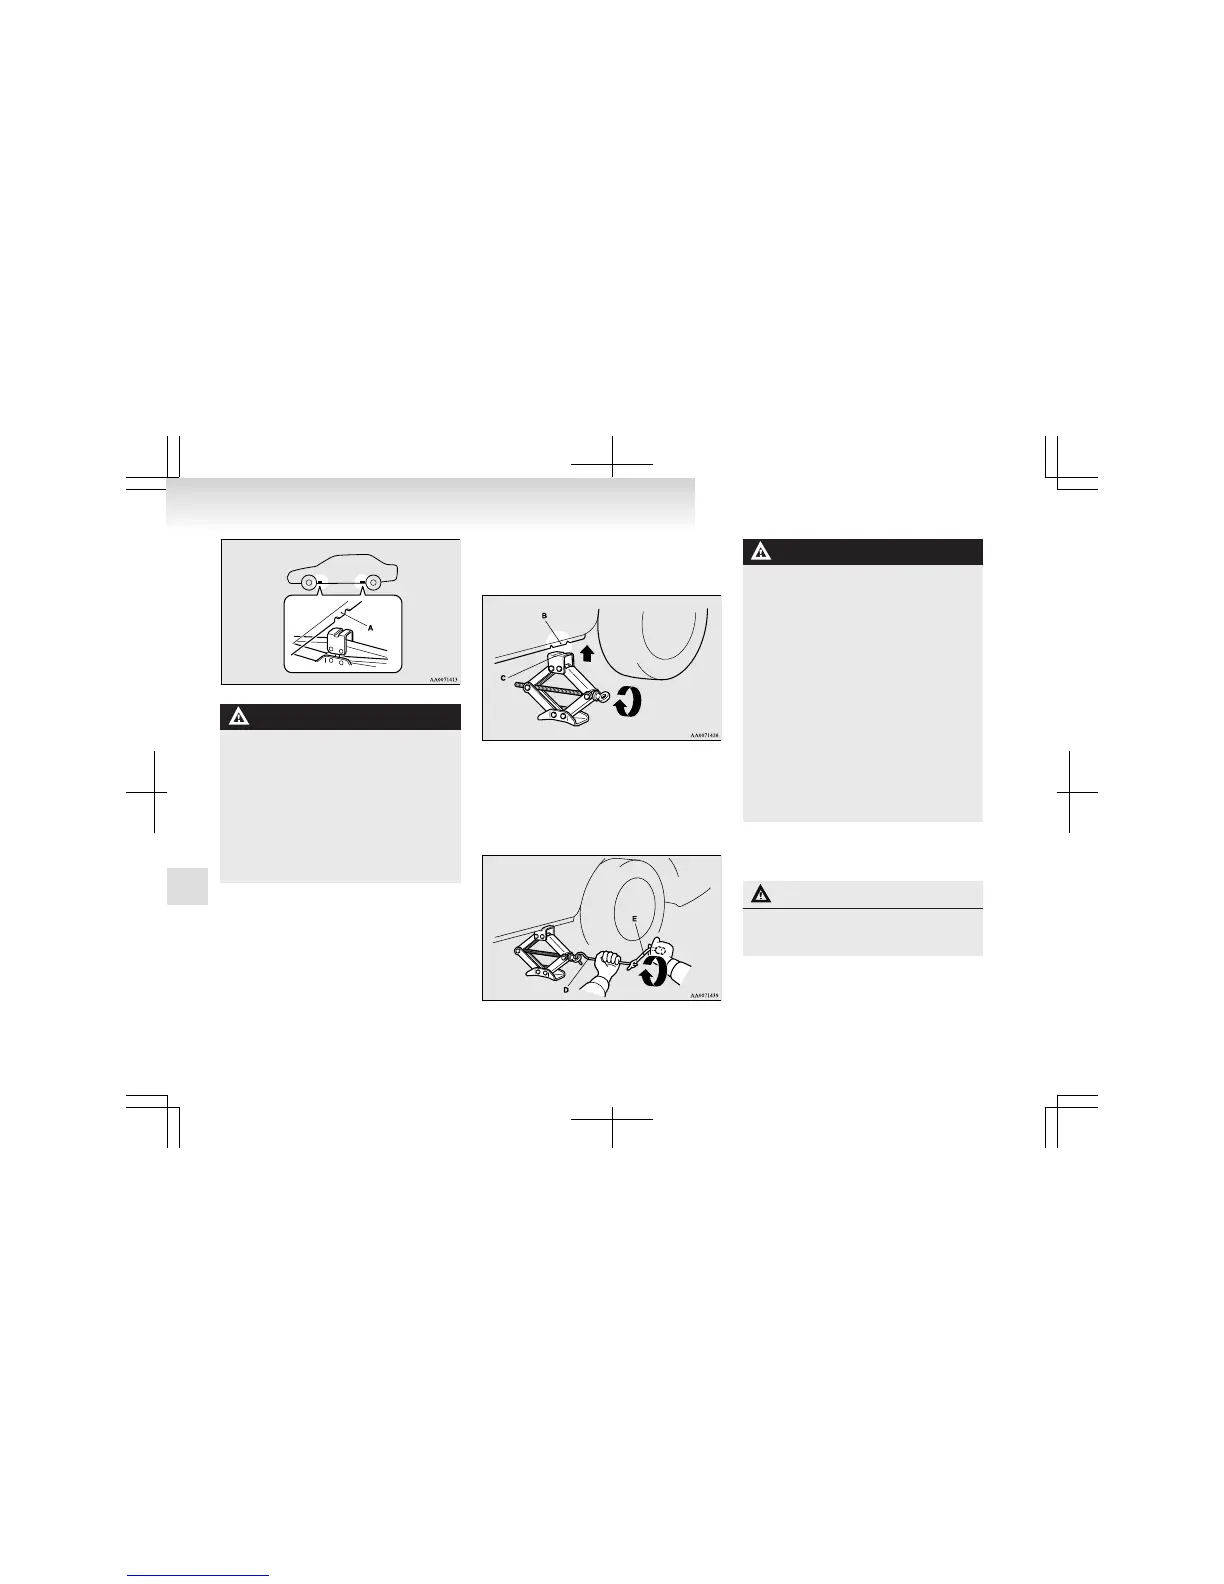
Set the jack only at the positions shown
here. If the jack is set at a wrong position,
it could dent your vehicle or the jack
might fall over and cause personal injury.
l
Do not use the jack on a tilted or soft sur-
face.
Otherwise, the jack might slip and cause
personal injury. Always use the jack on a
flat, hard surface. Before setting the jack,
make sure there are no sand or pebbles
under the jack base.
3. Rotate the jack by hand until the flange por-
tion (B) fits in the groove (C) at the top of
the jack.
4. Insert
the jack bar (D) into the wheel nut
wrench (E). Then put the end of the jack bar
into the shaft’s jack end, as shown in the il-
lustration.
Slowly rotate the wheel nut wrench until the
tyre is raised slightly off the ground surface.
WARNING
l
Stop jacking up the vehicle as soon as the
tyre is raised off the ground. It is danger-
ous to raise the vehicle any higher.
l
Do not get under your vehicle while using
the jack.
l
Do not bump the raised vehicle or leave it
sitting on the jack for a long time. Both
are very dangerous.
l
Do not use a jack except the one that
came with your vehicle.
l
The jack should not be used for any pur-
pose other than to change a tyre.
l
No one should be in your vehicle when us-
ing the jack.
l
Do not start or run the engine while your
vehicle is on the jack.
l
Do not turn the raised wheel. The tyres
still on the ground could turn and make
your vehicle fall off the jack.
5. Remove
the wheel nuts with the wheel nut
wrench, then take the wheel off.
CAUTION
l
Handle the wheel carefully when chang-
ing the tyre, to avoid scratching the wheel
surface.
6. Clean
out any mud, etc. on the hub surface
(F), hub bolts (G) or in the installation holes
(H) in the wheel, and then mount the spare
tyre.
For emergencies
6-14
6