Defect Criteria
LCD panel
Green
Red
Blue
White defect
None
Not more than 1 pixel
Not more than 4 pixels
White spot
Not more than 3 pixels
Not more than 5 pixels
Not more than 20 pixels
Negligible
white defect
Not more than 15 pixels
Ignored
Ignored
Black defect
Not more than 5 pixels
Not more than 5 pixels
Not more than 5 pixels
Pixel short cut
(White defects and black defects shall
be counted separately from this defect.)
Not more than 5 pixels
Not more than 5 pixels
Not more than 5 pixels
Blinking pixel : Count a blinking pixel at the time of occurrence as a white defect that the transmittance is
5 % or more. Occurrence of this defect in two adjoining pixels shall be rejected.
Flaws or foreign objects : They shall not be seen on the screen when the projected image is in focus.
(The squeezed-out adhesive shall not be seen, either.)
Irregular pixels or stains : They shall not cause any trouble in projection.
Discrimination of the pixel defects (white defect, white spot, and negligible white defect)
1. Connect the projector to a PC using the attached RS-232C cable.
2. Load the CD-ROM into the CD drive, and select the CD drive on the PC monitor.
3. Copy the file containing the dot pattern (RGB) from the CD-ROM into the PC.
4. Display the dot pattern of the color to be checked as PC wallpaper. (Select “TILE” in the Display Property setting.)
5. Project the PC wallpaper onto the screen.
6. Check the projected image for any defective pixels.
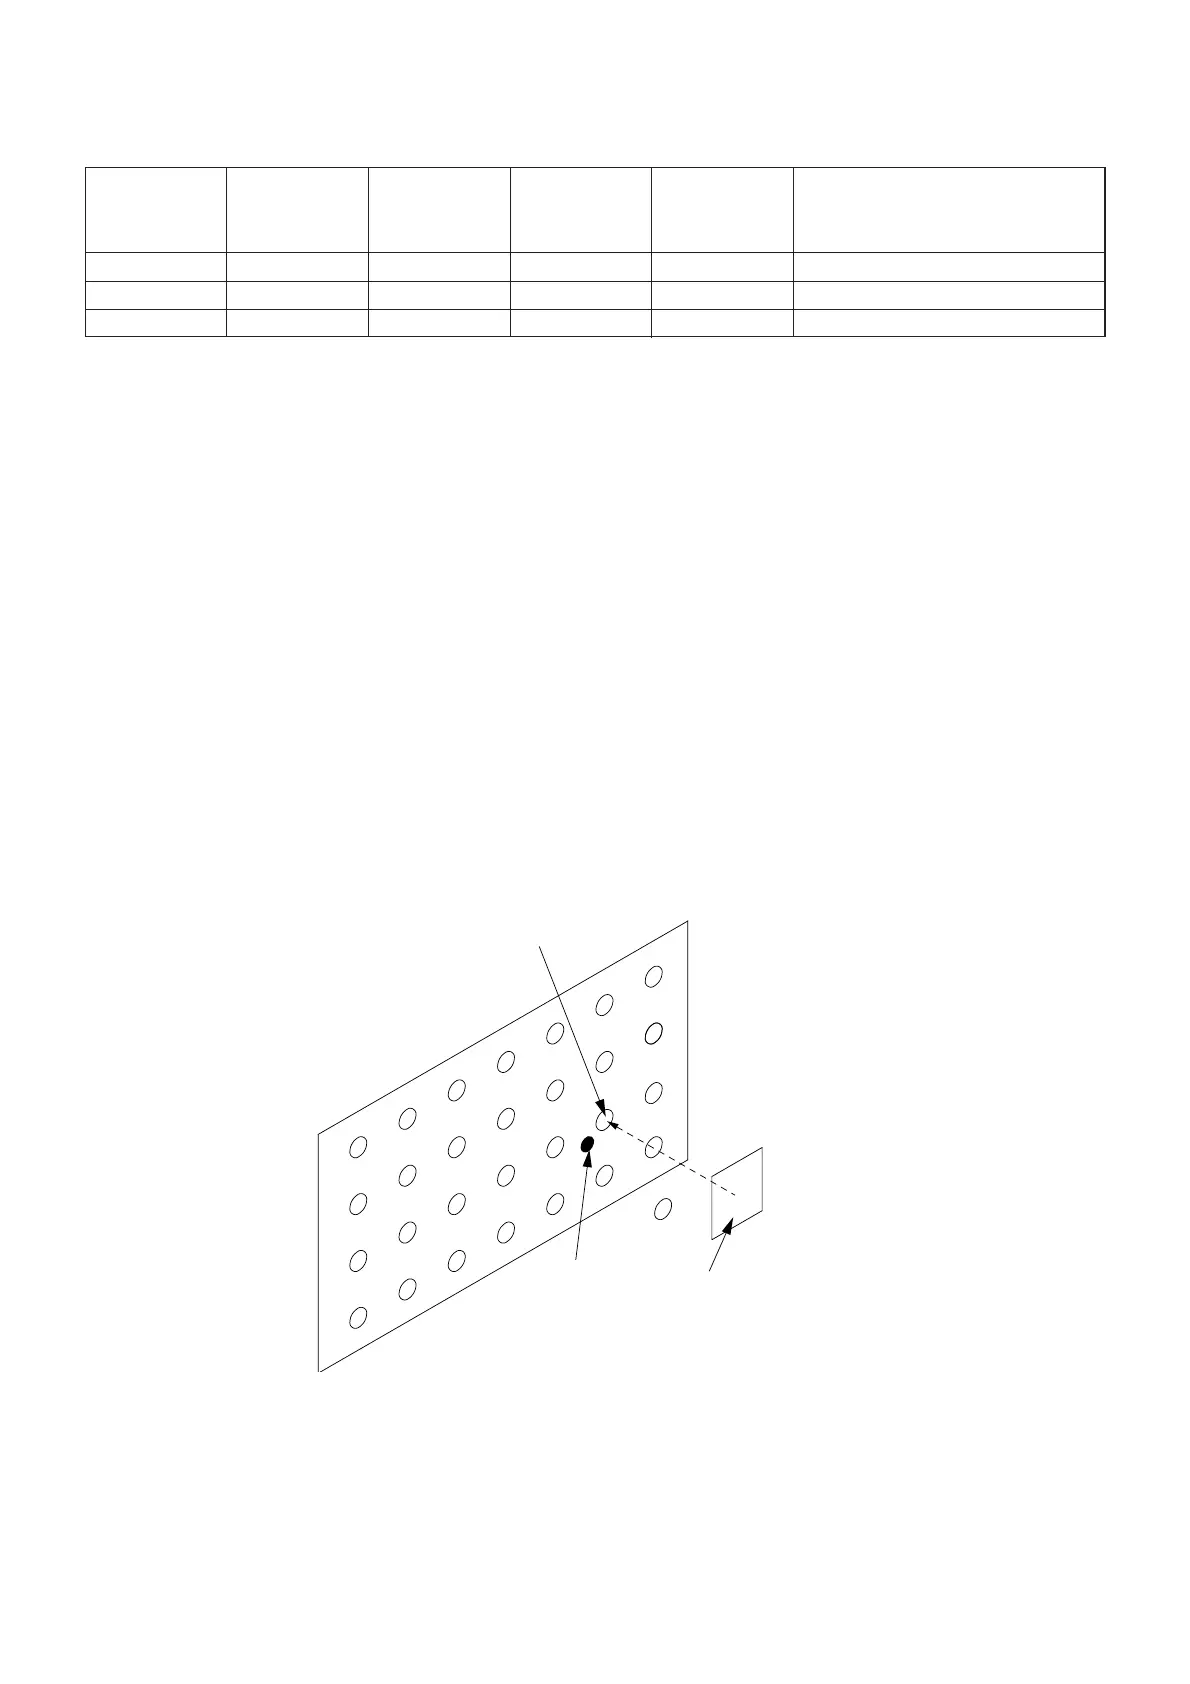
7. If a defective pixel is found, see the dot near such pixel using a 5 % ND Filter.
8. Compare the brightness of the defective pixel and that of the dot. If the defective pixel is brighter than the dot, such pixel is
judged to be a white defect. If the defective pixel is darker than the dot, go to the next step.
9. Change the 5 % ND Filter used in step 7 with a 2.5 % ND Filter.
10. Compare the brightness of the defective pixel and that of the dot. If the defective pixel is brighter than the dot, such pixel is
judged to be a white spot. If the defective pixel is darker than the dot, go to the next step. (Carry out the next step only with
the green LCD panel.)
11. Change the 2.5 % ND Filter used in step 9 with a 1.5 % ND Filter.
12. Compare the brightness of the defective pixel and that of the dot. If the defective pixel is brighter than the dot, such pixel is
judged to be a negligible white defect.
Dot
Defective pixel
ND Filter (1.5 %, 2.5 %, 5 %)
-
16
-
 Loading...