-
10
-
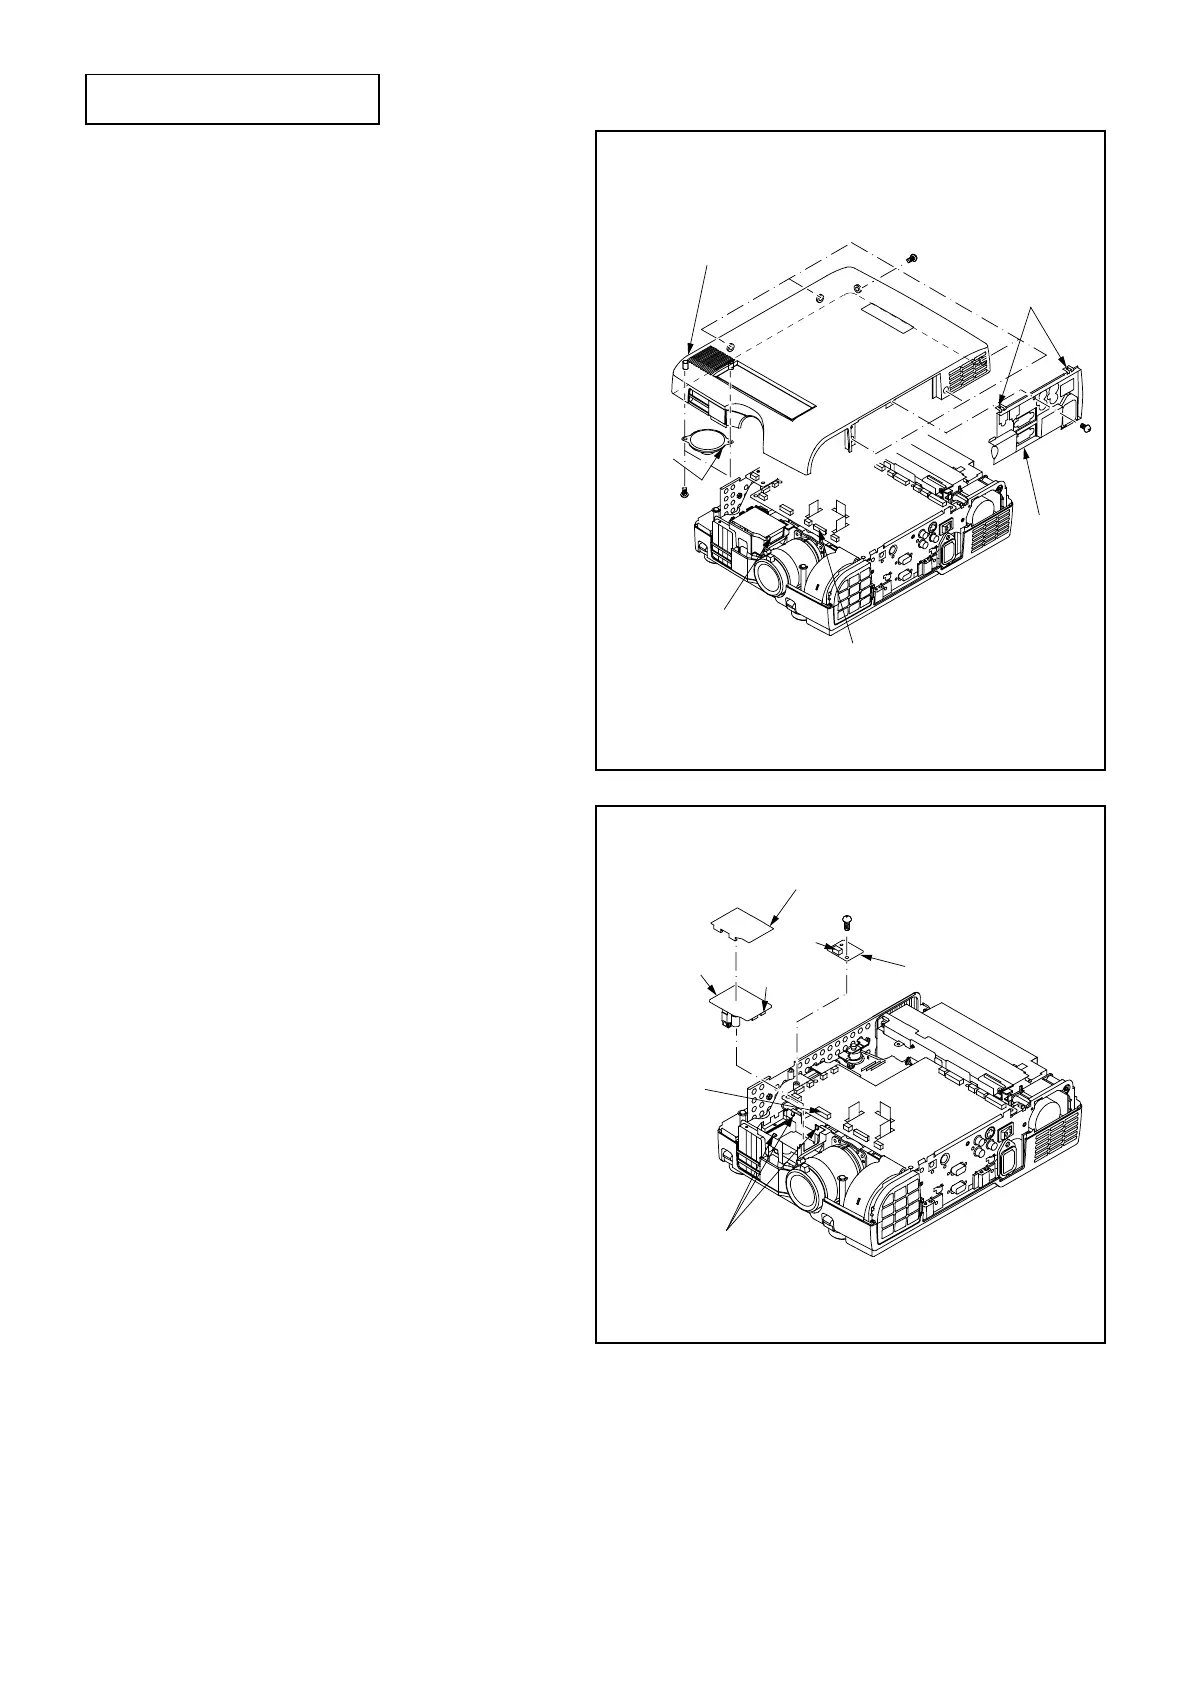
2. Removal of SENSOR PCB ASSY and
AUDIO PCB ASSY
1. Remove the Top Case Assy and the Terminal Board
following “1. Removal of TOP CASE ASSY and
SPEAKER”. (Fig. 3-1)
2. Remove the (a) screw and the SENSOR PCB ASSY as
shown in Fig. 3-2.
Note: Also disconnect the NJ connector when removing the
SENSOR PCB ASSY.
3. Remove the Audio Barrier as shown in Fig. 3-2.
4. Release the three (b) hooks and remove the AUDIO
PCB ASSY as shown in Fig. 3-2.
Note: Also disconnect the GN connector on the AUDIO
PCB ASSY and the SV connector on the MAIN PCB
ASSY when removing the AUDIO PCB ASSY.
1. Removal of TOP CASE ASSY and
SPEAKER
1. Remove the seven (a) screws and the Top Case Assy
and the Terminal Board as shown in Fig. 3-1.
Note: Also remove the ST connector on the MAIN PCB
ASSY and the GE connector on the AUDIO PCB
ASSY when removing the Top Case Assy.
Also release the two (b) hooks when removing the
Terminal Board.
2. Remove the two (c) screws and the Speaker as shown
in Fig. 3-1.
DISASSEMBLY
 Loading...