No. 99MAH016B
3 OPERATING PROCEDURE
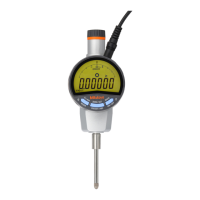
This chapter explains the operating procedure of the Digimatic
indicator.
3.1 Starting/Stopping This Instrument
Connecting to the power supply 3.1.1
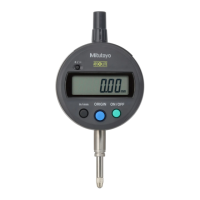
1 Remove the DC jack cover located at the upper on the Digimatic indicator ID-H, and
then push in the DC plug of the AC adapter (standard accessory) all the way until it
stops.
2 Plug the AC plug at the other end of the AC adapter firmly into an AC outlet or
extended outlet strip.
To supply or shut off the power to this instrument, be sure to turn it on or off with the
[ON/OFF] switch on the side of the main body. If the power to the instrument is shut off
during operation, damage to its internal parts could result.
Start / Stop 3.1.2
1 Slide the [ON/OFF] switch on the side of the main body upward or downward to start
(restart) or stop (terminate) measurement with this instrument.
2 To start measurement, slide the [ON/OFF] switch upward.
3 To stop measurement, slide the [ON/OFF] switch downward.
3.2 Parameter Setup Mode
Parameters such as “Digital resolution” and “Counting direction” can be changed in
the Parameter Setup mode.
To put this instrument in the Parameter Setup mode, observe the following procedure.
1 Press and hold the [MODE] key for a long time (2 seconds or more) in the
Measurement mode. Then, the mode is switched to the Parameter Setup mode, the
“res.” (“unit” for inch spec) symbol is blinking on the LCD.
2 Press and release the [MODE] key quickly (for less than 2 seconds) to change setup
items.
3 When the item to be set is displayed, press the [SET/ZERO] key quickly, then change
the setting.
4 When the setting of a desired setup item has been changed, press and hold the
[MODE] key for a long time to return to the Measurement mode.
The setting contents remain in memory even when the power is turned off.
 Loading...