11
Need help or have any questions? Call us at 1-714-963-0329 or send us an Email at service@globalhobby.net
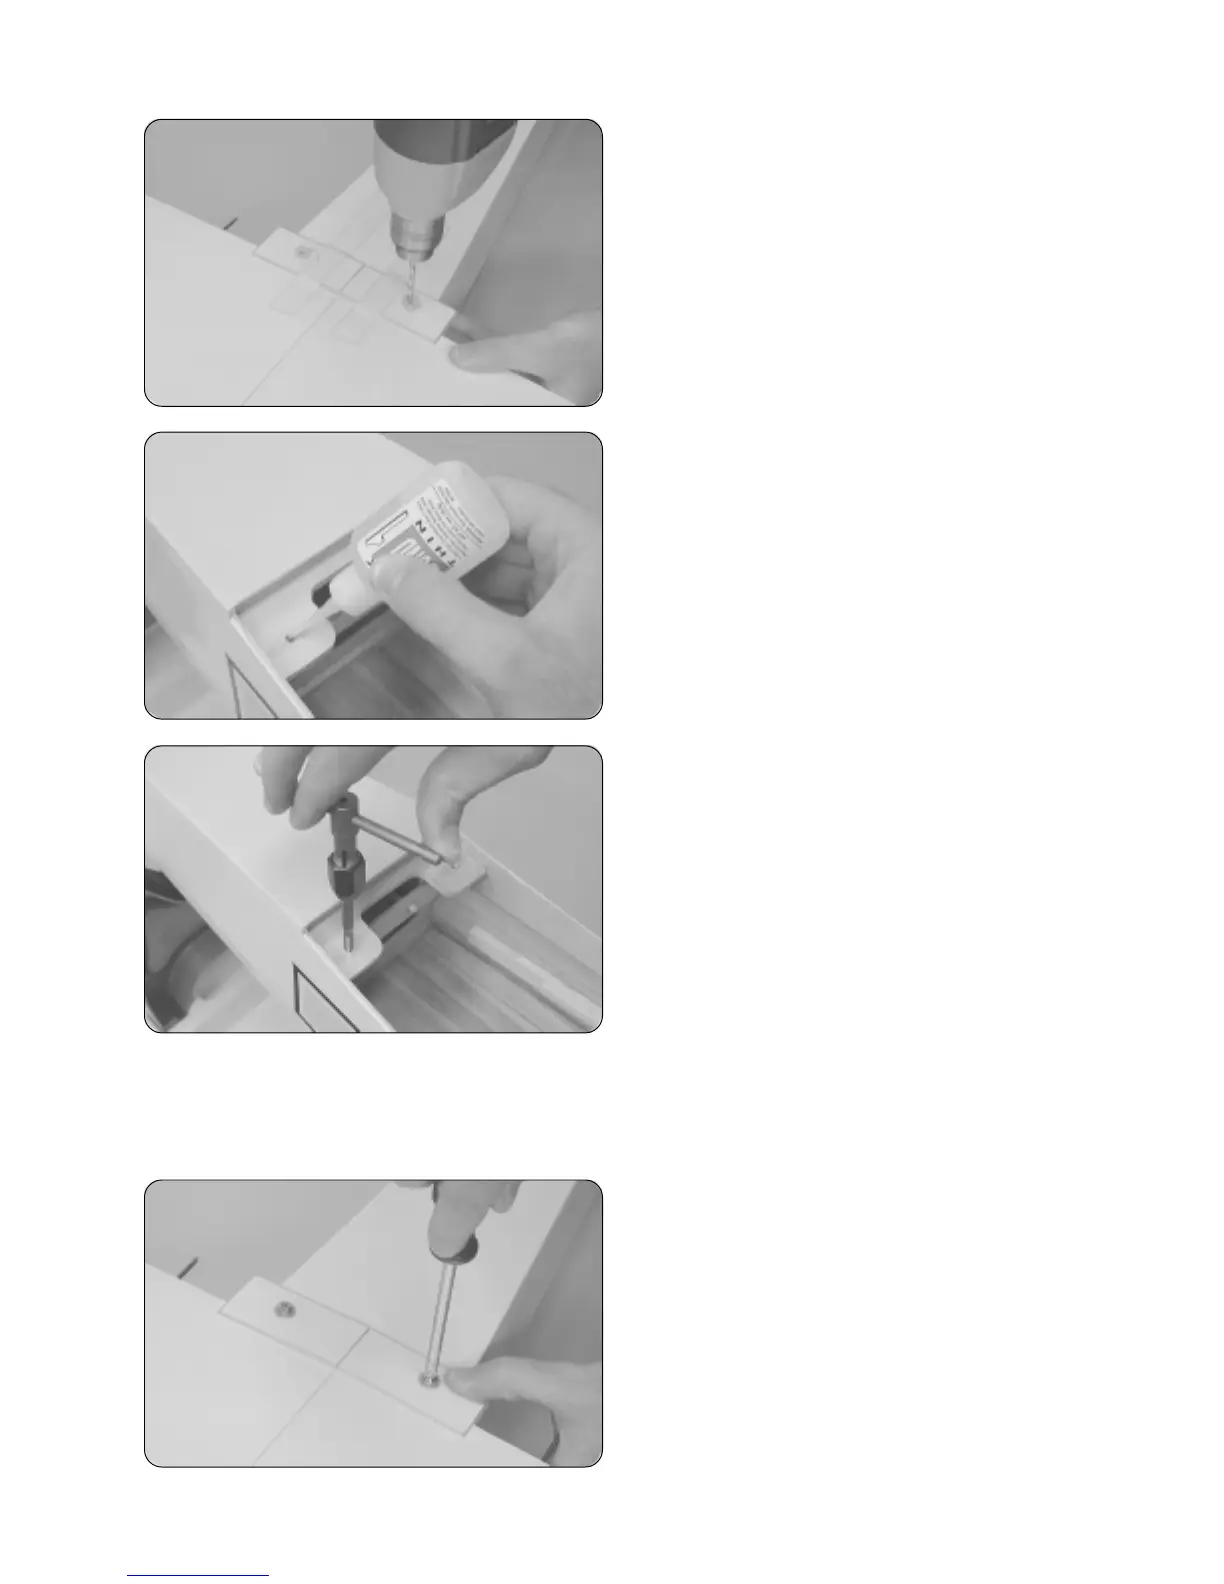
❑ Using an 5/32" diameter drill bit, drill two holes into the
wing and through the plywood wing hold-down block inside
the fuselage. Locate one hole in each wing panel, 1-3/4" out
from the centerline and 5/8" in front of the trailing edge.
IMPORTANT Drill the two holes perpendicular to the bottom
surface of the wing.
❑ Remove the wing from the fuselage and set it aside.
❑ Carefully apply several drops of thin C/A into both holes
in the wing hold-down block and allow the C/A to dry completely
before proceeding.
WARNING Let the C/A dry before proceeding to tap the
holes. If you don't, the C/A will clog the tap badly and ruin
the threads.
❑ After the C/A has fully cured, carefully tap the two holes
using a 5mm tap. Work slowly, being careful not to damage
the new threads you've just cut.
❑ After you're done tapping the threads, apply a couple of
small drops of thin C/A into the holes and let it soak in. Allow
the C/A to completely cure before proceeding.
IMPORTANT Do not omit this procedure. The C/A will
strengthen the threads and help prevent them from being
stripped out over time.
Step 3: Mounting the Wing
❑ Using a 13/64" diameter drill bit, enlarge only the two wing mounting holes in the wing, so the wing hold-down bolts will
slide through without binding.
❑ Set the wing back into the wing saddle and realign it.
❑ Secure the wing into place using two 5mm x 40mm
machine screws and two 5mm flat washers.
☞
Don't overtighten the screws. You don't want to crush
the wing.