8
Visit our website at http://modeltech.globalhobby.com or for Customer Service at http://globalservices.globalhobby.com
❑ Kwik Bond 30 Minute Epoxy
❑ Excel Modeling Knife
❑ Ruler
❑ Pencil
❑ 220 Grit Sandpaper w/Sanding Block
YOU'LL NEED THE FOLLOWING PARTS FROM THE KIT:
❑ (1) Right Wing Panel w/Aileron
❑ (1) Left Wing Panel w/Aileron
SECTION 7: WING ASSEMBLY
❑ (1) Hardwood Wing Joiner (W3)
YOU'LL NEED THE FOLLOWING TOOLS AND SUPPLIES:
❑ Masking Tape
❑ Paper Towels
❑ Rubbing Alcohol
❑ NHP Epoxy Mixing Sticks
❑ NHP Epoxy Mixing Cups
Step 1: Installing the Wing Joiner
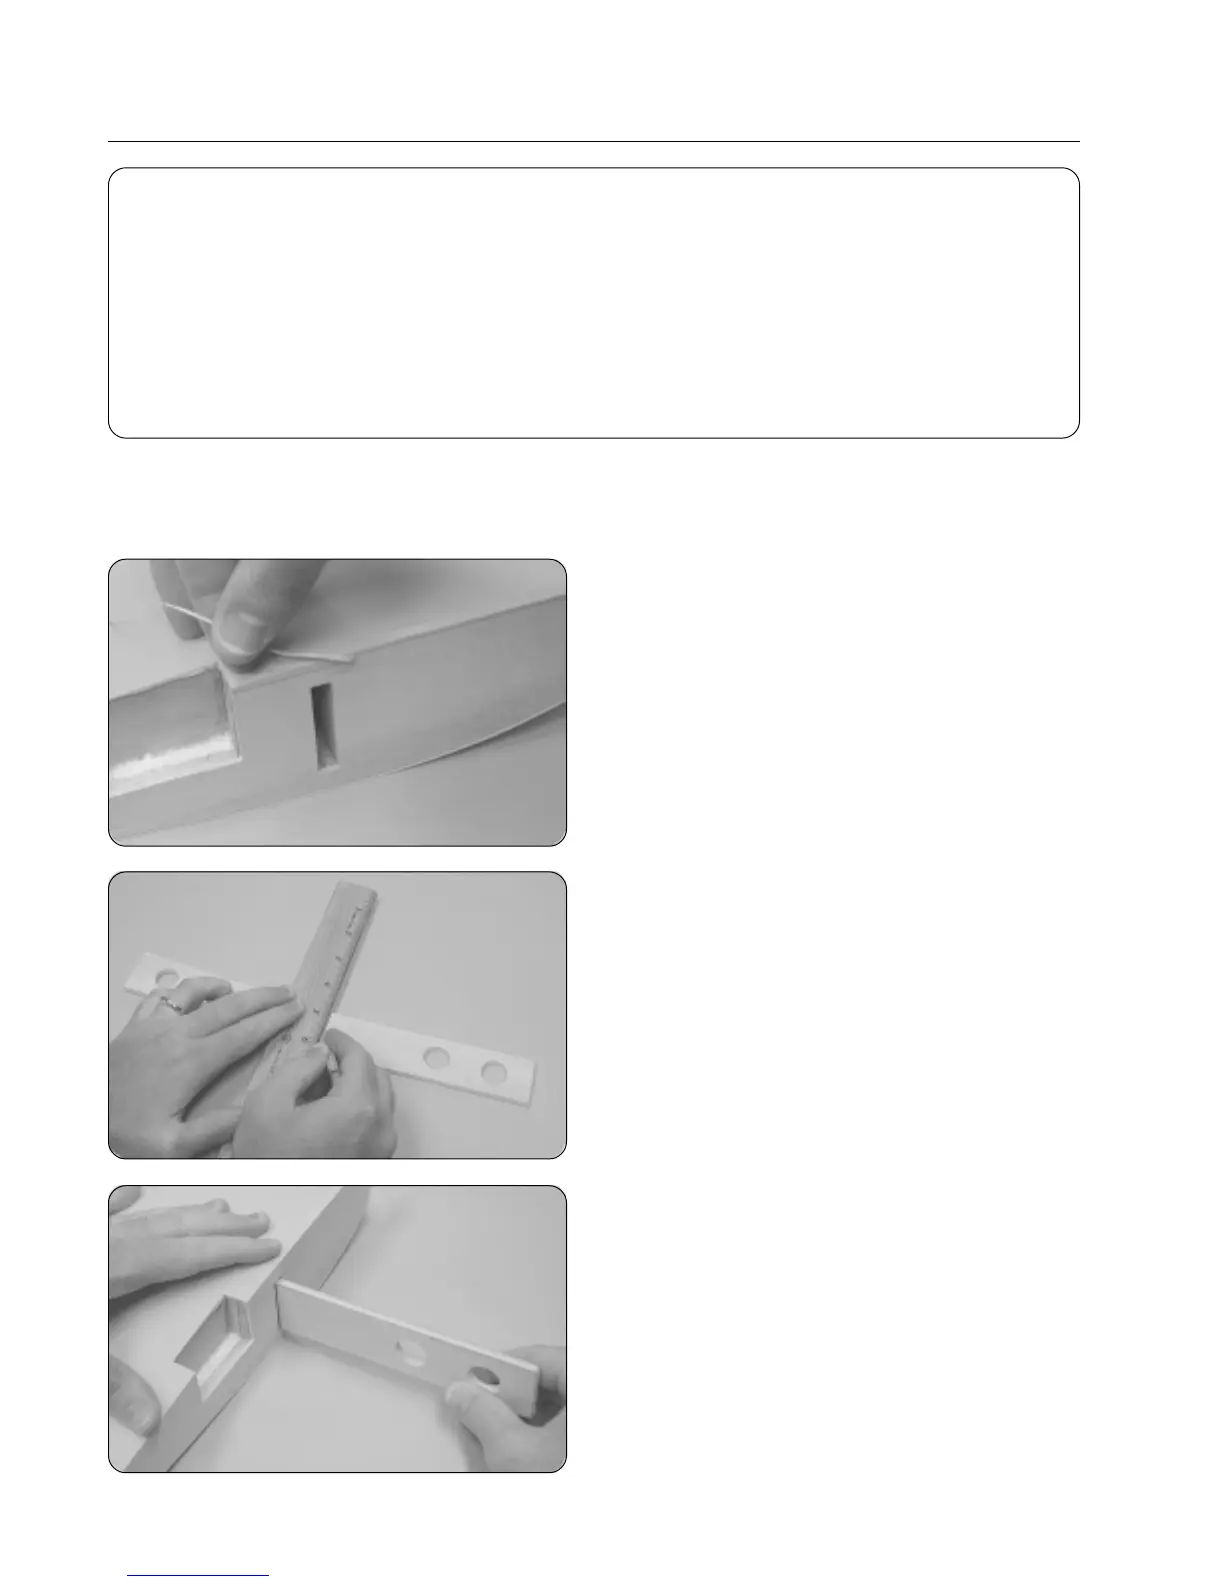
❑ Remove the aileron and hinges from each of the two wing panels and set them aside for now.
❑ Using a modeling knife, cut away and remove the excess
covering material that overlaps onto the root ribs of each wing
panel, leaving about 1/16" overlapped so it does not pull away.
IMPORTANT It's very important to the integrity of the wing
center section joint that you remove as much covering material
from the root ribs as possible.
❑ Use a ruler and a pencil to locate and draw a vertical
centerline on each side of the hardwood wing joiner.
❑ Test-fit the wing joiner into each wing panel. It should
slide easily into each panel up to the centerline you drew.
☞
If it does not fit properly, use 220 grit sandpaper with a
sanding block to lightly sand the edges and tips of the joiner,
until you are satisfied with the fit.
IMPORTANT The wing joiner is cut in a "V-shape." When
test-fitting the joiner, make sure the v-shape is toward the top
of the wing.