Customer Services Publishing
Easter Inch, Bathgate, West Lothian
EH48 2EH, United Kingdom
FPers6
© Motorola Ltd. 1997
All Rights Reserved
Printed in U.K.
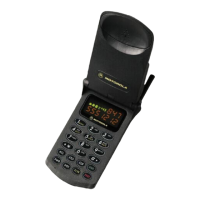
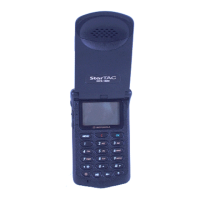
DCS 1800 starTAC PORTABLE
CELLULAR TELEPHONE
PERSONALITY TRANSFER
68P09304A85-O
19/07/97
23
Cellular Subscriber Group
PERSONALITY TRANSFER
4. INTRODUCTION
Personality Transfers are required when a phone is Express
Exchanged or when the main board is replaced. The
different variations (languages, features) of the DCS
starTAC personal cellular telephones requires that each
main board must be configured correctly to ensure that the
unit takes on the correct personality required. Therefore,
when a main board is replaced its personality must be
transferred into the new board, so that it functions correctly
in the customers unit. There are two possible methods of
transfer.
• Normal Transfer, and;
• Master Transfer
If the defective unit powers up, then the Normal Transfer
method should be followed. If the faulty unit will not power
up, then a Master transfer will be required to configure the
replacement board, once installed.
5. NORMAL TRANSFER
This method allows the personality, selected features and
stored phone numbers of a defective radio, to be transferred
into a repaired radio. Data is transferred from the donor unit
into the recipient unit using a Transfer card (Part No
5104025D01). The instruction steps should be followed in
order.
Step 1. Insert the Transfer card into the slot located on
the back of the donor unit. Turn the donor unit
on, the display should show ‘Clone’.
Step 2. The donor unit is now in the cloning mode, and
ready to transfer the first block of data.
Step 3. Enter 021# via the unit’s keypad. This command
will cause the first block of information to be
uploaded into the Transfer card.
Step 4. While data transfer is taking place between the
unit and the card, ‘Please Wait’ will be
displayed. After a short period of time, if the
data transfer has been completed correctly,
‘Clone’ will re-appear in the donor unit’s
display.
Step 5. When the first data block has been successfully
uploaded, remove the card from the donor.
Step 6. Insert the Transfer card into the slot located on
the back of the recipient unit. Turn the recipient
unit on, the display should show ‘Clone’.
Step 7. The recipient unit is now in the cloning mode,
and ready to receive the first block of data.
Step 8. Enter 03# via the unit’s keypad. This command
will cause the recipient unit to download the first
data block from the Transfer card.
Step 9. While data transfer is taking place between the
card and the unit, ‘Please Wait’ will be
displayed. After a short period of time, if the
data transfer has been completed correctly,
‘Clone’ will re-appear in the recipient unit’s
display.
Step 10. The second data block must now be transferred.
Repeat steps 1 to 9, but enter 022# to program
the second data block into the Transfer card.
Step 11. The third data block must now be transferred.
Repeat steps 1 to 9, but enter 025# to program
the third data block into the Transfer card.
Step 12. When the third block of data has been
transferred successfully, remove the Transfer
card and check the repaired radio functions
correctly. See page 19 for further information.
 Loading...