94
Option•Mate
Configuration
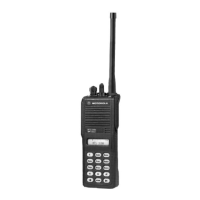
(HT 1000 “C” or
Later Models only)
From the MAIN MENU, press F4, F3 and then F5 to access this screen.
Note: This screen can be accessed from the RADIO
CONFIGURATION MENU (F4/F3) only if an HT 1000 codeplug has
been read into memory.
This screen contains fields related to the setup and operation of
Option•Mate Plug-compatible devices. Most compatible devices can
be made to work by setting the Plug-In Board field in this screen to
“Installed”. However, some other devices come with separate, customized
configuration utilities which can be used to modify the internal
configurations of these devices. Refer to the manufacturer’s literature
for further information on these utilities. This screen deals only with
the set up of the radio’s circuitry to accommodate such audio-
processing devices.
Note: DO NOT set the Plug-In Board field to “Installed”
unless an option board has actually been installed. If you do
so, the radio will remain muted and no audio will be
transmitted.
Note: Special cloning instructions for radios equipped with
Option•Mate compatible devices are provided on page 95.
Function Key Descriptions
F5 - PRINT Prints the current system configuration.
F9 - DEFAULT Resets the fields on this screen to their default values.
DCE
MOTOROLA Radio Service Software Select a function key, F1-F10.
HT/JT1000/VISAR Model : H01KDC9AA3CN
Serial:
CHANGE:RADIO:CONFIG:OPTION•MATE
Option•Mate Configuration
-------------------------
Plug-In Board...........Not Installed
F1 F2 F3 F4 F5 F6 F7 F8 F9 F10
HELP PRINT DEFAULT EXIT
 Loading...