90
Permanent Monitor Use the UP/DOWN arrow keys to enable/disable this option. If this
option is enabled, the Permanent Monitor feature will be enabled in
the radio. To enter Permanent Monitor, the radio user must hold down
the Monitor button for the time specified in the Monitor Long Press
Period field on this screen. The operation of Permanent Monitor
operates is determined by the setting in the Permanent Monitor
Definition field on this screen.
Note: The Permanent Monitor state is NOT preserved across channel
changes or power cycling.
The default is Enabled.
Permanent Monitor Definition Use the UP/DOWN arrows to make your selection. The field is used to
specify the squelch mode of the radio during a momentary press of the
Monitor button or in Permanent Monitor mode. The two options are:
Note: The definitions above do NOT apply to Monitor during Scan
mode. Monitor operation during Scan is controlled by the PL Defeat
field on the SCAN CONFIGURATION screen (F4/F3/F8/F2).
The default is Open Squelch.
External Mandown Switch Emergency must be enabled for this feature to work. This option enables/
disables the radio’s capability to initiate the transmission of an
emergency alarm sequence (including the ID code) when the radio is
tipped more than 60 degrees from its vertical axis. The Mandown Switch
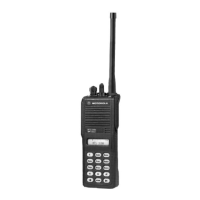
is applicable to HT 1000 models only.
Note: This operation is only possible when the radio is equipped with
an External Mandown Switch accessory. Emergency must be enabled
for this feature to work.
Possible Side Button
Setups for Scanning
Open Squelch The radio will be continuously unmuted
PL Defeat The radio will be in Carrier Squelch during Monitor.
Operator Selectable
Scan Only
Sidebutton 1 = Scan/Scan Programming On/Off
Sidebutton 2 = Scan Programming Status Scroll
Sidebutton 3 = Monitor
Operator Selectable
Scan with Monitor
Sidebutton 1 = Scan/Scan Programming On/Off
Sidebutton 2 = Monitor/Scan Programming Status Scroll
Sidebutton 3 = Any other function
Operator Selectable
Scan with Nuisance
Delete
Sidebutton 1 = Scan/Scan Programming On/Off
Sidebutton 2 = Select
Sidebutton 3 = Any other function
Scan On/Off Only Sidebutton 1 = Scan On/Off
Sidebutton 2 = Any other function
Sidebutton 3 = Any other function
Scan On/Off with
Nuisance Delete
SidebButton 1 = Scan On/Off
Sidebutton 2 = Select
Sidebutton 3 = Monitor
 Loading...