Do you have a question about the Motorola MC3190 and is the answer not in the manual?
Steps to set the default associate number for all segments.
Procedure for downloading directed and undirected jobs into the handheld.
Instructions for starting data collection on any selected segment.
Detailed steps for collecting data in an undirected CPA segment.
Guide to collecting data for directed CPA download segments.
Process for creating a new CPA segment manually when download fails.
Steps to split a directed job list for collection or deletion.
Instructions for creating a new CPG segment manually.
Procedure for transmitting collected data segments from the handheld.
Reference for functions and commands used in CPA collection.
Reference for functions and commands specific to directed CPA downloads.
Reference for functions and commands used in CPG collection.
Instructions for connecting the handheld via Ethernet to a network switch dock.
Connecting the handheld to a router with multiple LAN ports.
Configuring Ethernet connection using a dial-up dock.
Connecting via dial-up to transmit data, including DSL considerations.
Connecting to a modem with multiple LAN ports without a router.
Connecting to a modem with a single LAN port, requiring computer disconnection.
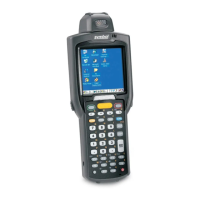
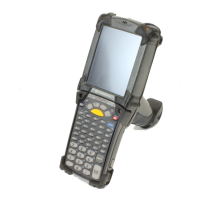
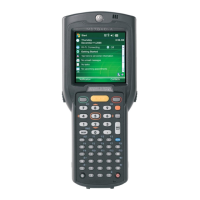
The Motorola MC3190/3090 (V51+) is a handheld data collection device designed for RetailData operations, primarily focused on competitive price auditing (CPA) and general product collection (CPG). This quick start guide outlines the initial setup, basic operation, and common commands for efficient data collection and transmission.
The MC3190/3090 serves as a portable scanner and data entry device for field associates. Its primary function is to facilitate the collection of product information, including prices, indicators, and descriptions, either through directed jobs (pre-defined lists) or undirected collection (ad-hoc scanning). The device supports both Competitive Price Audit (CPA) and CPG collection types, allowing for flexibility in various retail data gathering scenarios. Once data is collected, the device can transmit this information to a central system via Ethernet or dial-up connections, depending on the charging dock and available network infrastructure.
Upon receiving the MC3190/3090, users must carefully unpack all components, which include the handheld unit with stylus, a modem/charging station, two batteries, an AC adaptor and cable, a handheld manual, and optional Ethernet connectors and cables. The handheld unit features protective bumpers around the FUNC and ALT keys to prevent accidental reboots, which should not be removed. Battery installation involves removing the battery cover by turning silver tabs outward, gently pulling the strap at the base, inserting a charged battery bottom-first in the direction indicated by a sticker until it clicks, and then replacing the cover. The device will then begin its reboot process. Following the reboot, users are prompted to calibrate the touchscreen by tapping on crosshairs with the stylus. After calibration, the device will display a Windows desktop, but the reboot program continues to run in the background. A "Warm Boot" message and scrolling files indicate the completion of this process, after which a "RetailData Icon" will appear on the desktop, signifying the collection program is ready. A crucial step is setting the handheld's internal date and time. This is done by double-tapping the time in the lower right corner of the screen. Users must ensure the year, month, date, time, and AM/PM settings are correct, as date errors can prevent the RetailData program from opening. Once set, tapping "Apply" and "OK" saves the changes, and the Control Panel can be closed. Before starting data collection, the associate number must be configured within the "SystemSettings" menu by selecting "Options," then "System," "Settings," entering the associate number, and clicking "Save." Pressing "Enter" completes this setup, leading to the "Segments" screen, where collection can begin.
The device supports both "Directed" and "Undirected" job downloads. To download a job, users navigate to "Communications," then "Download," select "Job," enter the "Job Schedule number," and click "Continue" to confirm. The handheld can be removed from the charger once the file is downloaded and begins importing. For "Undirected Collection" (Downloaded Competitive Price Audit - CPA), users scroll to the downloaded segment, select "Collect," and carefully review the "Collection Criteria" and "Collection Attributes." The "Allowed Indicators" screen displays permissible price points and indicators. "Func 1" can be pressed at any time during collection to review criteria. If specific categories are required, users select the desired category, noting its "Category Status" (collected, in progress, or completed). "Func 4" allows exiting a category collection. Scanning items and entering prices and indicators follows, with invalid indicators prompting the "Collection Criteria indicator screen." "Directed Collection" (Downloaded CPA) involves similar steps: scrolling to the segment, selecting "Collect," reviewing criteria and attributes, and noting allowed indicators. The "Aisle Assignments" feature allows users to assign categories to aisles, with "Func 8" returning to this screen. Items can be searched by scrolling, scanning, or entering UPCs. "Func 2" allows scanning comparable items. After entering prices or "01" for not found items, allowable sale indicators are entered. "Func 5" provides collection statistics. Manually creating a new CPA segment is an option if downloading is not possible. This requires selecting "File," "New Segment," entering header information (Job Number, Chain, Zone), "Save," and then manually specifying "Collection Attributes" (Price, Price Indicator, Sale Ending Date, Savings Amount) and "Allowed Indicators" (Promotional, Non-promotional, Promo Killers).
"Splitting a Directed Job" allows RAs to divide a list among themselves. This must be done before collection starts, by selecting "Options," "Utilities," "Split List," specifying "Starting" and "Ending" numbers for items to collect, clicking "Delete other items," typing "delete" to confirm, and then "Confirm." "Creating a New CPG Segment" follows a similar process: "File," "New CPG Segment," entering header information, and "Save." To "Transmit a Segment," users scroll to the desired segment, select "Communications," then "Transmit." They must enter the exact "Store Time," indicate if the job is complete, enter "total Travel Time" for the day on one segment, and designate if they drove to the retailer. Clicking "Continue" initiates transmission, which should be verified via IVR or the Field Portal.
The device utilizes various function keys and key combinations for efficient data entry and navigation:
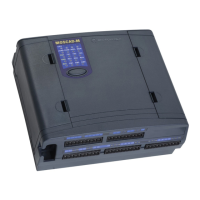
The MC3190/3090 supports both Ethernet and dial-up connections for data transmission. For "Ethernet Setup no Dial-up – Network Switch Dock," the charging dock has a network switch on the side. The Ethernet cable connects directly to the home router. Users must disable the radio (a big red X on the taskbar) and ensure an upside-T Ethernet icon appears at the bottom of the screen when the handheld is docked, indicating a successful connection. The dock also charges a spare battery in a rear slot, with a red light indicating charging status. For "Cable/DSL Modem AND Router with multiple LAN ports," the modem connects to the router, and an Ethernet cable connects from a LAN port on the router to the back of the handheld charging dock. For "Dial-up Dock," the charging dock has connections for an AC power adapter, a phone line (for internal modem), and a USB plug (for Ethernet connector). The phone line must be connected for dial-up transmission. The Ethernet setup for this dock involves a mini a/b cable, an Ethernet cable, and an external Ethernet adapter. The mini a/b cable connects to the dock, the Ethernet cable connects the adapter to the home router, and the adapter connects to the USB port on the dock. For "Dial Up Connections," the phone line from the wall plugs directly into the phone jack on the charging dock. DSL users may need a noise filter. Phone number prefixes must be changed for hotel transmissions. For "Cable/DSL Modem ONLY with multiple LAN ports," the Ethernet adapter plugs directly into one of the modem's LAN ports using an Ethernet cable, and a mini USB cable connects the adapter to the handheld charging dock. For "Cable/DSL Modem ONLY – Only ONE LAN Port," users must unplug their computer's Ethernet cable from the modem, connect the Ethernet cable from the adapter to the modem's LAN port, and connect the mini USB cable from the adapter to the handheld charging dock. If transmission fails, resetting the modem and performing a warm boot on the scanner may resolve the issue.
The guide emphasizes the importance of maintaining the physical integrity of the device, specifically the bumpers around the FUNC and ALT keys, which prevent frequent reboots. If these come off, Field Support should be contacted for replacements. For any operational questions or issues, users are directed to contact their District Manager or Field Support. The document also references the full MC3190 manual for more detailed information on the device and collection program, and the Field Portal for training videos. Proper date and time settings are highlighted as a critical maintenance aspect to avoid "Date Error" messages, which are attributed to operator error if they persist. This suggests that regular verification of these settings is part of routine device maintenance. The charging dock's function to charge both the internal battery and a spare battery simultaneously indicates a design feature aimed at ensuring continuous operation and minimizing downtime due to power issues. The red light indicator for charging status helps users monitor battery health. Troubleshooting steps for network connectivity, such as resetting the modem and performing a warm boot for single-LAN port modem setups, are provided, guiding users through basic self-maintenance for transmission issues.
| Connectivity | 802.11a/b/g, Bluetooth |
|---|---|
| Keypad | 28-key numeric, 38-key shifted alpha, 48-key alphanumeric |
| IP Sealing | IP54 |
| Processor | Marvell PXA320 |
| Operating System | Windows CE 6.0 or Windows Embedded Handheld 6.5 |
| Display | QVGA (320 x 240) |
| Battery | 4800 mAh |
| Scanner | 1D Laser or 2D Imager |
| Operating Temperature | -10° C to 50° C |
| Dimensions | 190 mm x 82 mm x 145 mm |
| Drop Specification | Multiple 4 ft./1.2 m drops per MIL-STD 810G |