9
Chapter 4 – Installation guide
This chapter explains how to install the Robotic Mower, please read this completely before you start the installation.
4.1. Introduction
We recommended you to make a sketch of your lawn, including all obstacles and how these should be
protected. It makes it easier to find a good position for the charging station and to correctly place the boundary
wire around your garden perimeter
protecting
bushes, flower beds etc. You will also need some tools, a
hammer and wire
stripping
pliers.
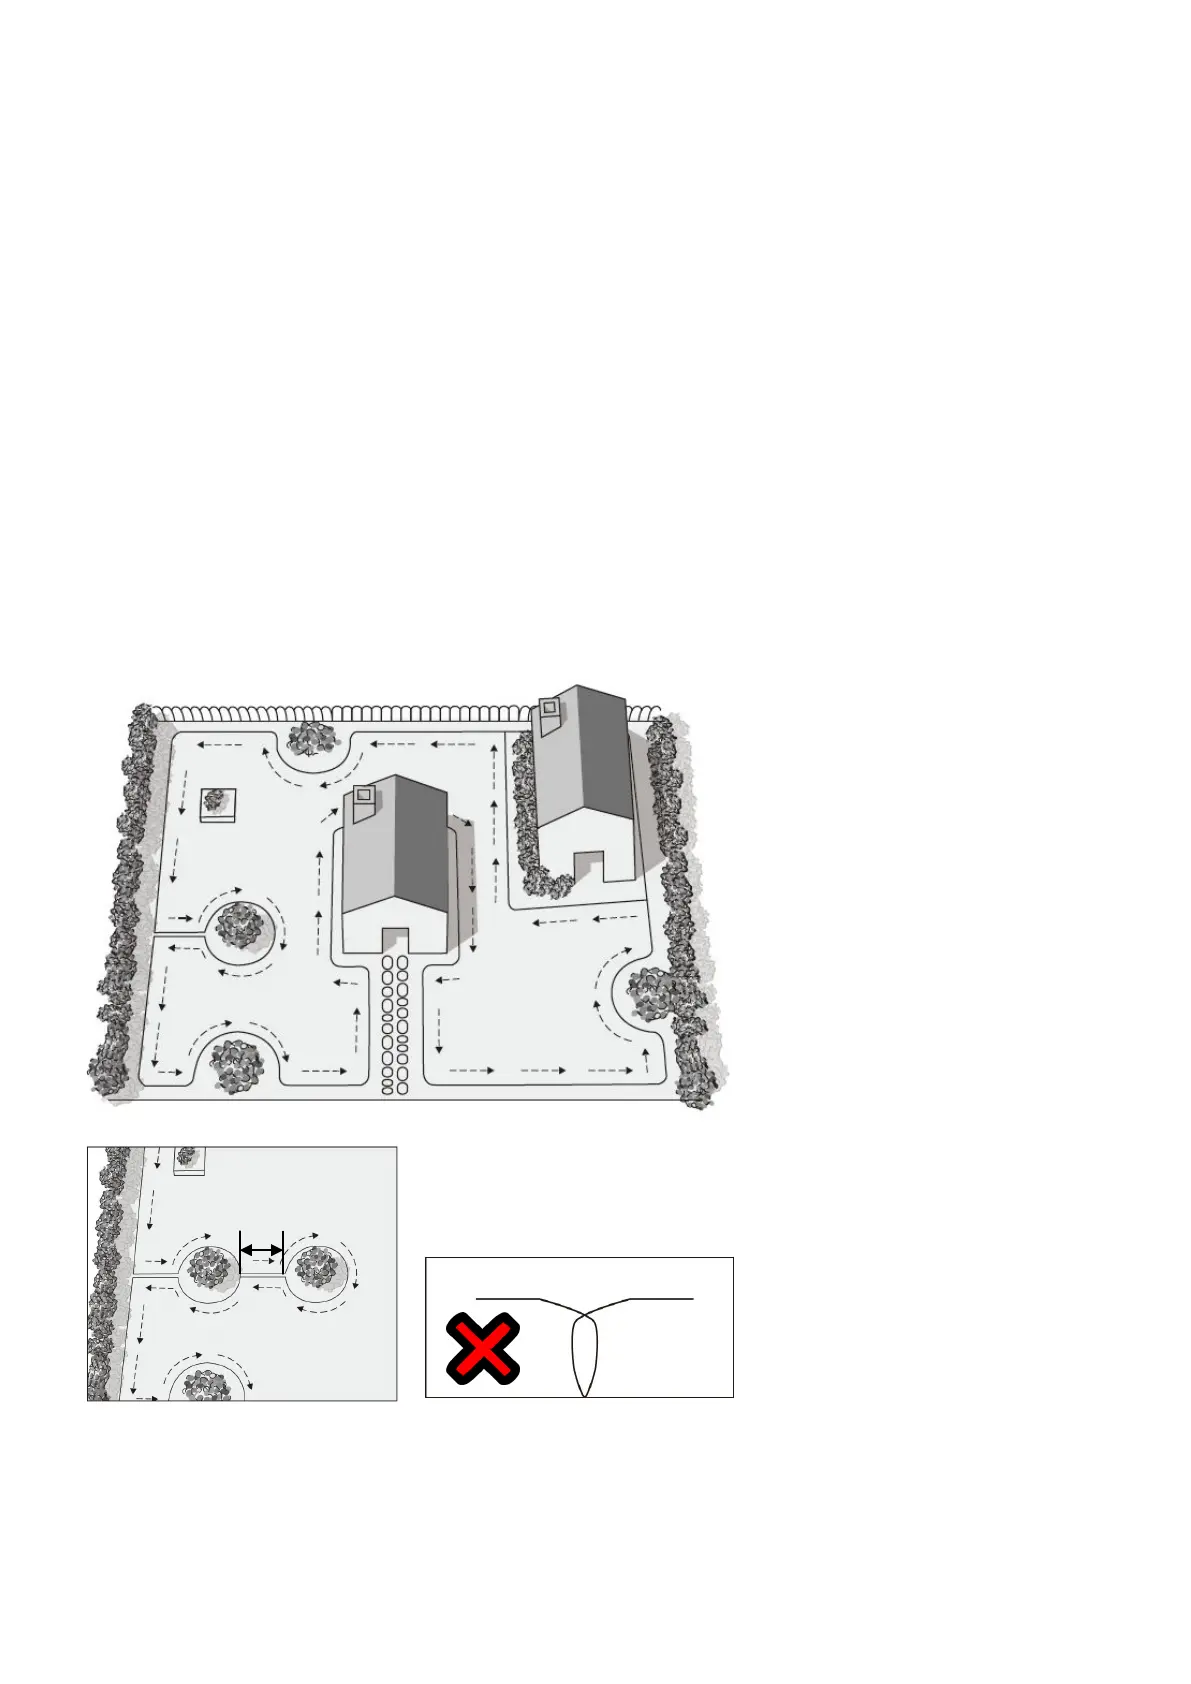
4.2. Perimeter islands
- Use the Boundary wire to define areas inside the working area by creating islands around obstacles that
cannot withstand a collision, for example, flower beds and fountains. Furthermore, fence out all shock-
sensitive objects and garden ponds (Fig.3A).
- Continue unrolling the wire, moving from the edge towards the object to be protected.
- Peg the perimeter wire clockwise around the protected objects.
- Completely fence the island out and return to the spot where you left the lawn’s edge.
- The wires leading to and returning from the Island should be parallel and very close, but not crossing each
other.
Fix both wires, to and from the island, on the ground together with the same pegs.
- Following the above instructions to remove objects from the mowing area, your Robotic Mower will cross the
two parallel wires, but not cross the single wire around the objects.
- Minimum distance between islands: 1m (3.3ft). Otherwise, define jointly as one island (Fig.3B).
Fig.3A
Fig.3B Fig.4
Note!
DO NOT cross the boundary wires
Boundary wires must not cross each other (Fig.4).