14
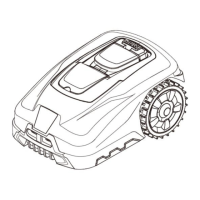
4.4.2 Connect the charging station with the boundary wire
The wire leading to the front of the charging station must be thread underneath the base, using the cable holders on
the station’s underside. Connect it to the connector marked "+", and connect the rear boundary wire to the
connector marked “S1” (Fig.19A/ Fig.19B).
Fig.19A Fig.19B
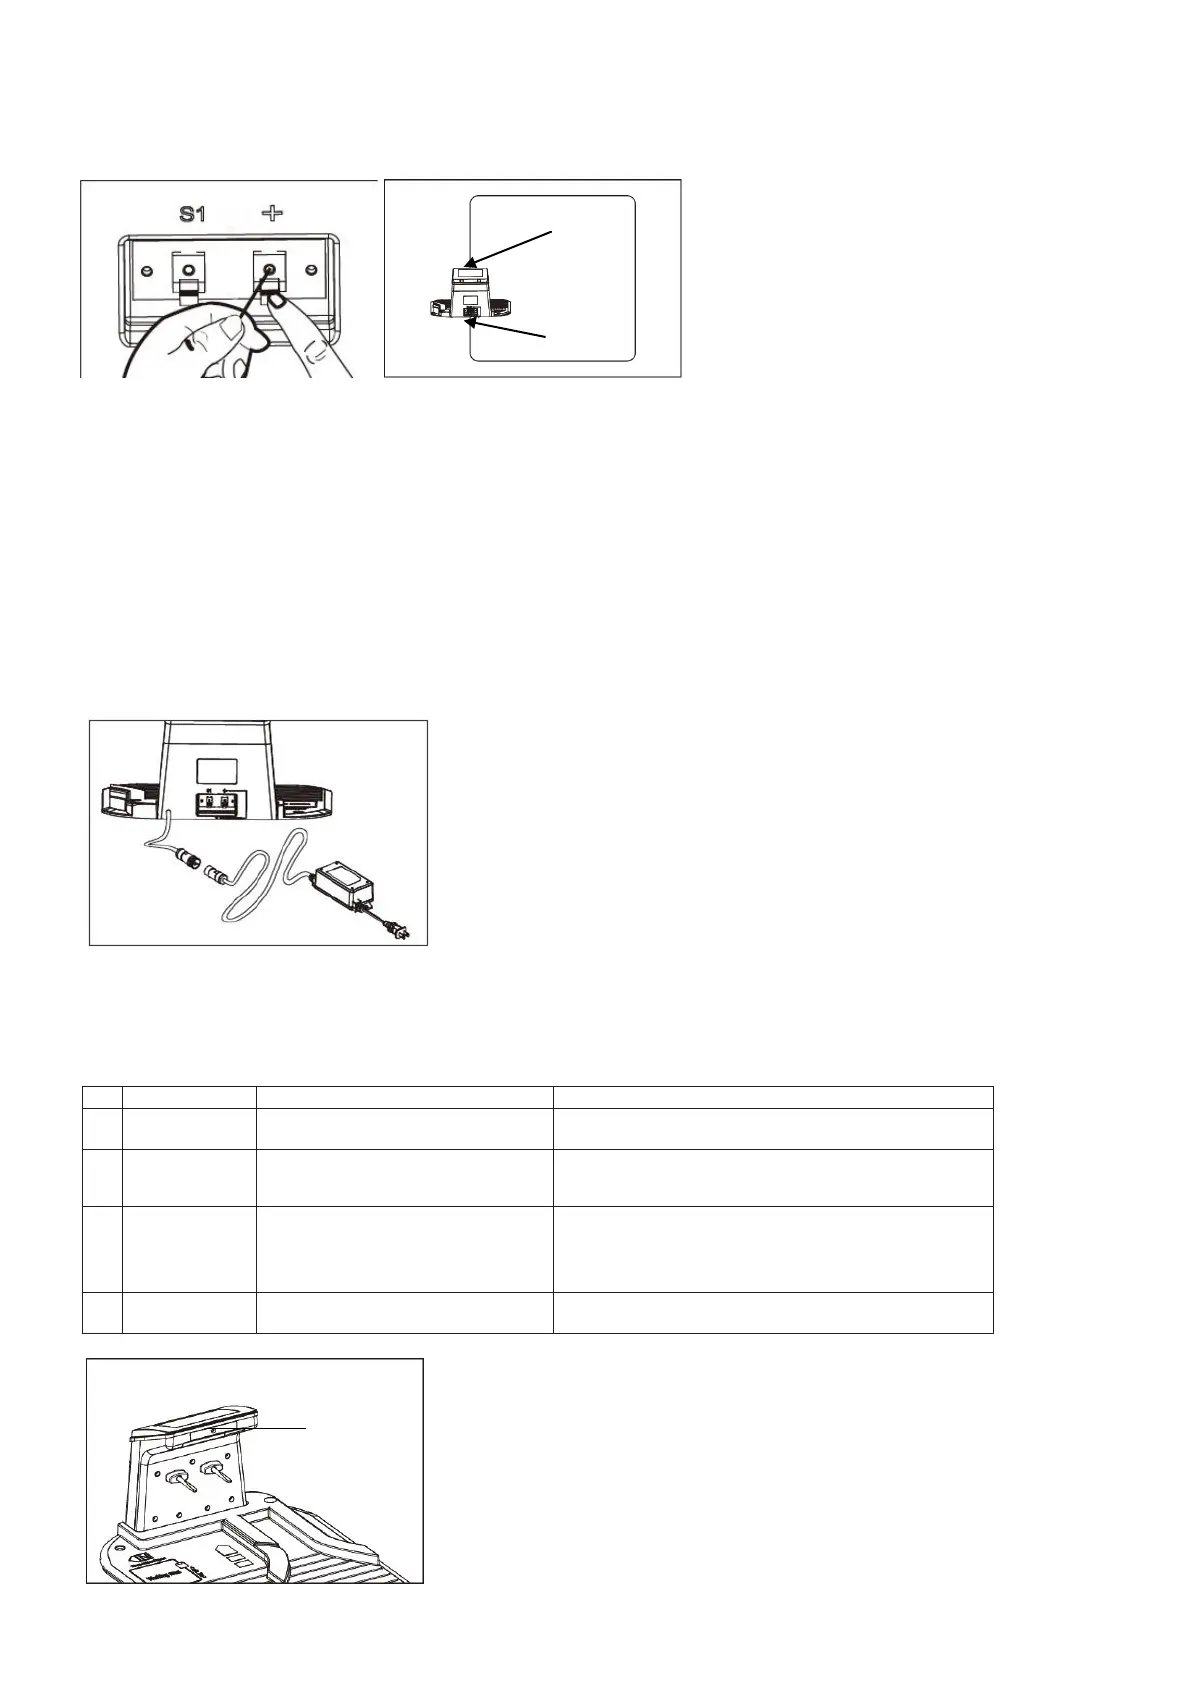
4.4.3 Connect the charging station to the charger
1. Before connecting the charger station to the electric power supply, make sure that the mains supply voltage is 100-
240V~50/60Hz.
2. Plug the charger directly into an electrical outlet. Ensure the power cord is not frayed or cut and safe to use. Never
carry anything by or pull on the power cord.
3. Do not operate a damaged charger. Replace damaged cords or charger immediately at an authorized service
center
4. Do not charge in wet locations. Do not charge at temperatures above 45℃ or below 0℃.
5. Keep the Robotic Mower and charger away from water, heat emitters or chemicals. Be careful not to damage the
charger cord - by keeping it away from sharp edges.
6. Connect the charger to the charging station. Align the notch on the power cord connector with the groove on the
adaptor connector (Fig.20).
Fig.20
Once these connections are made, plug in the power supply. There is a LED indicator on the charging station
– after proper installation, it should flash a constant green light. If the LED is off, check the power connections. If
the LED is on but not constant green, refer to the trouble shooting guide below (Fig.21).
Green light on
Ready for mowing (Battery fully
charged, Boundary wire OK)
3
Flashing
Green
Boundary cut off or connected
wrongly
Change the two wire ends and check if the
boundary wire has a break somewhere.
4
Red
Await full charge or set “Start” – “OK”.
Fig.21
LED indicator
This wire end connect to “+”
This wire end connect to “S1”