15
4.5 Charging Information
The device will return to the charging station in one of the
follow
ing situations:
1. You press the Home button and close the LCD cover.
2.
The battery capacity
decreases to
less than 30%
. After a full charge, it will go back to work or wait in the base
station until the next work time window is reached.
3. The red LED indicator on the station indicates the battery is on charge.
4. The constant green LED indicator on the station indicates the battery is fully charged. If in the scheduled working
time, the Robotic Mower will leave the station and start the automatic working process; otherwise it will stay on the
station.
Note: If your Robotic Mower for some reason cannot return to the charging station, it will
try
again by returning to
lawn area and find the Boundary wire, then follow same
pr
ocedur
e.
Note: If the battery temperature is higher than 45℃, the device will stop charging to protect the battery. After
the temperature has been reduced, charging will
automatically
resume.
Note: If the Robotic Mower’s system control board temperature is higher than 90℃, the Robotic Mower will stop
working, and go back to charging station. After the temperature has been reduced, the work process will restore
according to your settings.
Note: If the battery power is fully consumed while the device has not driven to the charging station, the Robotic
Mower cannot be started (the screen remains off). Please take the Robotic Mower back to the station and put it on
the charging position; keep the main power switch ON. The Robotic Mower will be charged automatically.
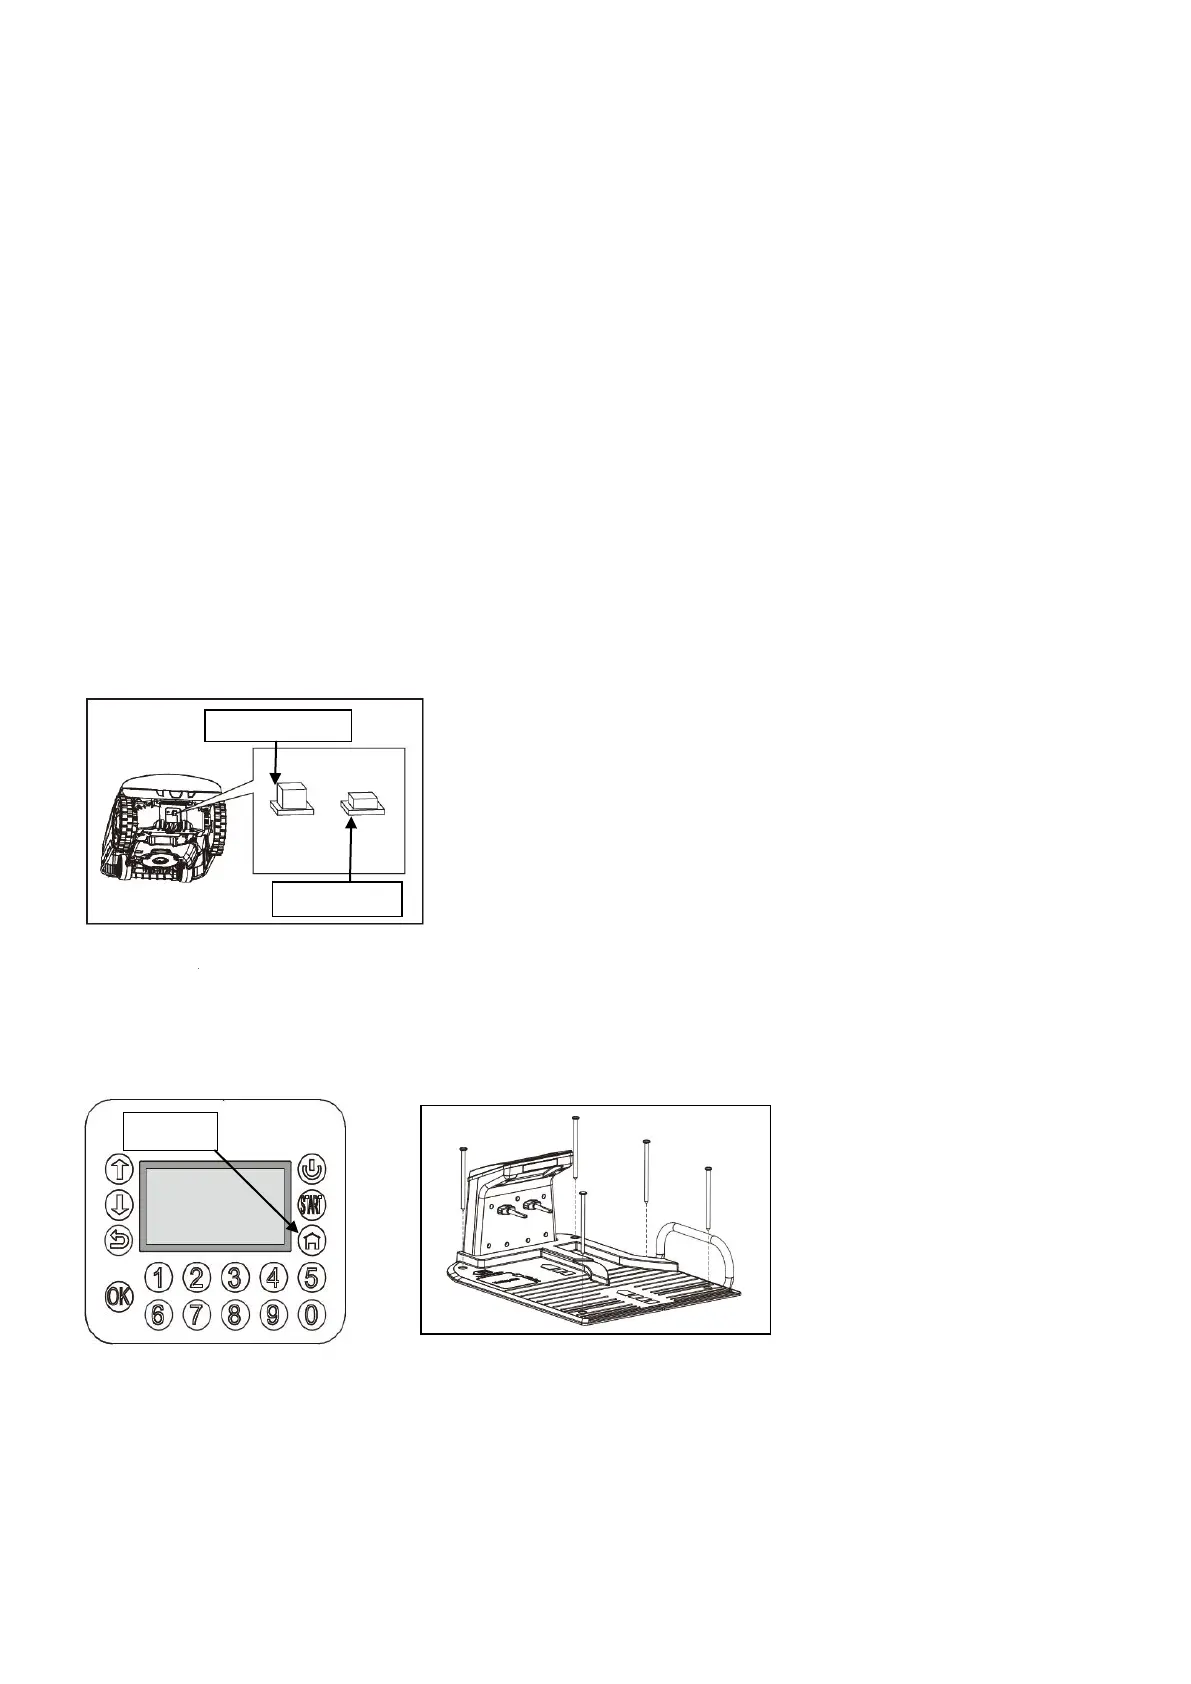
4.6 Turn on and test the installation
A constant green LED on the charge station indicates the border wire is set up correctly. Next please check that the
boundary wire pegs are fully hammered down and flush to the lawn surface.
Now place your Robotic Mower into the working area, next to the charging station.
Press the main power switch to “ON” (Fig.22).
Fig.22
Now open the display cover, press the power button for three seconds. After a short boot of the operating system,
enter the PIN code “1-2-3-4”, confirm with “OK”, press the HOME key and then close the
LCD cover
. Now your
Robotic Mower should follow the wire in an anti-clockwise direction returning to the charging station and dock into
charging position. The Robotic Mower will start to fully charge. If the Robotic Mower fails to
dock, it may be
necessary to adjust the charging station position until the Robotic Mower docks without any
pr
oblems. (Fig.23)
Fig. 24
Stop moving at any time
If you want to stop the Robotic Mower at any time during cutting, please press the red STOP button. Once the STOP
button is pressed, the Robotic Mower will stop and wait for your further commands. The Robotic Mower will not start
to work until you have entered your PIN and closed the LCD cover.
4.7 Secure the charging base
Once the Robotic Mower has been successfully tested, checking that that the mower docks correctly, use
a hammer and knock down the fixing nails fully to secure the base. Remember: Take care to ensure the
wire is not
kinked or damaged.
(Fig.24)
.
HOME