6. Place O-ring (3) on bearing cover plate and bolt
bearing cover plate to bearing housing using six hex
head screws (A) and lock washers. The six screws
should be tightened evenly, and care should be taken to
insure the O-ring becomes seated in the step in the
bearing housing. When the bearing cover plate is fully
secured to the bearing housing, a small gap of 0.010 to
0.020 inch will exist between the bearing cover plate
and the bearing housing.
Note: Some pumps have a sleeve installed on the
drive shaft to receive any possible wear caused
by the packing. (See fig. 4-10.) If the sleeve is
used, install at this time. Refer to Section 4-48
for details.
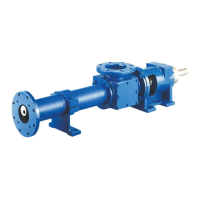
4-29. Rotor/Stator Assembly
1. Slide head ring (42) over rotor (40) contour to the
rotor head. The side of the head ring with the smallest
diameter holes should be facing the rotor head.
Note: On some models the head ring is a two-piece
component which eliminates this step.
2. Slide stator clamp rings (36) on both ends of the
stator (30) and secure in position with retaining rings
(35).
3. On F012, G022, H036, H050 and K115 models,
place one stator gasket (34) in recess of adapter flange
(25A), and fit adapter flange with gasket to end of stator.
4. Coat the rotor (40) contour with waterless hand
cleaner, glycol or other lubricant compatible with the
stator elastomer. Insert rotor into stator so that rotor
head is at the specified distance from the end of the
stator (Dimension “A,” fig. 4-5). On F012, G022, H036,
and K115 models, be sure the rotor is inserted in the
end of the stator fitted with the adapter flange (25A) and
gasket (34).
Note: Rotor can also be inserted in the stator utilizing
Moyno’s Hydraulic Stator Removal Device
(SRD). See separate SRD service manual or
contact the local Moyno distributor for further
information on this new product.
Note: Turning the rotor counterclockwise while
inserting into stator will ease assembly.
4-30. Rotor Gear Joint Assembly
1. Slip O-ring (41) over the rotor head and allow to
hang loose with head ring. Insert primary thrust plate (6)
into rotor head, flat side first. Thrust plate and rotor head
surfaces must be flush to assure proper assembly and
operation of the pump. (See fig. 4-6.)
2. Assemble the rotor end gear joint by first fitting a
gear joint seal (13) onto the connecting rod assembly
(38). The seal must be positioned so that the flat face of
the seal neck fits into the seal retainer component of the
connecting rod assembly. Apply a small coating of
approved gear joint lubricant to the inside surfaces of
the seal.
Page 9
3. Apply a small amount of lubricant to the flat face of
the seal support (12) and slide it onto the connecting rod
so that the flat face and radius of the support is against
the seal.
4. Grease the concave spherical surface of the rear
thrust plate (11) and position thrust plate against the
seal (13) with the lip on the outside diameter of the seal
fitting the step on the back side of the thrust plate.
Frame
Designation
A
(inches)
1E008G1 4.06
2E008G1 4.06
4E008G1 4.06
6E008G1 4.06
1E012G1, 1E018EG1 4.06
2E012G1, 2E018EG1 4.06
4E012G1 4.06
1E022G1, 1E033EG1 3.62
2E022G1, 2E033EG1 3.62
1E036G1 4.56
1F022G1 4.62
2F022G1 4.62
4F022G1 4.62
6F01231 5.00
1F036G1, 1F0543G1 4.00
2F036G1, 2F054EG1 4.00
1F050G1, 1F075EG1 4.00
2F050G1, 2F075EG1 4.00
4F050G1 4.00
1F065G1 4.75
1G036G1 5.68
2G036G1 5.68
4G036G1 5.68
4G050G1 5.68
6G050G1 5.68
6G022G1 6.06
1G065G1, 1G098EG1 6.06
2G065G1, 2G098EG1 6.06
1G090G1 6.06
2G090G1 6.06
1G115G1 6.19
Frame
Designation
A
(inches)
1H065G1 6.25
2H065G1 6.25
4H065G1 6.25
2H090G1 6.25
4H090G1 6.25
6H036G1 6.62
6H050G1 6.62
1H115G1 6.25
2H115G1 6.25
1H175G1 6.75
1J115G1 6.84
2J115G1 6.84
4J115G1 6.84
6J065G1 6.84
6J090G1 6.84
1J175G1 7.00
2J175G1 7.00
1J335G1 7.19
1K175G1 8.70
2K175G1 8.70
4K175G1 8.70
6K115G1 9.20
1K335G1 8.70
2K335G1 8.70
3K335G1 8.75
1K345G1 8.75
2K345G1 8.75
3K345G1 8.75
1K620G1 8.75
2K620G1 8.75
1K800G1 7.50
2K800G1 7.50
Fig. 4-5. Rotor Installation