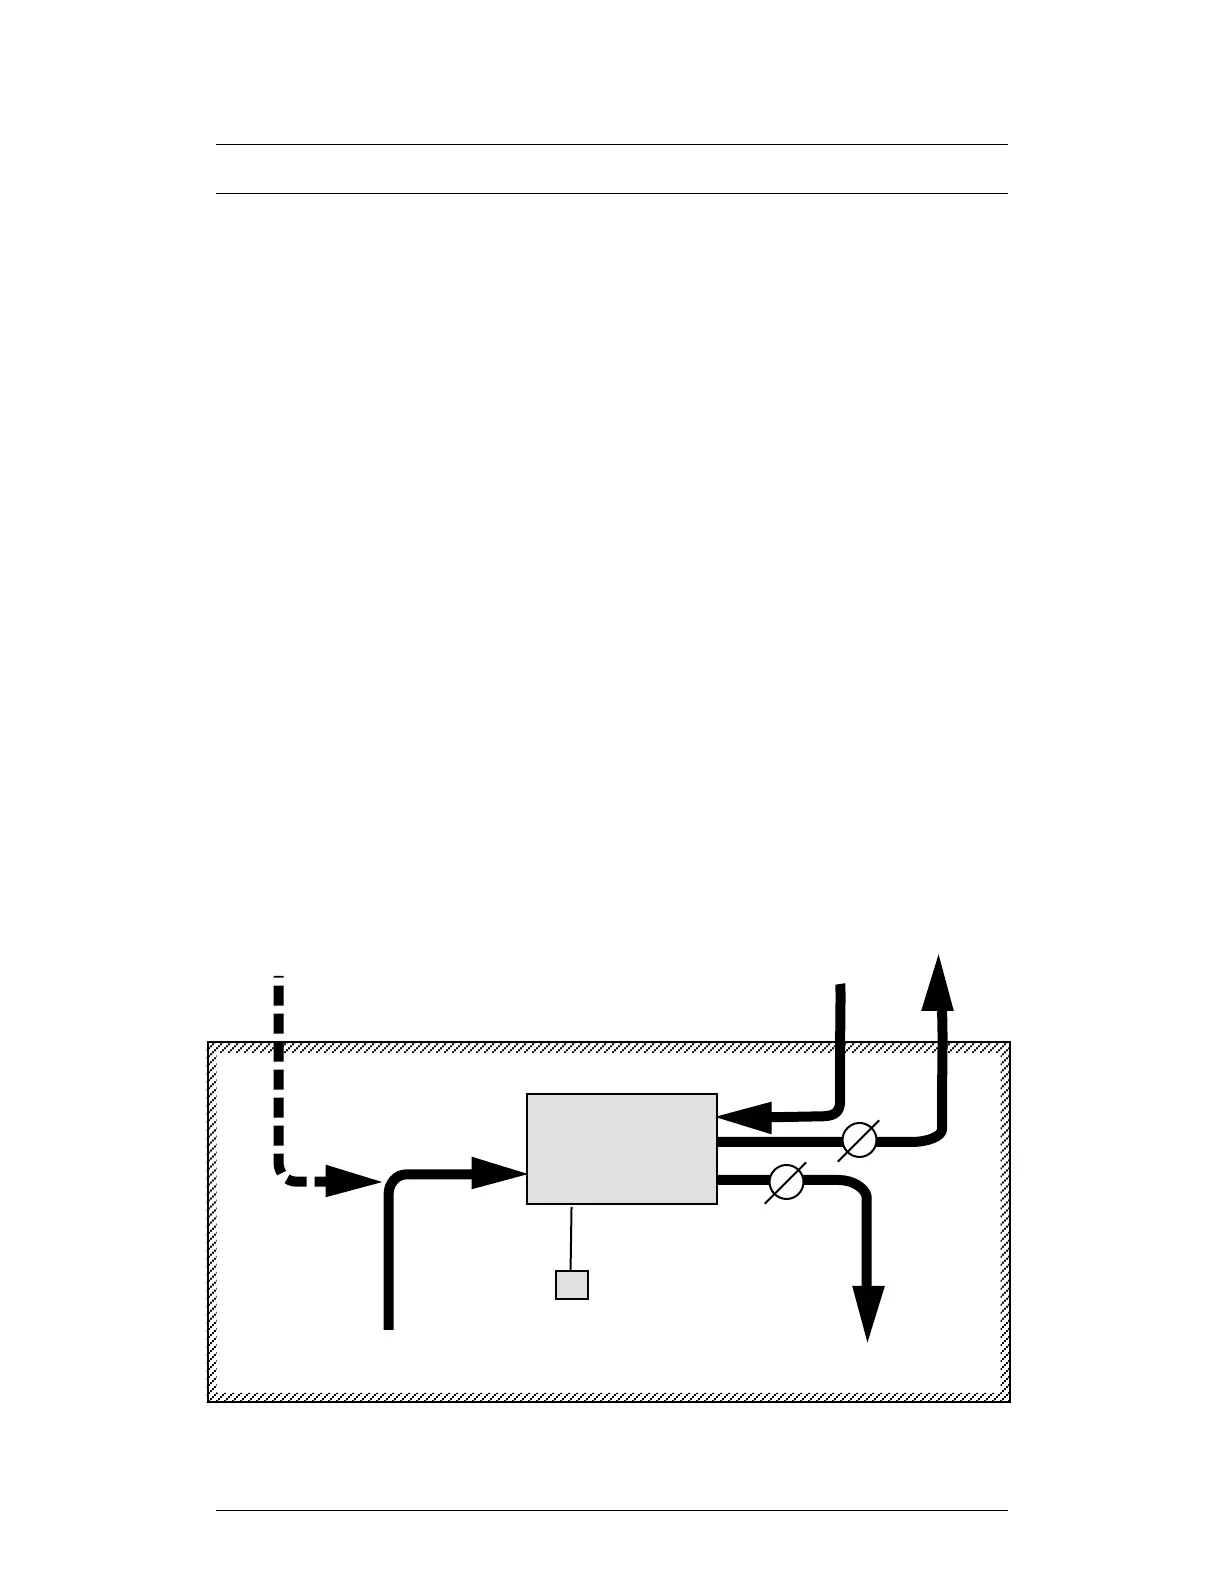
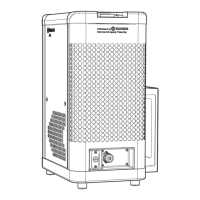
3–1
Reactivation air IN –
from outdoors
Reactivation air OUT –
to outdoors
Process air IN –
from process space
Process air OUT –
to process space
Optional makeup air IN –
from outdoors
HUMIDISTAT
(option)
OUTDOORS
PROCESS SPACE (STORAGE AREA)
J136
Damper
Damper
HC-150
DEHUMIDIFIER
3 – INSTALLATION AND STARTUP
3.1 INSPECTION
1. When the unit arrives, check immediately for signs of shipping damage. If you do
notice any damage, report it to the trucking company right away.
2. Remove the cover on the front of the unit, as shown in Fig. 1–4. Check the following
items:
• Remove the packaging restraints.
• Be sure the HoneyCombe
®
wheel is in position.
• Push in on the drive mechanism and release the belt. Be sure the HoneyCombe
®
wheel can be turned by hand with some resistance.
• Replace the drive belt in the working position. Be sure that it is in good contact
with the drive sheave.
• Be sure the drive belt and rollers are free of grease.
• Ensure that the process and reactivation air filters are in place.
3.2 POSITIONING THE UNIT
1. You must allow three clearances around the unit:
•a 24" space in front of the unit so you can remove and replace the
HoneyCombe
®
wheel
•a 7" space in front of the process air intake to allow smooth air flow (not
necessary if ductwork is installed)
FIGURE 3–1
HC-150 INSTALLED IN PROCESS SPACE