Installation procedure4.2
Install this product to the installation place in
accordance with the list shown below.
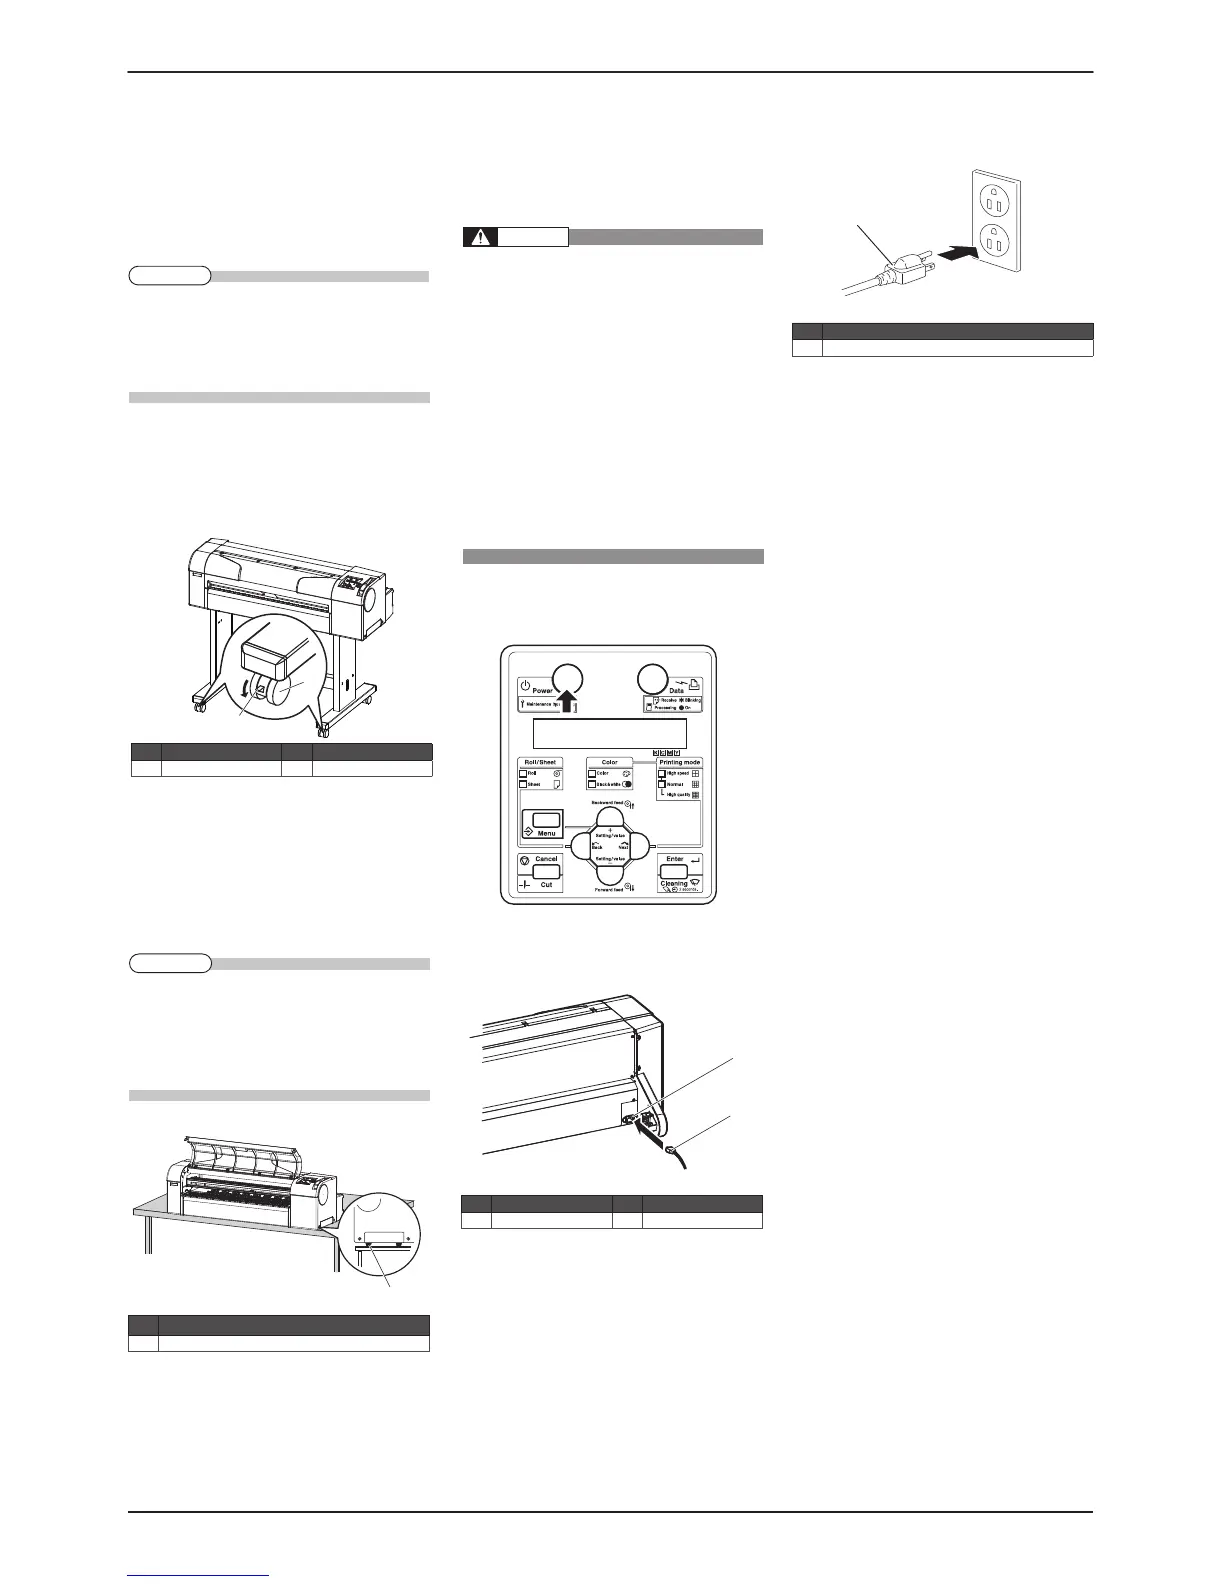
When using the printer 4.2.1
with the stand
Please check that the butterfly bolts are not
z
loose before/after carrying this product.
When transferring or carrying outside, sepa-
rate the printer and the stand.
Check that the two butterfly bolts attaching
1.
the stand and the printer are not loose.
Carry the printer to the installation place.
2.
Lock two casters on the front side.
3.
Check that the two butterfly bolts attaching
4.
the stand and the printer are not loose.
When using the printer 4.2.2
only (RJ-901X)
Install the printer so that the rubber foot (front) of
1.
the product is placed on the front of the board.
z
When using the printer only (without the
stand), always arrange as shown below.
There is a possibility that the printed sheets
are affected or errors such as media jams oc-
cur.
Connecting the power cable5
This section explains how to connect the power
cable. Follow the steps below to connect the
power cable.
Be sure to use the specified power
z
cable. Using a power cable other than
the specified can cause an electric
shock or fire.
Use the power cable compliant with
z
the safety standards, power-supply
voltage, and plug shape of the country
where the printer is used.
Use a power cable which is equipped
z
with a protective earth, and securely
connect it to the outlet.
Do not use a damaged power cable. It
z
could lead to an electric shock or fire.
Confirm that the product is turned OFF.
1.
Connect the power cable to the AC inlet on
2.
the back of the product.
Correctly insert the power cable plug into the
3.
power socket.
 Loading...