NO OSD
OSD IS SCROLLING
OSD AND VIDEO IS DISTORTED OR BLANKING
• Source video type is not 480i or 576i
• Monitor/TV is connected COMPONENT VIDEO
DIRECT
• M15 is connected to HDMI OUT
• Set the video source such as DVD-player to 480i
(NTSC) or 576i (PAL)
• Connect the Monitor/TV to COMPONENT
VIDEO MONITOR OUT.
• Use COMPONENT VIDEO MONITOR OUT to
view OSD
35
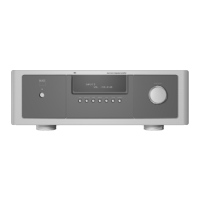
FACTORY DEFAULT SETTINGS
In the event that the M15 may become configured inappropriately or become non-responsive the factory default settings can be set by the front
panel buttons as follows;
• To set the factory default settings for the 120V version, simultaneously press the M15’s front panel buttons audio and digital.
• To set the factory default settings for the 230V version, simultaneously press the M15’s front panel buttons video and digital.
Note: Setting the M15 to factory default settings will erase any stored AV Presets and source input renaming.
HTRM SPECIAL FUNCTIONS
SOFTWARE VERSION NUMBER
• Press simultaneously the ON + TEST buttons for five seconds to display version numbers.
LIGHT SENSOR CALIBRATION MODE
• Press simultaneously the ENTER + SETUP buttons for five seconds to enter the setup menu. Then scroll down to “B Light”, press ENTER, then
scroll down to “Sens LvL” and press ENTER, you are now in the light sensor calibration mode:
• You will see displayed on the first line of the LCD where #### is the reading (0 - 1023) from the light sensor. The second line shows a bar
graph representing the reading.
• Press the ENTER key to exit this mode. A confirmation will be displayed. Select "Yes" or “No” to set the new value.
TROUBLESHOOTING
Reference
ENGLISH
FRANÇAISDEUTSCHNEDERLANDSESPAÑOL
ITALIANO
PORTUGUÊS
SVENSKA
CONDITION POSSIBLE CAUSE(S) POSSIBLE SOLUTIONS(S)
NO SOUND FROM ALL CHANNELS
NO SOUND FROM ZONE 2 OUTPUT
• AC power unplugged
• power not switched on
• outlet is un-powered
• Tape Monitor is engaged
• A digital input was selected for analog source
connection
• Check AC cable, connection, and outlet
• Disengage Tape Monitor
• Set DIGITAL INPUT to NONE in the SOURCE SETUP
menu for each analog input source connection.
NO SOUND FROM SOME CHANNELS • Faulty/missing cables
• THX/SPEAKER SETUP channel(s) set to “NONE”
• Power-amp or speaker-connections faulty
• Check cables
• Check THX/SPEAKER SETUP menu
• Check power amp, cabling, and speakers
NO SOUND FROM SURROUND CHANNELS • No surround listening mode is engaged
• surround-channels set to “NONE” on
THX/SPEAKER SETUP menu
• Surround-channels level set too low on SPEAKER
LEVEL menu
• Select appropriate listening mode
• Correct THX/SPEAKER SETUP or SPEAKER LEVEL
settings
NO SOUND FROM SUBWOOFER • Subwoofer is off, unpowered, or improperly
connected
• Subwoofer set to “NONE” on THX/SPEAKER
SETUP menu
• Subwoofer level set too low on THX/SPEAKER
SETUP menu
• Power-up subwoofer, check sub’s AC outlet or
check connections
• Correct THX/SPEAKER SETUP or LEVEL SETUP
settings
NO SOUND FROM CENTER CHANNEL • Source is a 2/0 (etc.) Dolby Digital or DTS
recording without center channel
• Center set to NONE on THX/SPEAKER SETUP
menu
• Center level set too low on THX/SPEAKER SETUP
MENU
• Play a known 5.1-channel recording or select
Dolby Pro Logic or Mono mode
• Correct THX/SPEAKER SETUP or LEVEL SETUP
settings
NO DOLBY DIGITAL/DTS • Source’s digital output is not connected to an
M15’s digital input
• Check connections
M15 DOES NOT RESPOND TO HTRM REMOTE
OR ZR2 REMOTE
• Batteries are flat or incorrectly inserted
• IR transmitter window on remote, or IR receiver
window on M15 is obstructed
• M15 front panel is in very bright sunlight or
ambient light
• Check batteries
• check IR windows and ensure clear line-of-sight
from remote to M15
• reduce sunlight/room lighting
GREY OR BLANK PICTURE • Source video type is not set correctly in the
SOURCE SETUP menu.
• Video monitor is not set correctly in the DISPLAY
SETUP menu
• Set the video type as per the video chart on page
22 for each source in the SOURCE SETUP menu.
Component Video YUV overrides the VIDEO
TYPE settings of S-Video and CVBS
• Set the video MONITOR TYPE as per the video
chart on page 22 in the DISPLAY SETUP menu.
For multiple source VIDEO TYPE configurations,
set MONITOR TYPE to YUV