4-2 Description
4.2 EHP50-TS
Application
This chapter describes controls and functions provided by the EHP50-TS
application for time domain and spectrum analysis, included in EHP-TS
software package.
To install EHP-50G, connect the supplied fiber optic to the OPTIC LINK
connector taking care that the spigot matches the housing. Connect the
other end of the fiber optic to the OPTIC LINK connector of the USB-OC or
8053-OC. Connect the converter to a port of the PC.
Do not pull the fiber optic by holding onto the cable but use the
connector so that the head does not get damaged.
Avoid dirt and other particles getting into the transducers of the fiber
optic.
4.2.1 Main menu
Turn on EHP-50G by pushing the Red POWER button for one second
(ORANGE LED for about 1 second is shown on button press). After that,
the led turns off for 2 seconds, lights orange for about ½ second as an auto-
check and then blinks red.
Communication with PC is shown by the blinking GREEN LED.
Run EHP50-TS application; a welcome screenshot will appear for a few
seconds.
Pressing the POWER down button for more than 4 seconds forces the
hardware of the apparatus to shut down. Then, it is necessary to wait
several seconds before switching it on again.
EHP-50G must be ON before running EHP50-TS control software.
EHP-50G may not be correctly recognized if switched ON when the
control software is already running.
The fiber optic of the EHP-50G can be disconnected and reconnected
while in use. In this case, communication will be restarted
automatically.
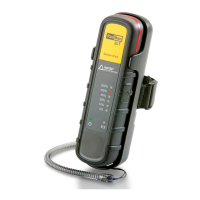
If the stored Firmware and/or FPGA version is older than what is
available, the software will inform you that an update is needed.
Confirm with OK and the Firmware/FPGA updating utility will be
automatically run (for further information please see chapter 7).