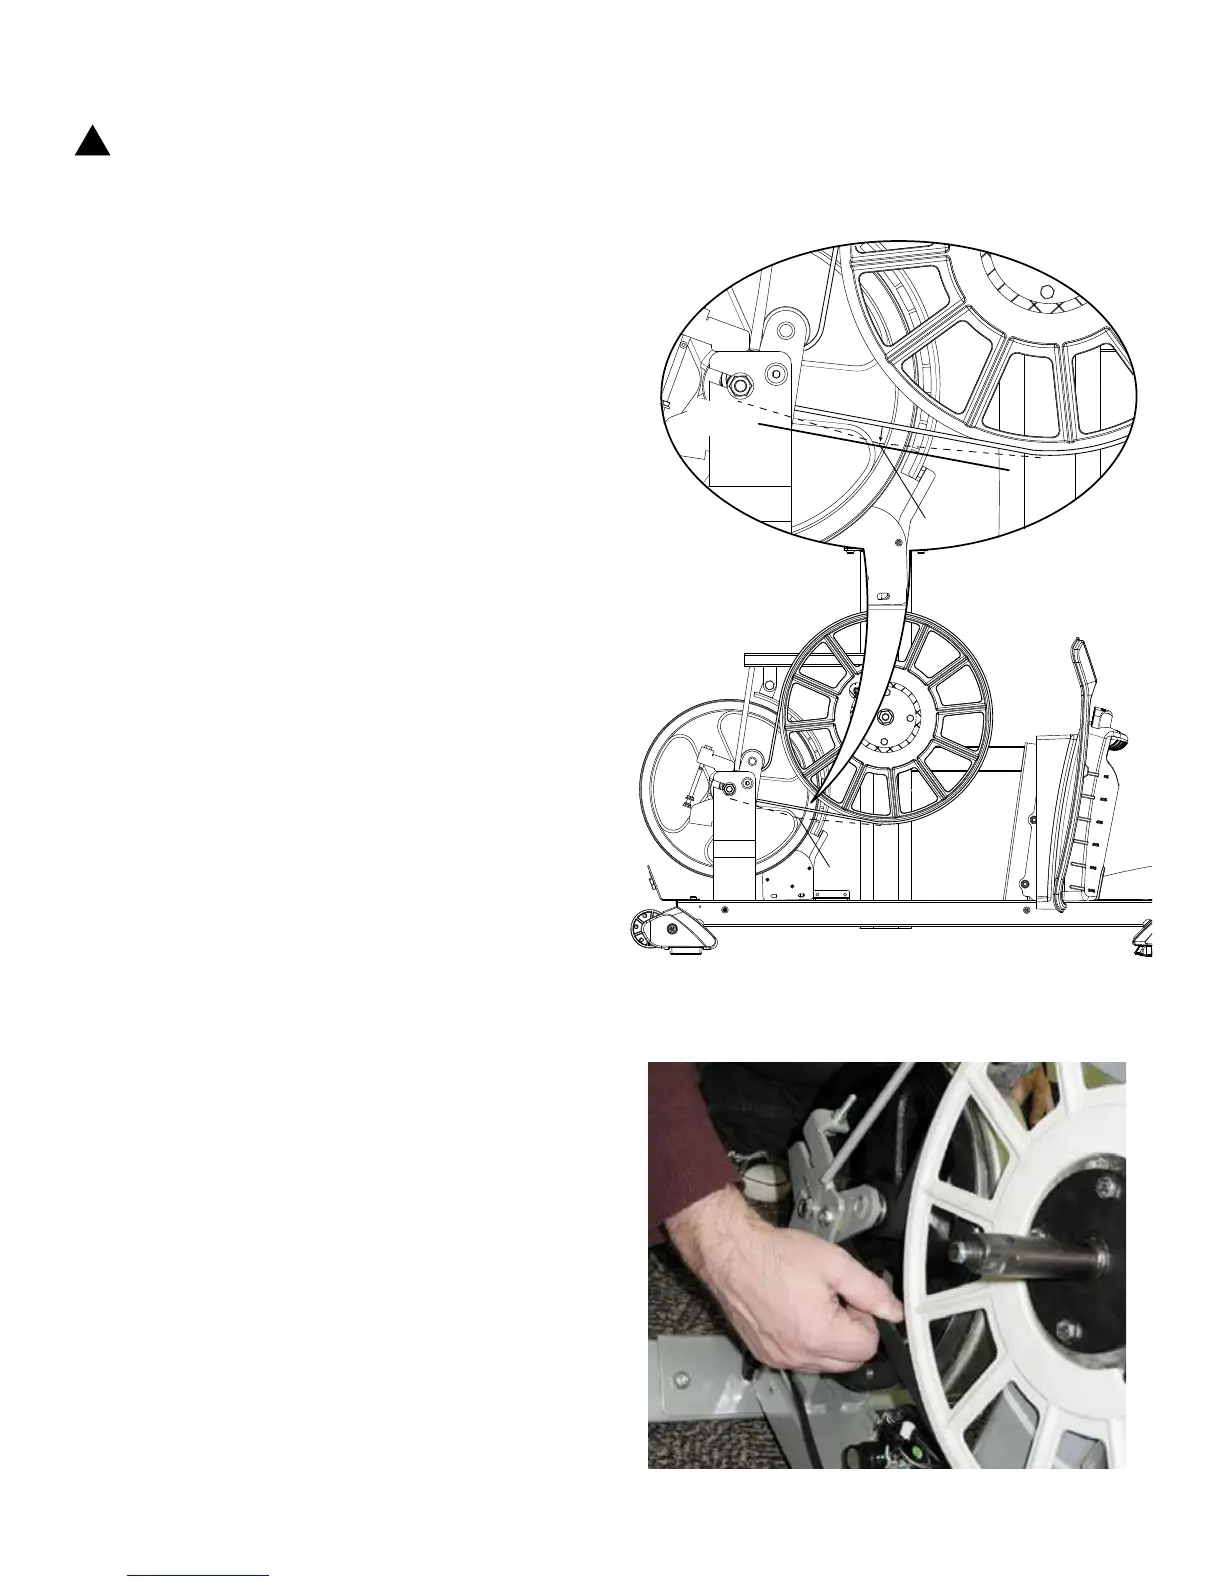
13
Note: Your machine may not match the image. For reference only.
1. Remove the Left Shroud from the Main Unit. Refer to the
“Replace the Shrouds” procedure.
2. To test the Drive Belt tension:
• Push the Drive Belt downward at the midpoint (M) between the
pulleys and measure the distance. The Drive Belt should have
only 0.25” (0.64 cm) of give. See Figure 1.
Or:
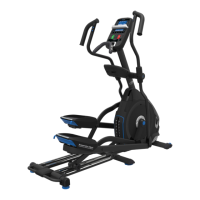
• Hold the edges of the Drive Belt at the midpoint (M) and twist it
(see Figure 2). It should turn only 90 degrees
(1/4 turn, to vertical).
If the tension is correct, go to Step 6.
If the tension is too loose or too tight, adjust the nuts and bolt on
the Tensioner Assembly (Idler Assembly). Continue to Step 3.
!
To reduce the risk of electrical shock or unsupervised usage of the equipment, always unplug the power cord from the wall outlet and wait 5
minutes before cleaning, maintaining or repairing this machine. Place the power cord in a secure location.
NOTICE: It is necessary to remove the Shrouds for this procedure. Refer to the “Replace the Shrouds” procedure.
Figure 1
Figure 2
M
M
0.25”
0.64 cm
}