20
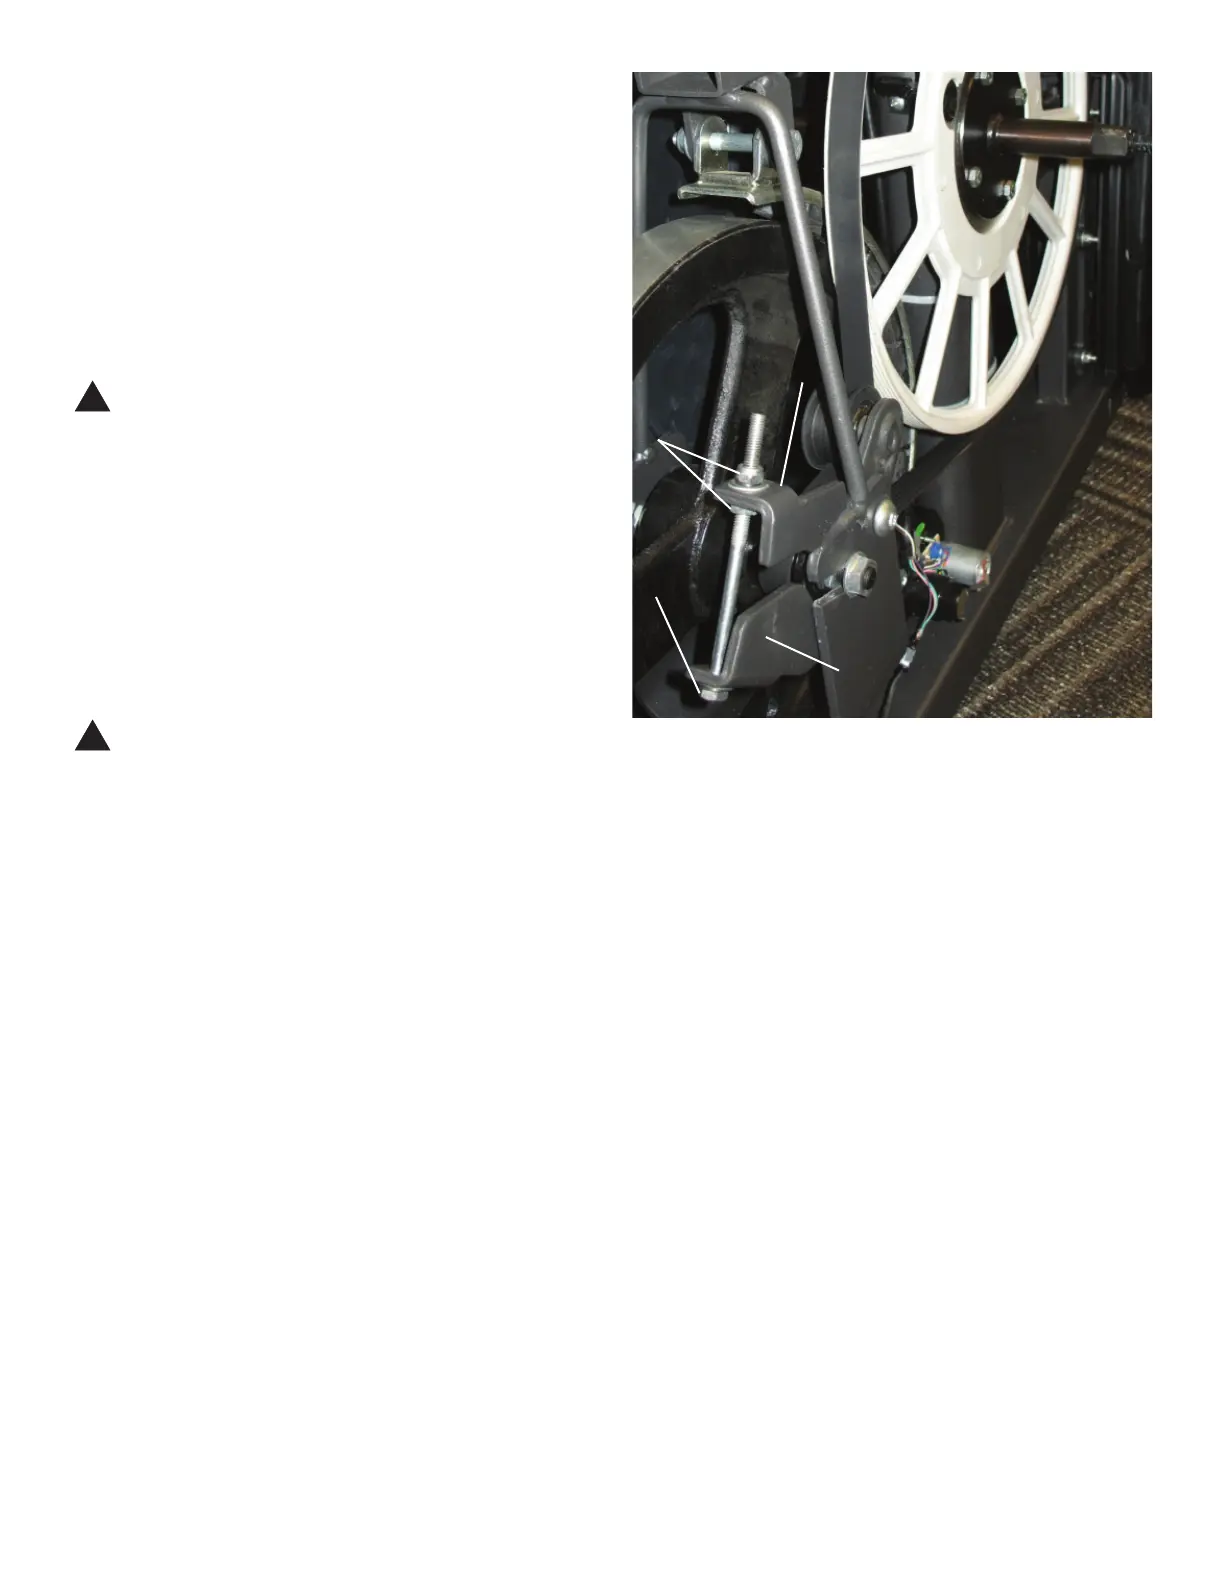
3. To adjust the nuts (C) on the Tensioner Assembly (A), use a 10mm
open end wrench to hold the bolt (B) steady and turn the nuts with a
second 10mm open end wrench.
4. When the tension is correct, tighten the nuts (C) against the
7HQVLRQHU%UDFNHW'WRKROGWKHEROW%DQGWKH7HQVLRQHU
Assembly (A) in position.
Note: This step may require two people.
5. Carefully turn the crank arm and check the movement of the drive
belt. The Crank Arms and Flywheel should move as one.
!
%HVXUHWRNHHSÀQJHUVFOHDURIDOOSLQFKKD]DUGVZKHQ\RX
turn the Drive Pulley.
Adjust the belt tension again if necessary.
6. Reassembly is the reverse procedure.
NOTICE: Be sure not to crimp any cables.
7. Final Inspection
Inspect your machine to ensure that all hardware is tight and components
are properly assembled.
!
Do not use until the machine has been fully assembled and
inspected for correct performance in accordance with the
Owner’s Manual.
A
C
B
D

 Loading...