79
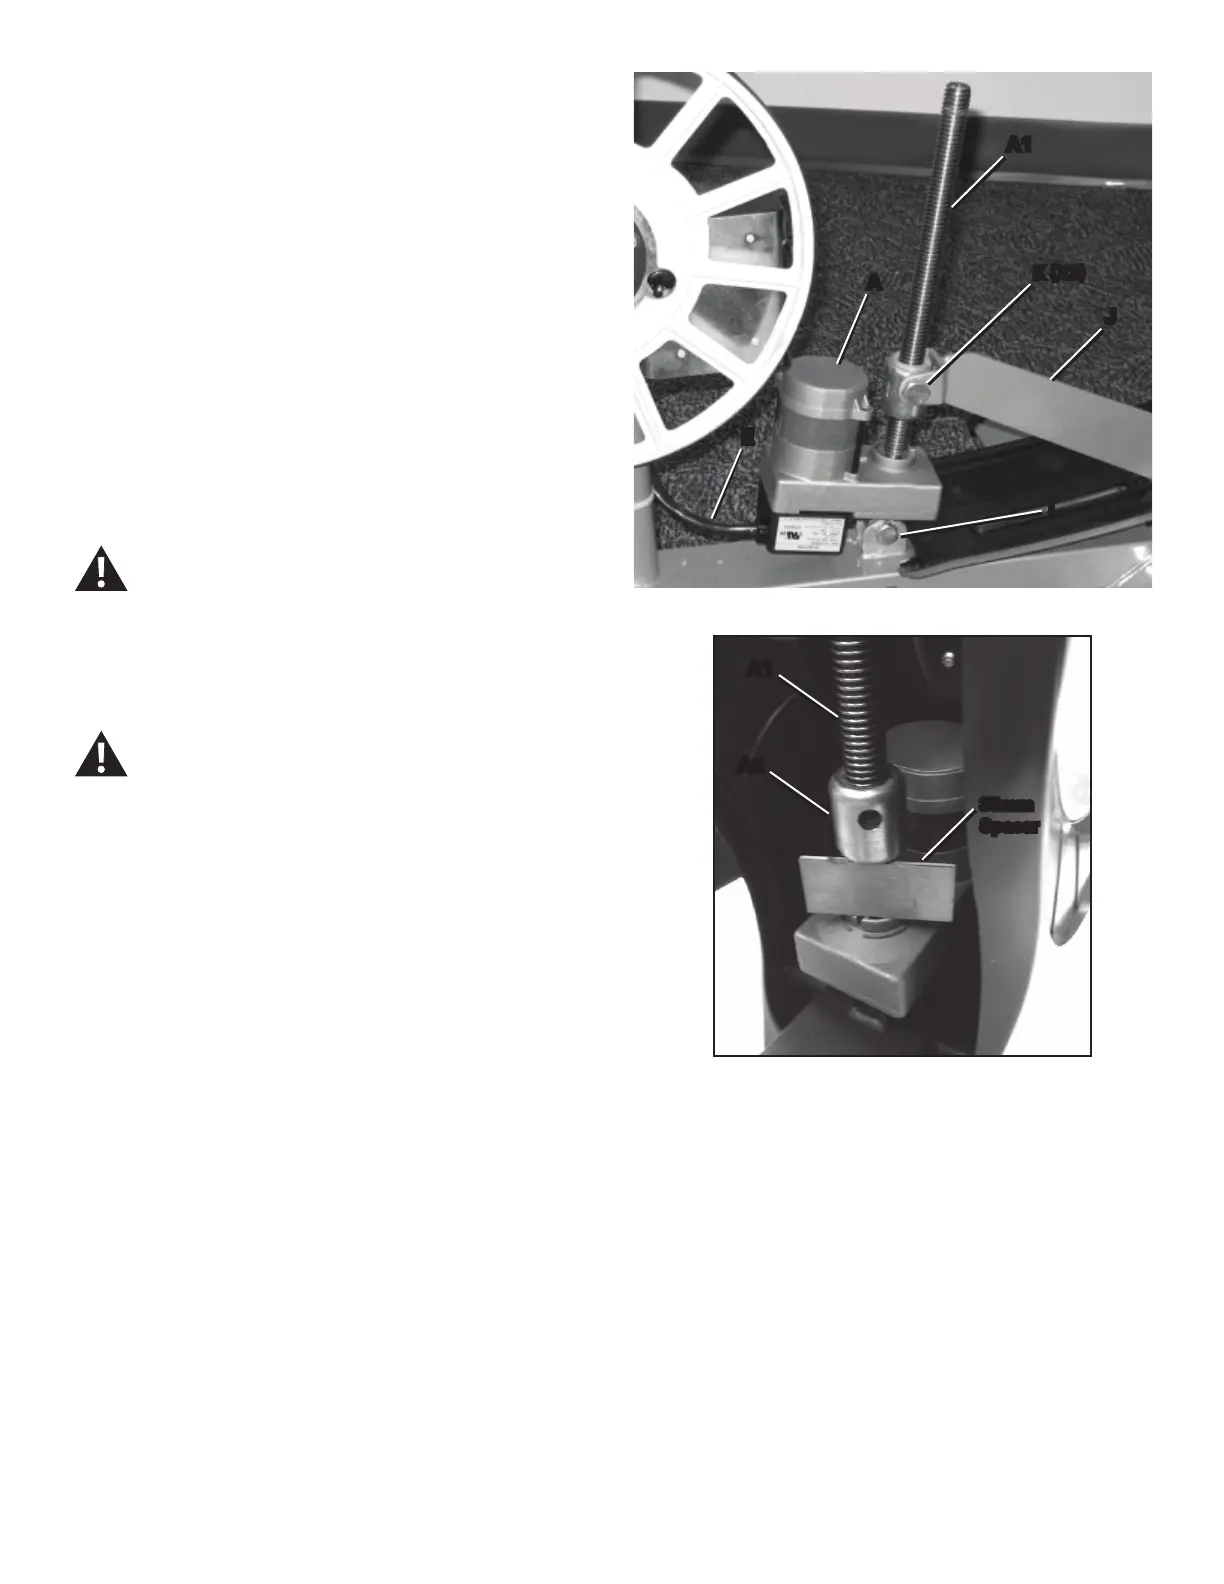
8. Using the 18mm socket and wrench and 18mm open end wrench,
loosen and remove the hex head bolts (K) that attach the Incline Adjuster
(J) assembly to the Lift Motor shaft (A1).
9. Remove the hardware (L) that attaches the Lift Motor assembly (A)
to the Frame.
10. Remove old Lift Motor assembly, and discard.
11. Install the replacement Lift Motor assembly and hardware (L) to the
Frame.
12. Connect the Lift Motor cable (E) to the proper locations on the MCB.
Secure the cables with zipties (as noted in Step 2).
Use the top screw (C1) to attach the green Lift Motor
ground wire to the Frame. Be sure not to crimp any cables.
13. Reinstall the Mast, Static Handlebar, Console and Top Shroud,
which were removed in Step 2. (Refer to the “Replace the Shrouds”
procedure.) Turn the power on.
Machine is on. Current is active. There is risk of electrical
shock.
14. From the Power Up Mode screen, push and hold down the PAUSE/
STOP button and Right arrow button for about 3 seconds to go into the
&RQVROH6HWXS0RGH7KH&RQVROHGLVSOD\ZLOOVKRZWKH(GLW'DWHVFUHHQ
with the current setting.
15. Push the OK button 4 times until the Console displays the TOTAL
RUN HOURS screen.
16. +ROGGRZQWKH3$86((1'EXWWRQDQG'RZQEXWWRQWRJHWKHUIRU
seconds. The Console display shows the Firmware Version string.
17. 3XVKWKH'RZQDUURZEXWWRQWLPHVWRJRWRWKH029(/,)7RSWLRQ
and push OK to enter the lift options menu.
18. 7KHFRQVROHGLVSOD\VWKH830;'10157&$/SURPSW3XVKWKH
'RZQDUURZVRWKDWWKH/LIW0RWRUWXUQVWRWKHORZHUOLPLW
19. When the motor has stopped turning, adjust the nut (A2) on the
shaft (A1) to 35mm above the Lift Motor base, using a ruler or 35mm
spacer.
20. Adjust the nut (A2) upward away from the motor base until the holes
in the nut align with the holes in the Incline Adjuster (J) bracket. Install the
hex head bolts (K) to secure the bracket to the nut.
K (X2)
A
J
L
E
A1
A1
A2
35mm
Spacer

 Loading...