87
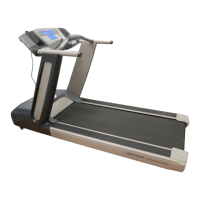
7. Using a 6mm hex wrench, remove the indicated screw from the Front
Roller.
8. Lift and pivot the Front Roller out of the Frame. This will free the Drive
Belt from the Front Roller.
9. Replace the old Drive Belt with the new Drive Belt around the Front
Roller.
10. Insert the end of the Front Roller with the Drive Pulley into the Frame
and pivot into the Bracket.
11. Using a 6mm hex wrench, attach the Front Roller to the Bracket.
Note: tighten the hardware until the Front Roller is centered in the
Bracket.
12. Loop the new Drive Belt around the Motor Pulley. Start the Drive Belt
on the Drive Pulley and roll it in a clockwise motion. Be sure the Belt does
not come off of the Motor Pulley.
Keepngersoutofanypinchopportunitieswhenturningthe
Pulleys.
13. Roll the Drive Pulley clockwise until the Drive Belt is fully installed.
ContinuetorolltheBeltforwardwhileaddingsidepressurewithngersto
align as necessary.
Front Roller
Drive Pulley
Motor Pulley
=
 Loading...