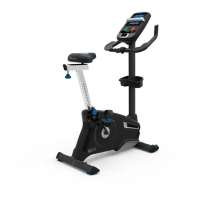
33
Console Setup Mode
The Console Setup Mode lets you input the date and time, set the units of measurement to either English or Metric,
control the sound settings (on/ oႇ), or see maintenance statistics (Error Log and Run Hours ± for service technician use
only).
1. Hold down the PAUSE/END button and Increase (c) button together for 3 seconds while in the Power-Up Mode to go
into the Console Setup Mode.
Note: Push PAUSE/END to e[it the Console Setup Mode and return to the Power-Up Mode screen.
2. The Console display shows the Date prompt with the current setting. To change, the Increase/Decrease buttons to
adjust the currently active value (Àashing). Push the Left/Right buttons to change which segment is the currently
active value (month / day / year).
3. Push OK to set.
4. The Console display shows the Time prompt with the current setting. Push the Increase/Decrease buttons to adjust
the currently active value (Àashing). Push the Left/Right buttons to change which segment is the currently active value
(hour / minute / AM or PM).
5. Push OK to set.
. The Console display shows the Units prompt with the current setting. To change, push OK to start the Units option.
Push the Increase/Decrease buttons to change between “MILES´ (Imperial English units) and “KM´ (metric units).
Note: If the units change when there is data in User Statistics, the statistics convert to the new units.
7. Push OK to set.
8. The Console display shows the Sound Settings prompt with the current setting. Push the Increase/Decrease buttons
to change between “ON´ and “OFF´.
9. Push OK to set.
10. The Console display shows the TOTAL RUN HOURS for the machine.
If resetting the Console:
A. Push and hold down the PAUSE/END and Left(e) buttons for 5 seconds. The Console will display the current
Firmware Version.
B. Push the Increase(c) button until the RESET CONSOLE option is displayed. Push the OK button, and con¿rm
the Console Reset.
11. For the ne[t prompt, push the OK button.
12. The Console display shows the Software Version prompt.
13. For the ne[t prompt, push the OK button.
14 . The Console will display the Power-Up Mode screen.
CONSOLE SETUP MODE
Use of this Machine in a Studio (Non-Home) Environment
This fitness machine can be configured for use in a studio environment. When in Studio mode, the machine only has
one active User profile. All other User profiles are disabled. Any workout values displayed on the Console that reference
previous workouts, such as the Goal Track feature, will use a summary of past workouts.
To switch into the Studio (non-home) mode, push and hold down for 3 seconds the PAUSE/END and Decrease(d) buttons.
The Console will display STUDIO SET for three seconds, and then will display PWR CYCLE NOW. Turn the power off for a
few seconds, and then on. The Console will display STUDIO MODE when successfully shifted into Studio mode.
Note: Do not switch your machine into Studio mode unless the machine is in a non-home environment. The Console
must be reset to switch back into the Home mode. If the Console is reset, the Console setup, user records and
workout records will be reset to defaults.