86 Installing a Common Vent System
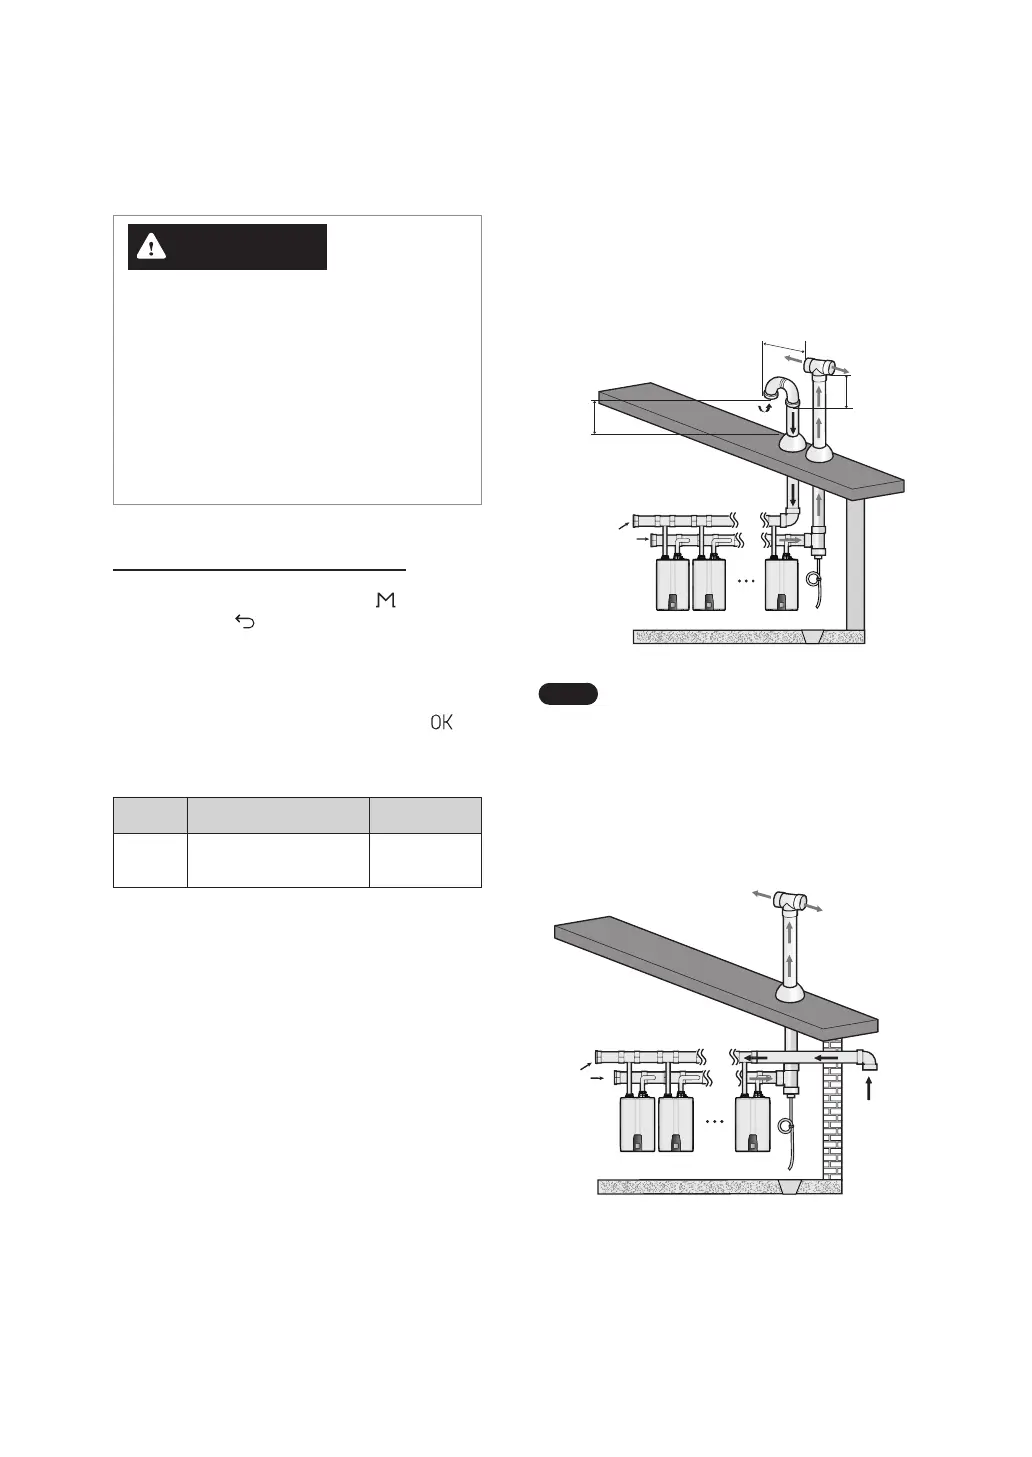
6.7 Common Vent Termination
Clearances
6.7.1 Direct Vent Application – Vertical
Installation
End
Cap
12"
(30.48 cm)
min.
Exhaust
Intake
12"
min.
Unit 1 Unit 2 Unit 12
Note
For more information about the
installation of the flue, refer to “3.6.6
Terminating the Vent” on page 54.
6.7.2 Venting Intake and Exhaust to
Different Locations
Unit 1 Unit 2 Unit 12
In
End
Cap
6.6 Setting up the Common Vent
System
WARNING
Electric Shock Hazard
To prevent serious injury or death:
●
ALWAYS disconnect power before servicing.
●
NEVER turn power on until the electrical
wiring installation is complete.
●
NEVER remove front cover unless power to
unit is turned off or disconnected.
Setting up for a Cascade System
1. Press and hold the Menu button ( ) and the
Back button (
) simultaneously for 3 seconds
on the front panel to access the Service/Installer
menu.
2. Select 2. Cascade Status and Set > 5. Cascade
Vent Setting by pressing the OK button (
)
and set up the common vent system for a
cascade system.
Function Menu Description
Cascade
Unit Vent
2. Cascade Status and Set
2.5. Cascade Vent setting
Common Vent
Individual Vent
 Loading...