14
Installation and Connection
2. Installation and Connection
2-1. Steps of setting up and connecting
Use the following steps for setting up your projector:
䢇 Step 1
Set up the screen and projector. (Contact your dealer to carry out the setup.)
䢇 Step 2
Connect cables to the image input terminals. (See this page)
Connect cables to the various control terminals. (See page 15)
䢇 Step 3
Connect the power cord. (See page 16)
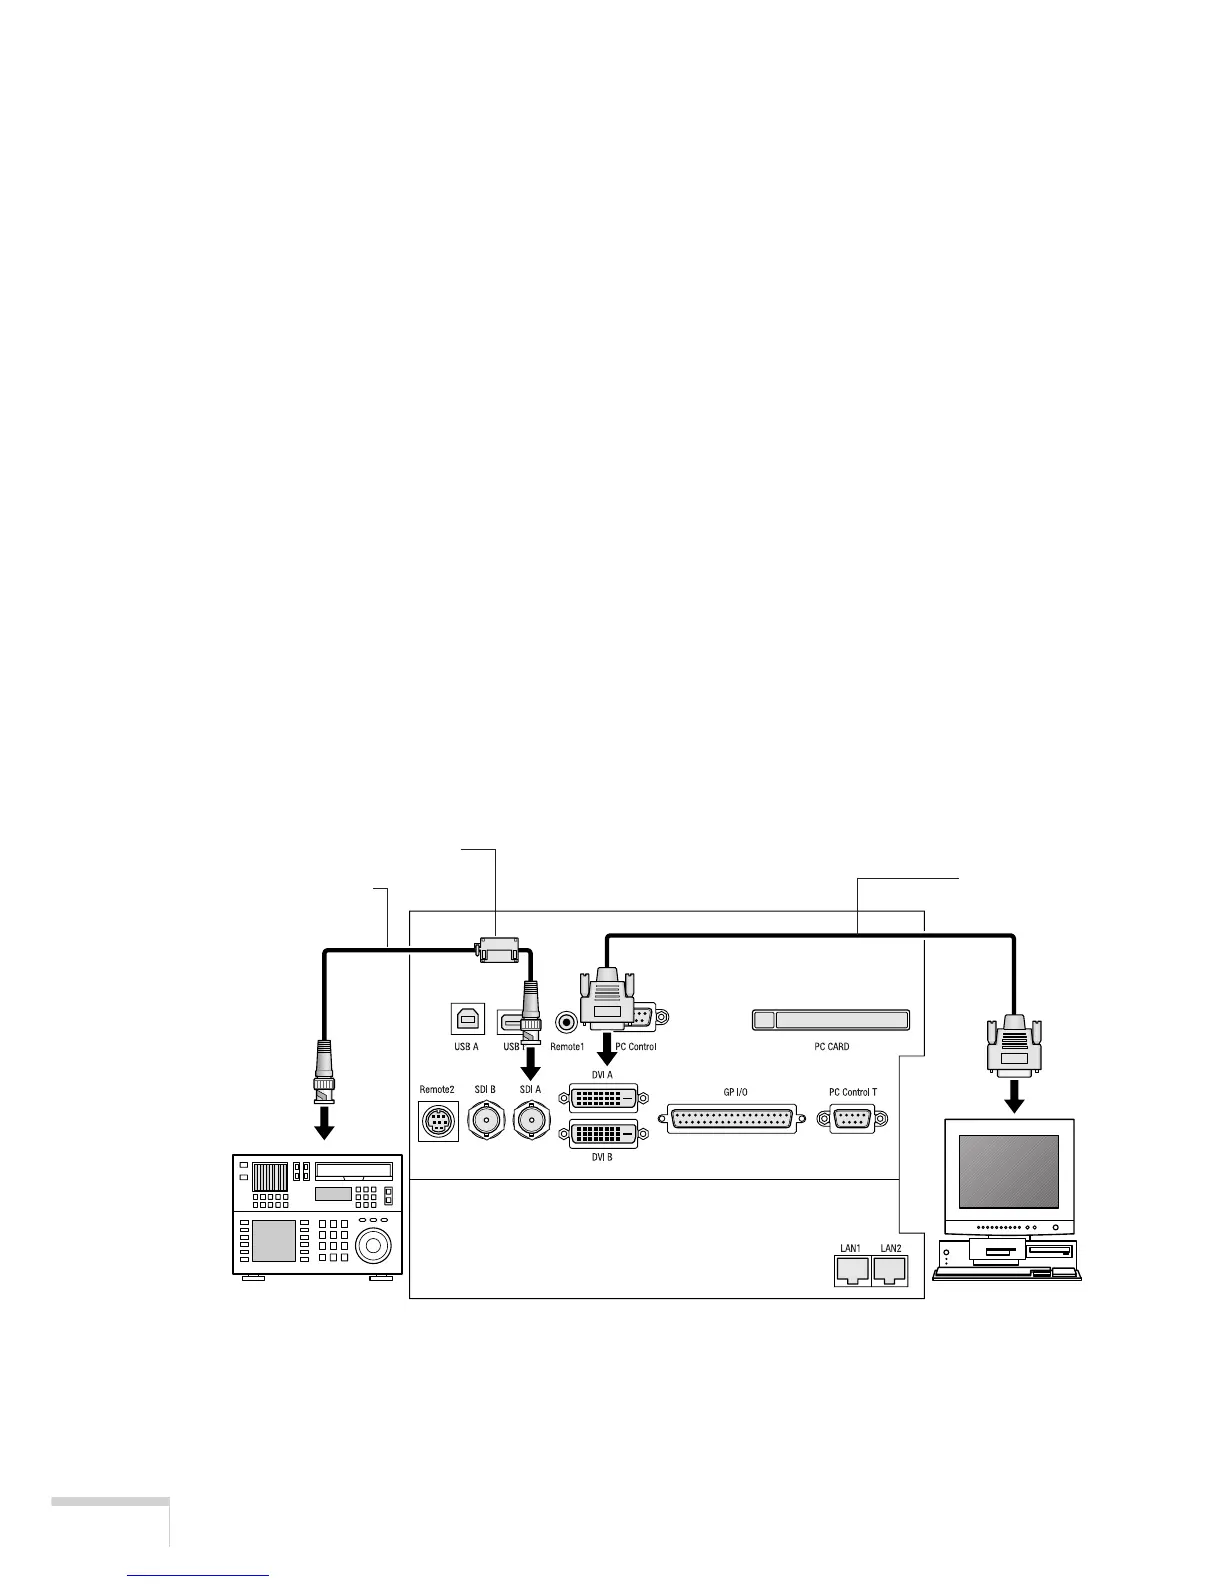
2-2. Connecting the image input terminals
Your projector has four image input terminals, namely, the HDSDI A input terminal, the HDSDI B input
terminal, the DVI-D A input terminal and the DVI-D B input terminal.
• HDSDI A/B input terminal (SDI-A/SDI-B) ........Inputs serial digital images from a Video Server
or Video source.
• DVI-D A/B input terminal (DVI-A/DVI-B) ........Inputs digital RGB signals from a PC.
Information for Reducing Radiation of Electromagnetic Waves
To reduce unnecessary radiation of electromagnetic waves, use the supplied ferrite clamp core.
BNC cable (75 ohm)
Ferrite clamp core
DVI-D
signal cable