18
3. Projecting an Image (Basic Operation)
This section describes how to turn on the projector and to project a picture onto the screen.
1 Turning on the Projector
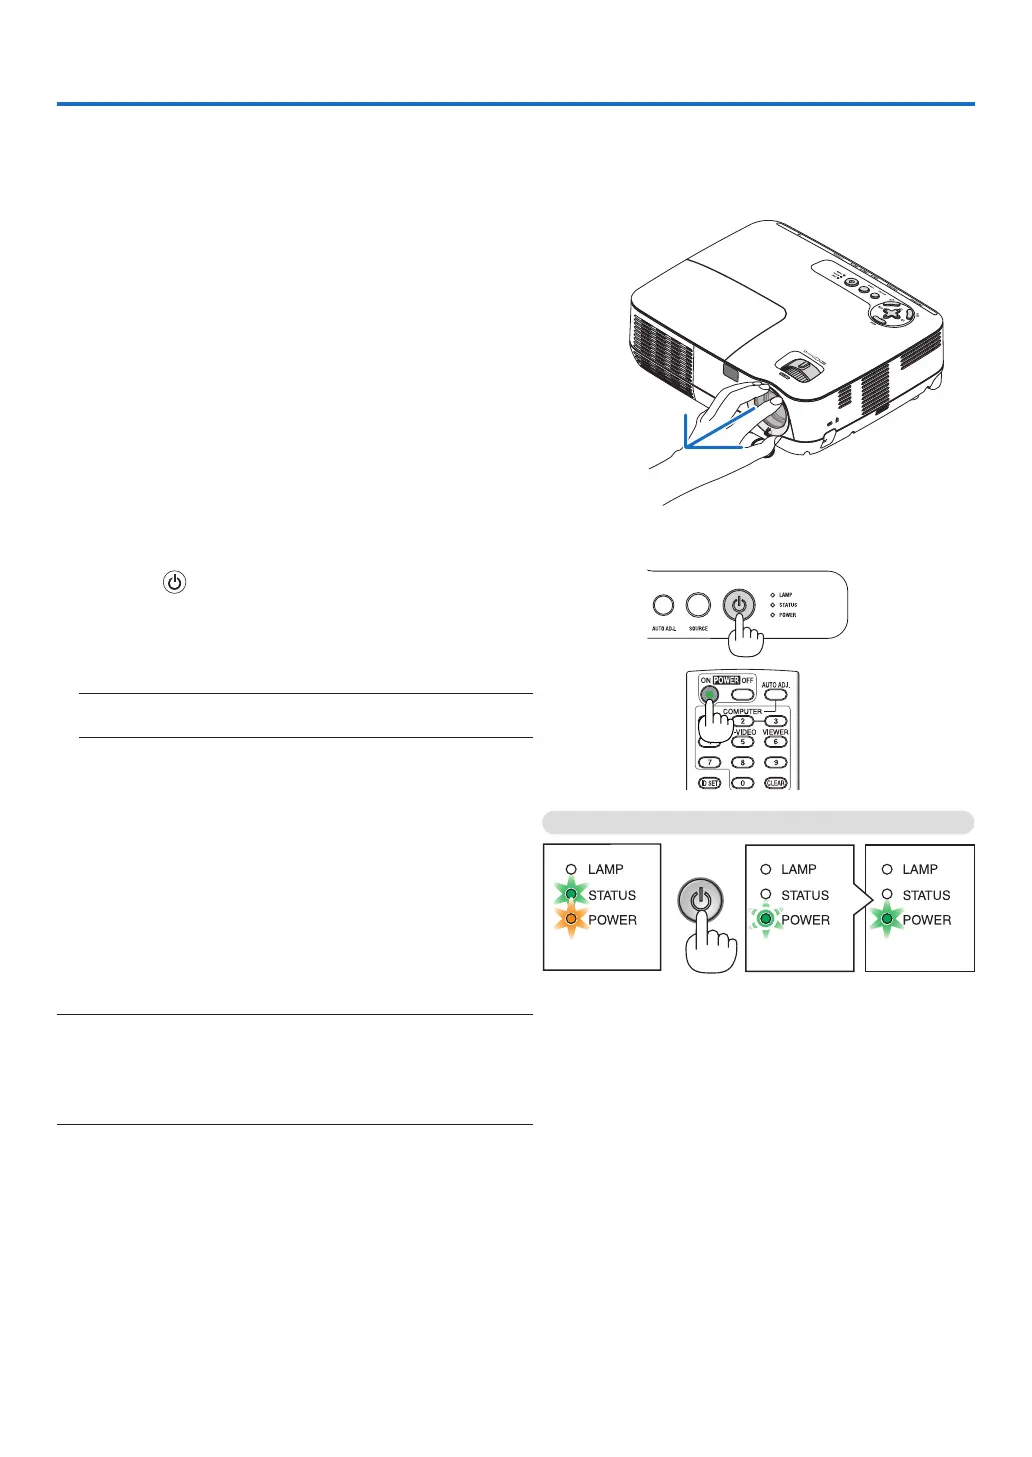
1. Remove the lens cap
• Donotremovethelenscapbypullingonthestring.Doing
so can cause mechanical damage to the part around the
lens.
2. Press the (POWER) button on the projector cabinet
or the POWER ON button on the remote control for 1
second.
The POWER indicator will turn to green and the projector
will become ready to use.
NOTE: When the projector is turned on, it may take some time
before the lamp light becomes bright.
TIP:
• WhentheSTATUSindicatorlightsorange,itmeansthat the
[CONTROLPANELLOCK]isturnedon.(→ page 59)
• Whenthemessage“Projectorislocked!Enteryourpassword.”
isdisplayed,itmeansthatthe[SECURITY]isturnedon.(→
page 32)
After you turn on your projector, ensure that the computer
or video source is turned on and that your lens cap is
removed.
NOTE: When no signal is available, the NEC logo (default), blue, or
blackscreenwillbedisplayed.Afteralapseof45secondsfromwhen
theprojectordisplaysablue,blackorlogoscreen,[ECOMODE]will
alwaysswitchto[ON].Thisisdoneonlywhen[ECOMODE]isset
to[OFF].
Standby
Preparing to power on
Power On
Steady orange light Blinking green light Steady green light
(→ page 73)