21
2. Projecting an Image (Basic Operation)
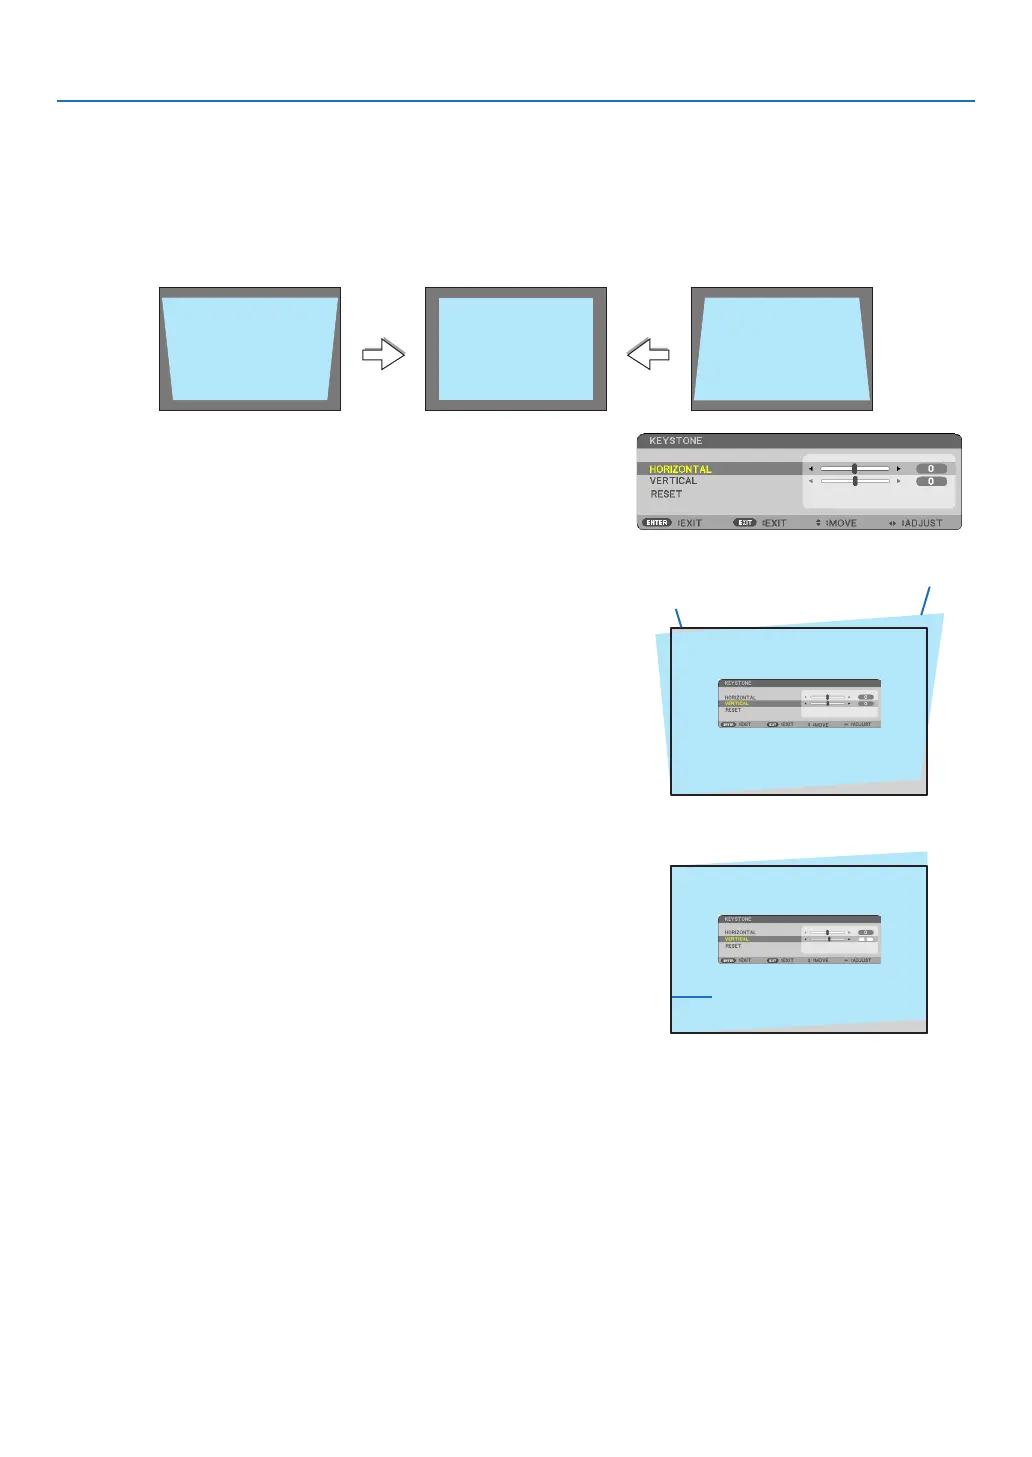
❻ Correcting Keystone Distortion [KEYSTONE]
Whentheprojectorisnotexactlyperpendiculartothescreen,keystonedistortionoccurs.Toovercomeit,youcanusethe
“Keystone”function,adigitaltechnologythatcanadjustforkeystone-typedistortion,resultinginacrisp,squareimage.
Thefollowingprocedureexplainshowtousethe[KEYSTONE]screenfromthemenutocorrecttrapezoidaldistortions.
Whentheprojectorisplaceddiagonallytothescreen,
Whentheprojectorissetupatanangleinrelationtothescreen,adjusttheHorizontaloptionoftheKeystonemenu
sothatthetopandbottomofsidesoftheprojectedimageareparallel.
1. When APPS is not selected as source and the menu is not dis-
played on, press the ▼ button on the projector cabinet.
The Keystone screen will be displayed on the screen.
• PresstheKEYSTONEbuttonwhenusingtheremotecontrol.
• Seepage22 for [RESET].
2. Press the ▼buttontoselect[VERTICAL]andthenusethe◀ or ▶
so that the left and right sides of the projected image are parallel.
* Adjusttheverticalkeystonedistortion.
Projected area
Screen frame
3. Align the left (or right) side of the screen with the left (or right)
side of the projected image.
• Usetheshortersideoftheprojectedimageasthebase.
• Intherightexample,usetheleftsideasthebase.
Align left side