7. Connecting to a Network
109
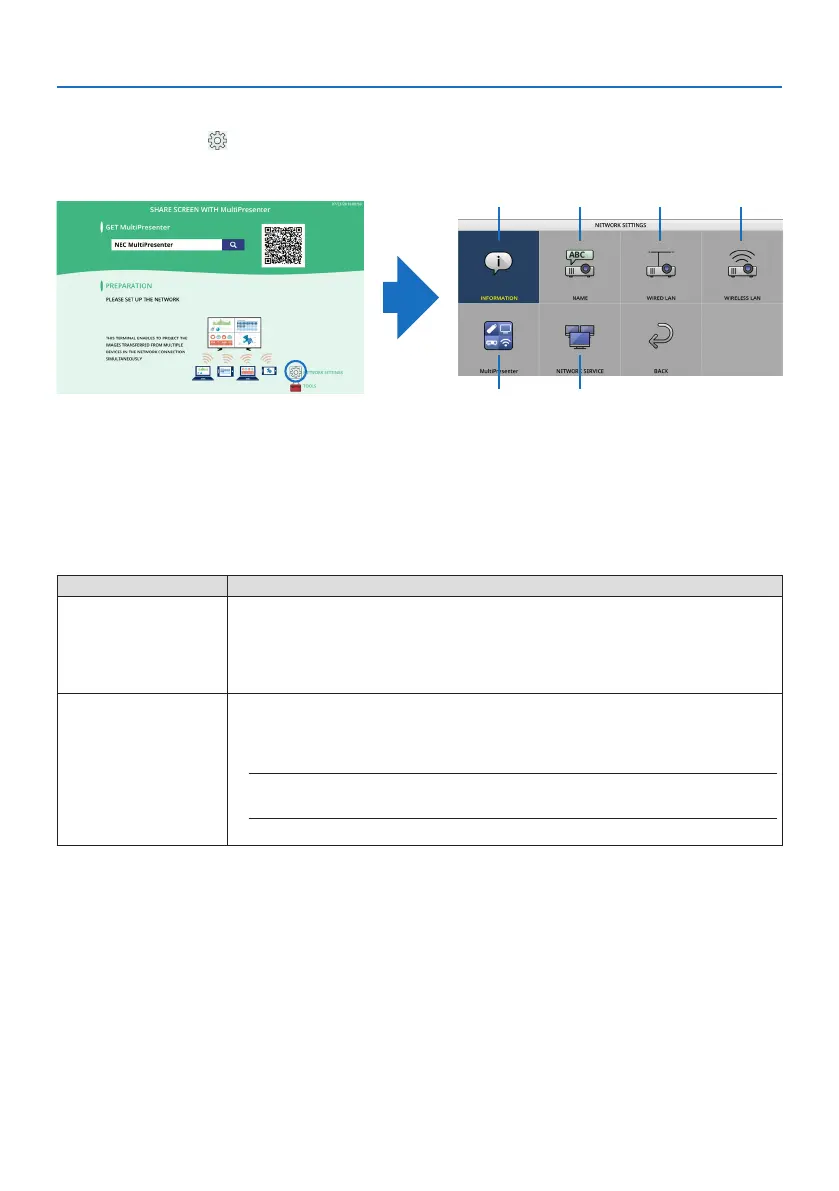
7-3. NETWORK SETTINGS
Move the cursor to [ NETWORK SETTINGS] at the bottom right of the start-up screen and press
the ENTER button to display the [NETWORK SETTINGS] screen.
⑤ ⑥
① ② ③ ④
① INFORMATION
Displays information regarding the wired LAN and wireless LAN of the projector.
• To return to the [NETWORK SETTINGS] screen, press the EXIT button.
② NAME
Sets the [PROJECTOR NAME] and [HOST NAME].
Item name Description
PROJECTOR NAME Set the [PROJECTOR NAME].
• Initial value: “PJ-XXXXXXXXXX”
The initial value “PJ-XXXXXXXXXX” represents the “PJ-” + “Serial Number”.
• Allowable characters: Alphanumeric symbols (including space)
• Number of characters: 1–16 characters
HOST NAME Set the [HOST NAME].
• Initial value: “pj-XXXXXXXXXX”
The initial value “pj-XXXXXXXXXX” represents the “pj-” + “Serial Number”.
• Allowable characters: Alphanumeric, “-”
NOTE:
• You can not enter “-” at the beginning or end of the [HOST NAME].
• Number of characters: 1–16 characters
③ WIRED LAN
Configure the profile of the wired LAN, DHCP, IP address, subnet mask, gateway, DNS and so on.
• When using a wired LAN, set the profile to [ENABLE] and configure the necessary settings.
• If you are not using a wired LAN, set the profile to [DISABLE].
• Once you have configured the settings, move the cursor to [OK] and press the ENTER button.