2. Projecting an Image (Basic Operation)
28
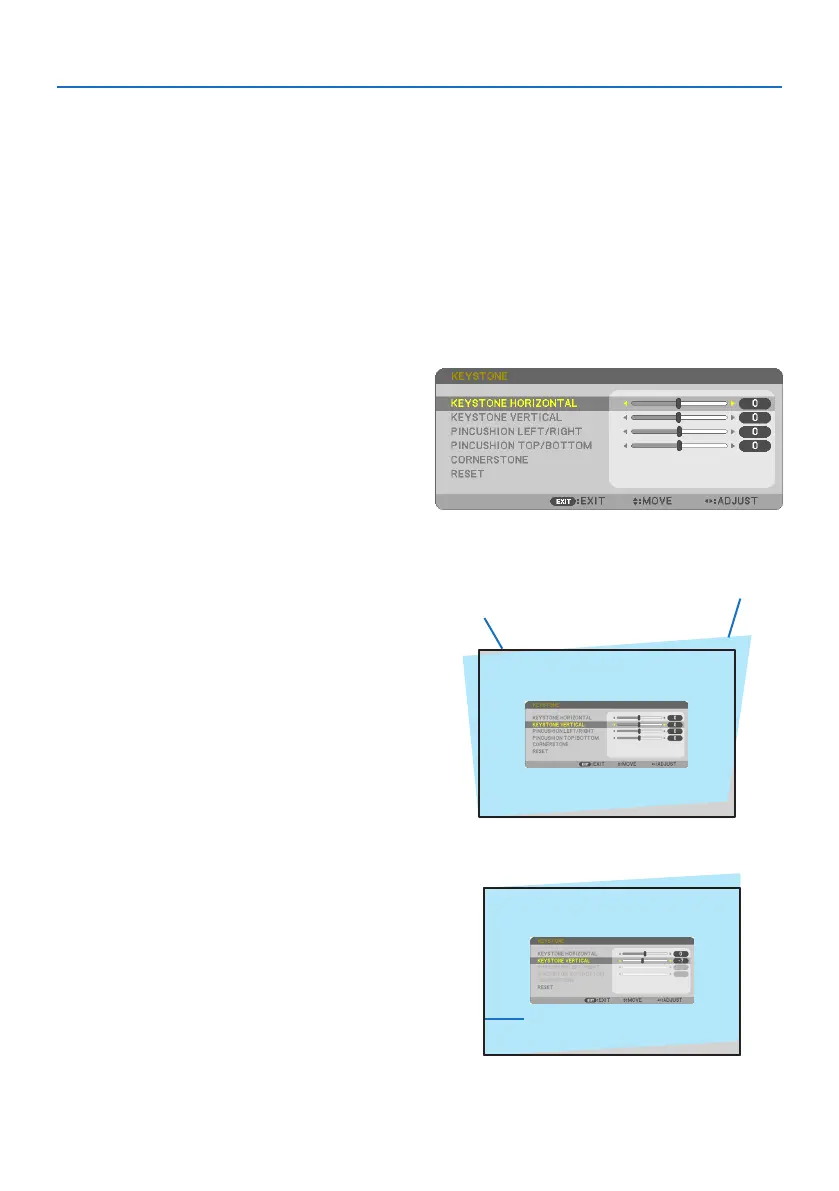
2-6. Correcting Keystone Distortion [KEYSTONE]
When the projector is not exactly perpendicular to the screen, keystone distortion occurs. For cor-
recting this distortion, you can use the “Keystone” function, a digital technology that can adjust for
keystone-type distortion, resulting in a crisp, square image.
The following procedure explains how to use the [KEYSTONE] screen from the menu to correct
trapezoidal distortions when the projector is placed diagonally to the screen.
Before performing KEYSTONE correction
The [KEYSTONE] correction has four features, [KEYSTONE HORIZONTAL], [KEYSTONE VERTICAL],
[PINCUSHION LEFT/RIGHT], [PINCUSHION TOP/BOTTOM], and [CORNERSTONE]. If the value of
either [CORNERSTONE] or [PINCUSHION] has corrected, [KEYSTONE HORIZONTAL] and [KEYSTONE
VERTICAL] are disabled. In this case, RESET the corrected values and restart to correct distortion.
1. Press the ▼ button on the projector cabinet.
The [KEYSTONE] screen will be displayed on
the screen.
• Press the KEYSTONE button when using
the remote control.
• See page 39 for [PINCUSHION].
• See page 37 for [CORNERSTONE].
• See page 29 for [RESET].
2. Press the ▼ button to select [KEYSTONE
VERTICAL] and then use the ◀ or ▶ so that
the left and right sides of the projected
image are parallel.
• Adjust the vertical keystone distortion.
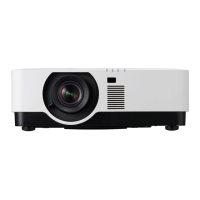
Projected area
Screen frame
3. Align the left (or right) side of the screen
with the left (or right) side of the projected
image.
• Use the shorter side of the projected im-
age as the base.
• In the right example, use the left side as
the base.
Align left side