Advanced Settings
36
NETGEAR Wireless Cable Gateway CG3000
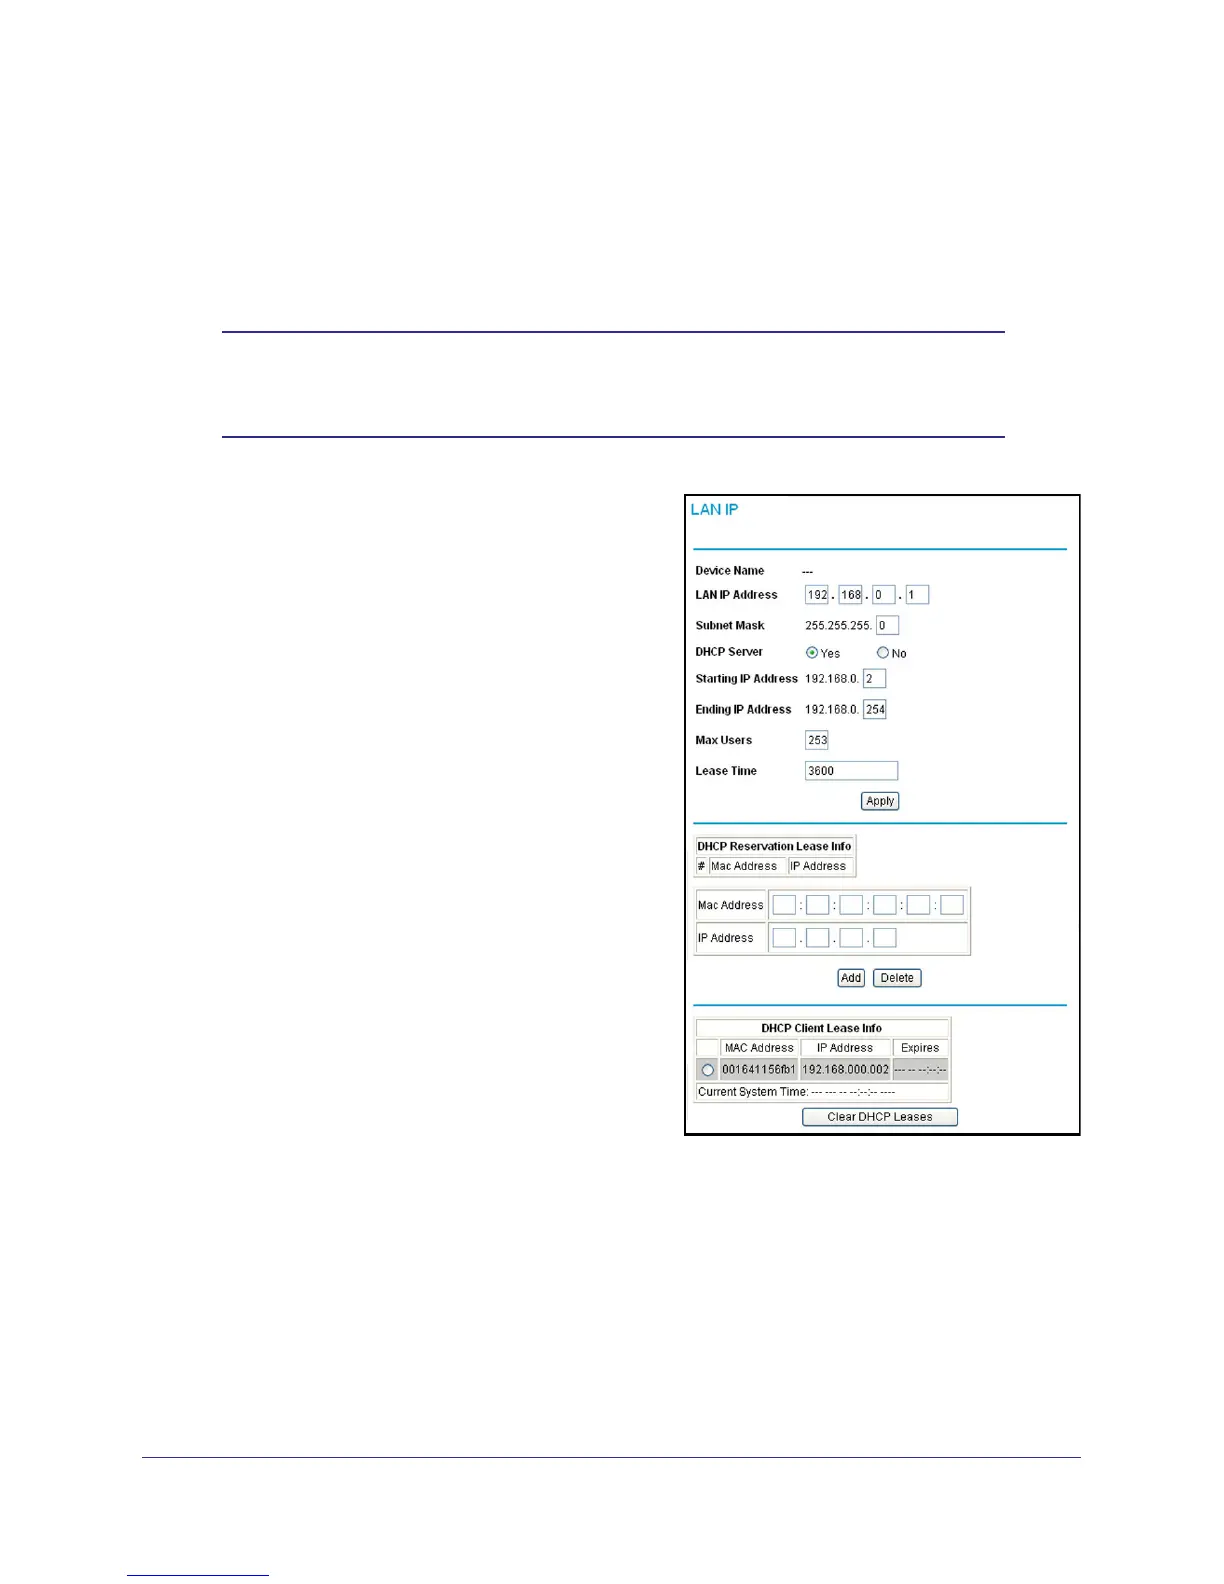
LAN IP Setup
The LAN IP screen allows you to configure LAN services such as the IP address of the
gateway and DHCP. The TCP/IP and DHCP default values work fine in most cases.
Note: If you disable the DHCP server, you will need to assign to your
computer a static IP address to reconnect to the gateway and enable
the DHCP server again.
1. Select Advanced > LAN IP.
2. Enter these settings:
• LAN IP Address. The factory default
setting is 192.168.1.1.
• Subnet Mask. The network number portion
of an IP address. Unless you are
implementing subnetting, use
255.255.255.0 as the subnet mask.
• DHCP Server: The Yes radio button is
selected by default so the gateway acts as
a DHCP server, providing the TCP/IP
configuration for all the computers
connected to it.
If you will assign IP addresses manually, or
you have another DHCP server on your
network, select the No radio button.
• Starting IP Address and Ending IP
Address. These fields specify the range in
the IP address pool.
• Max Users. The maximum number of
users on the network.
• DHCP Lease. See the following section,
Reserving an IP Address for DHCP Use .
3. Click Apply to save your LAN settings