5 Maintenance and troubleshooting
5.1 System setup
The Model 7100E is shipped ready to install and operate with complete factory configuration already
programmed and tested. The user may however wish to change the system configuration to suit the
application of the analyzer. Some setup parameters may be changed by the user via the control panel
keypad. All configuration parameters may be changed by the user via the Service Port.
Important: Before changing any of the Model 7100E settings, refer to Appendix C – Factory Setup for
reference. If the user has any questions before proceeding with changing analyzer settings, please
contact the Neutronics Service Department for assistance.
System setup via control panel keypad
The control panel user setup menu may be accessed from the Model 7100E control panel by pressing
and holding the “MODE” key for at least 10-seconds until the 7-segment alphanumeric display shows “---“
to indicate that the analyzer has accessed setup mode. Release the “MODE” key to activate setup mode.
Once in setup mode, the user can access adjustable parameters sequentially by continuing to press and
release the “MODE” key to scroll through the setup menu.
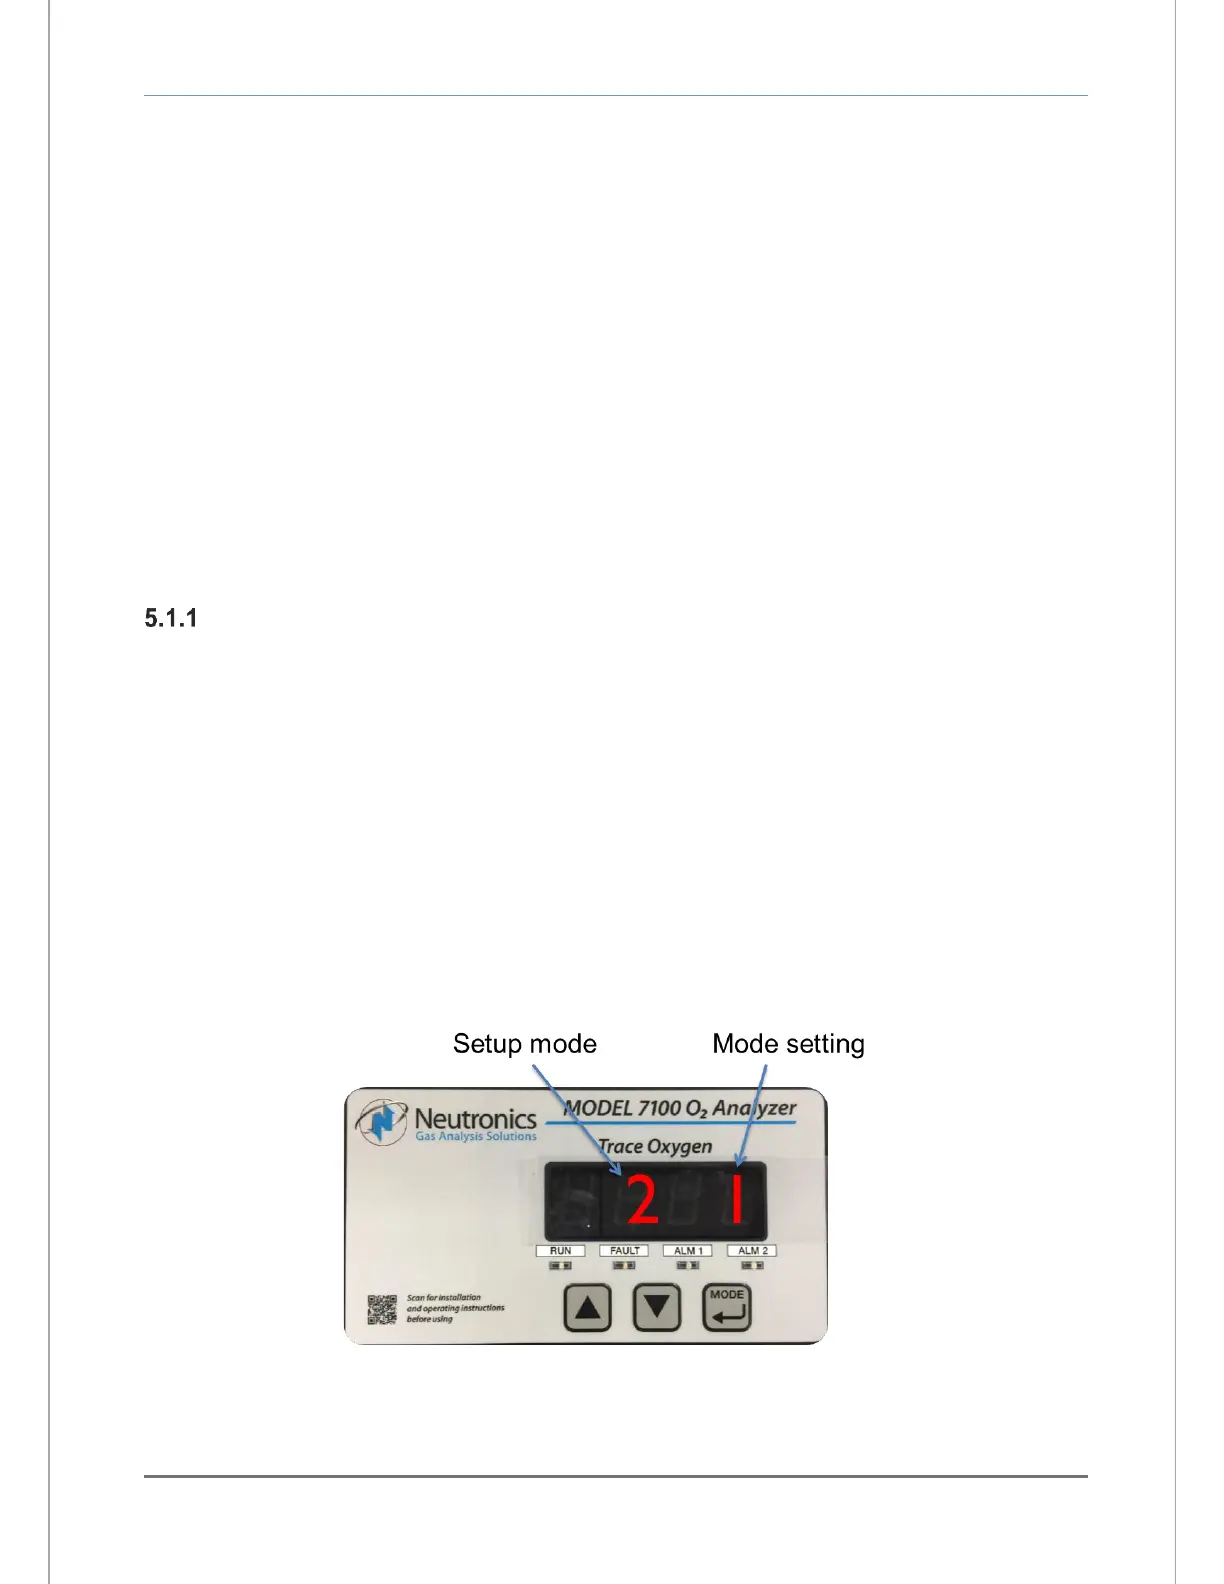
When you reach the mode that you wish to change, use the “UP” and “DOWN” keys to adjust the
displayed setting. The modes are numerically identified by the number on the left side of the display. The
current mode setting is identified by the number on the right side of the display (Figure 20). Descriptions
for the modes and the valid mode settings are included in the quick reference table, Figure 21.
New settings are automatically saved when the user advances to the next mode by pressing and
releasing the “MODE” key. The user may exit the Setup menu at any time by pressing simultaneously the
“UP” and “DOWN” keys (see Appendix D, Control panel Hot-Key functions).