TITAN 912L Linear Actuator
Installation Reference Manual
1010
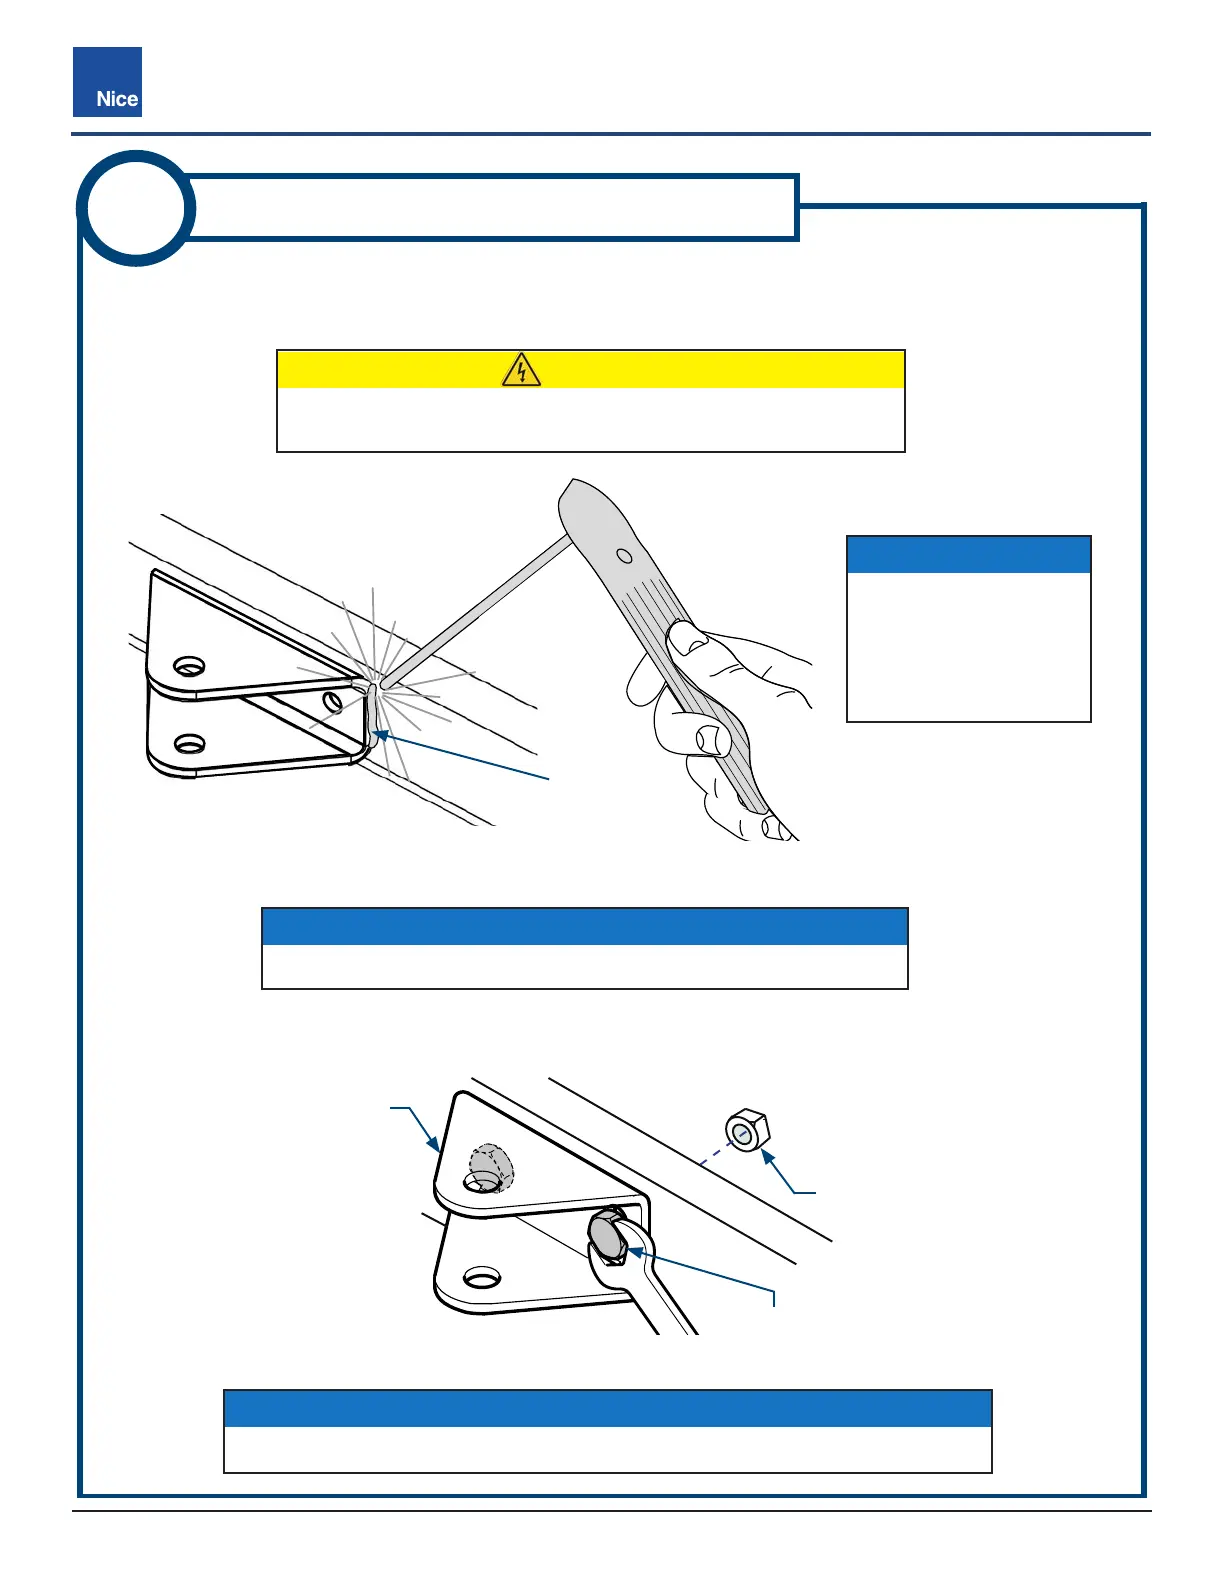
1. Weld the gate bracket to the gate supporting structure (FIG-5A) or use supplied 3/8” bolts and
nuts from kit (FIG-5B).
2. If welding is not possible, drill two holes to match bracket mounting holes and afx with two
3/8”x2.5” screws and 3/8” nuts included in the kit (FIG-5B).
FIG-5A: GATE BRACKET WELDED TO GATE
FIG-5B: GATE BRACKET AND HARDWARE (BLACK BRACKET SHOWN)
5
AFFIX GATE BRACKET TO GATE
GATE BRACKET
3/8”x2.5” HEX BOLT (x2)
WELD
3/8” NUT (x2)
IMPORTANT!
Ensure bracket centerline is 1/2” above the top of the pivot arm.
IMPORTANT!
Use a bubble level to assure after mounting that actuator is level and plumb.
CAUTION
Never weld parts to the gate or posts when the control board
is powered to avoid irrepairable damage to the circuit board!
NOTICE
Attach gate bracklet
only to structural
supports. If unsure of
exact bracket location,
tack weld or clamp until
gate can be tested.
www.ApolloGateOpeners.com | (800) 878-7829 | Sales@ApolloGateOpeners.com
 Loading...