Do you have a question about the Nice WALKY 1024 and is the answer not in the manual?
Important safety instructions and warnings for installation and use.
Key instructions and warnings to consider before commencing installation.
Critical instructions for safe and proper operation of the automation system.
Details the automation system's components and its intended purpose for gates.
Essential checks to ensure product suitability and integrity before installation.
Specifies the maximum weight and dimensions for gate automation.
Outlines necessary steps and considerations before starting the installation process.
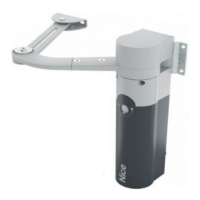
General guidance for installing the WL1024C/WL1024 gearmotor unit.
Procedure to determine the correct length for the gearmotor arm.
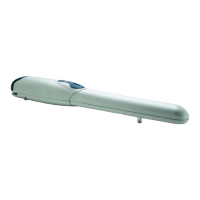
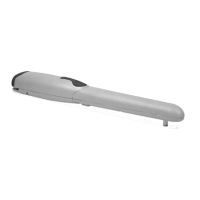
Steps for installing the gearmotor with its standard length arm.
Steps for installing the gearmotor with a shortened arm.
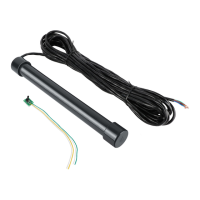
Instructions for mounting and connecting the WLT lamp to the gearmotor.
Steps for safely removing the control unit from the gearmotor.
Procedure for fine-tuning the gate leaves alignment when in the closed position.
How to manually lock and unlock the gearmotor for operation or maintenance.
Explains the various electrical connection points and systems used.
Instructions for correctly connecting the main power cable.
Guide for connecting a gearmotor that does not have an integrated control unit.
Information on connecting additional accessories like key selectors or lights.
How to assign unique addresses to Bluebus devices for recognition.
Steps to perform after powering up to verify system connections.
Process for the control unit to identify connected Bluebus and STOP input devices.
Procedure for teaching the control unit the gate's opening and closing limits.
Verifying the correct movement and stopping of the gate leaves after setup.
Performing essential tests to ensure the automation system functions safely and correctly.
Final steps to complete the system setup and handover to the owner.
Basic programming of functions like automatic closing and photocell behaviour.
Adjusting parameters such as pause time, motor speed, and force.
How to reset the control unit to its factory default settings.
Using advanced functions like "Move Anyway" for operation with safety devices disabled.
Interpreting status signals from the WLT lamp to diagnose problems.
Understanding LED indicators on the control unit for fault diagnosis.
Guide for connecting the OXI radio receiver to the control unit.
Instructions for installing and connecting the PS424 emergency power battery.
How to connect the Oview programmer for system management and diagnosis.
Steps for integrating the Solemyo solar power supply system.
Recommended frequency and procedures for maintaining the automation system.
Detailed steps for performing routine checks and maintenance tasks.
Guidelines for environmentally sound disposal of the automation system.
Lists key specifications including torque, speed, power, and dimensions.
Identification and description of various connectors and LEDs on the control unit.
Method for estimating the product's commercial life based on strenuousness index.
Formal declaration by the manufacturer regarding product compliance with EC directives.
Crucial safety advice for operating the automation system safely.
Indicates the availability of accompanying illustrations for clarity.
| Brand | Nice |
|---|---|
| Model | WALKY 1024 |
| Category | Gate Opener |
| Language | English |