11
6
7
8
9
10
14
15
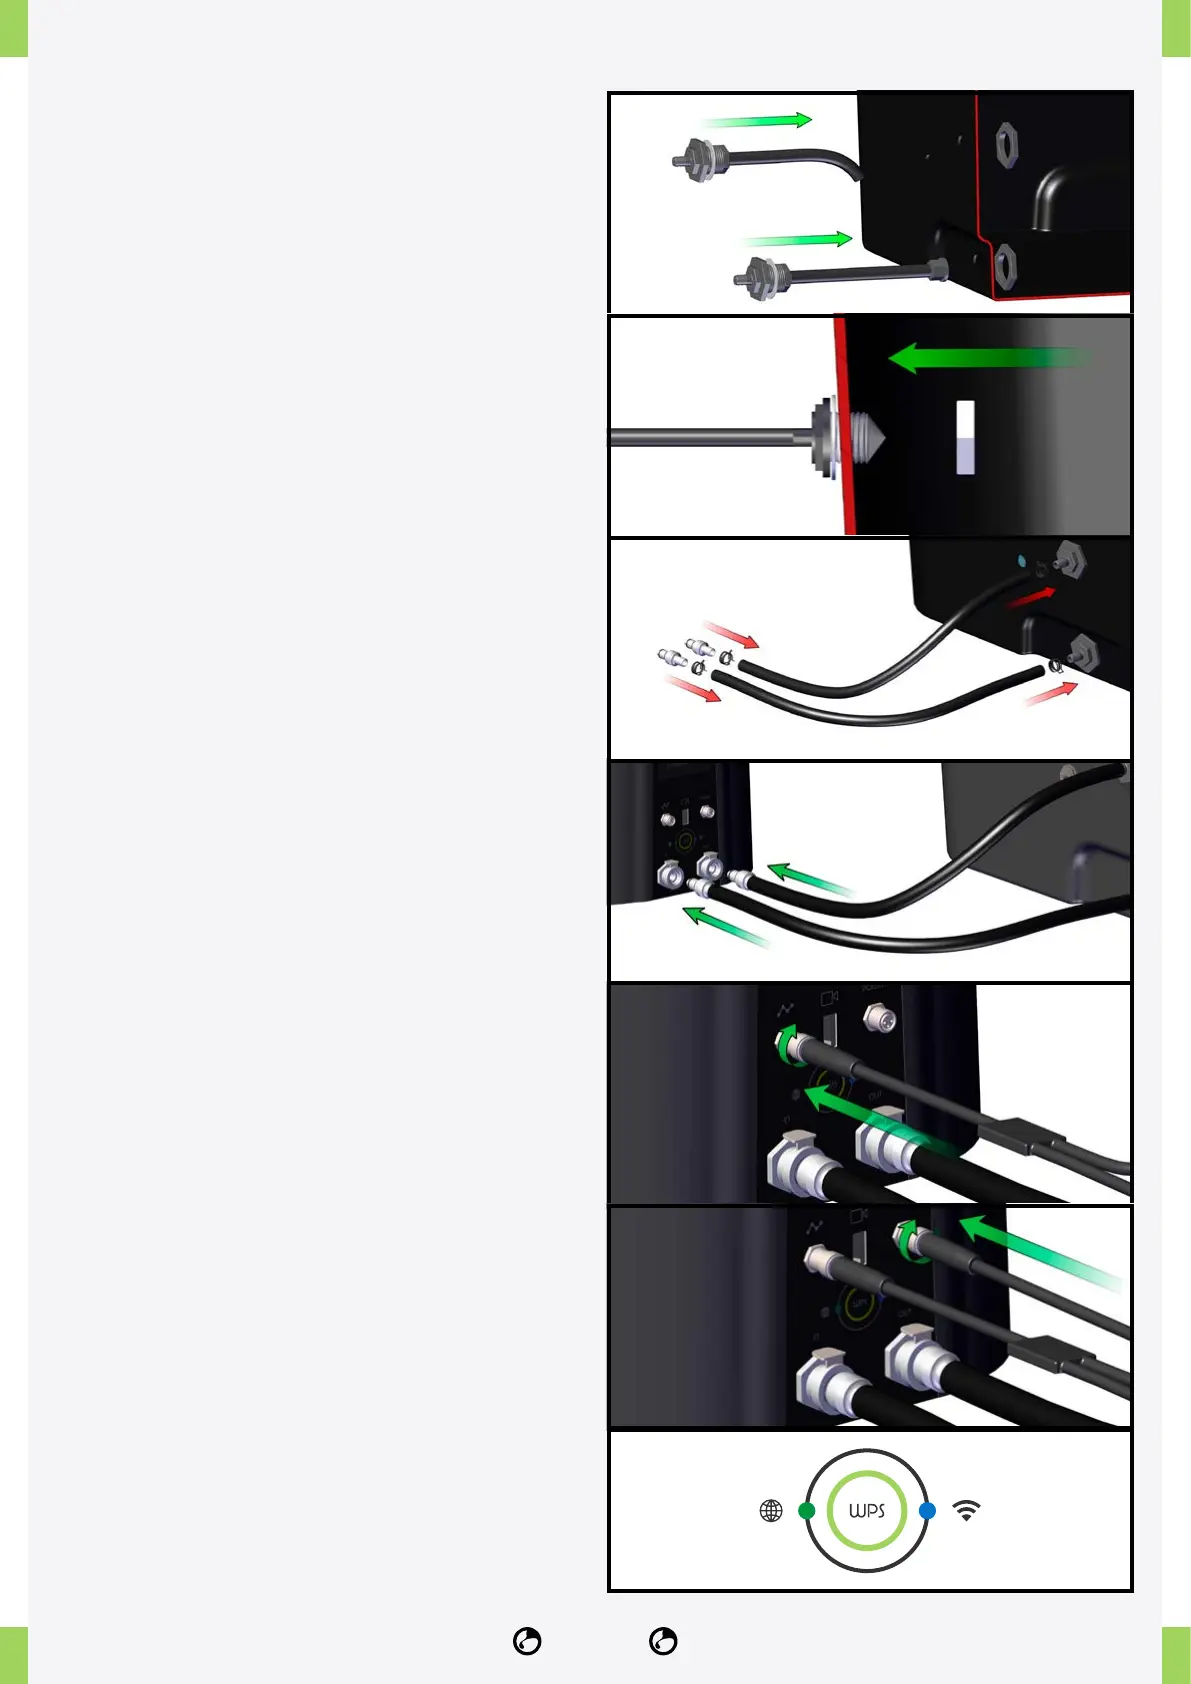
6� Fit the low and high seals: the seal must remain
on the outside and the corresponding nuts must be
tightened by turning them counterclockwise.
7� Insert the level probe by holding the gasket
towards the outside of the tank and tightening the lock
nut clockwise.
8� Use the hose supplied in the kit (8) to connect the
tank OUT connector (4) to the valve connector (9) and
the IN connector (3) to the valve connector (9) and
secure with the hose clips (7).
9� Connect the tub supply tubes to the NIDO ONE
V2 as follows: low tank hole tube connected to the
IN input of NIDO ONE V2, and high tank hole tube
connected to the OUT output of NIDO ONE V2.
10� Connect the water level and temperature/
humidity probe cable.
11� Fill the hydroponic system tank with water.
12� Fill the fertilizer cartridges, pH-, and/or pH+ with
acid.
13� Connect the pre-congured NIDO connector to
the lamp.
14� Connect the power cable and then the socket.
15� Before pairing the NIDO ONE V2 with the
NidoPro app, make sure the NIDO ONE V2 is
connected to the access point and online (green light
on and blue light on the NIDO ONE V2 panel).