30
1
2
3
5
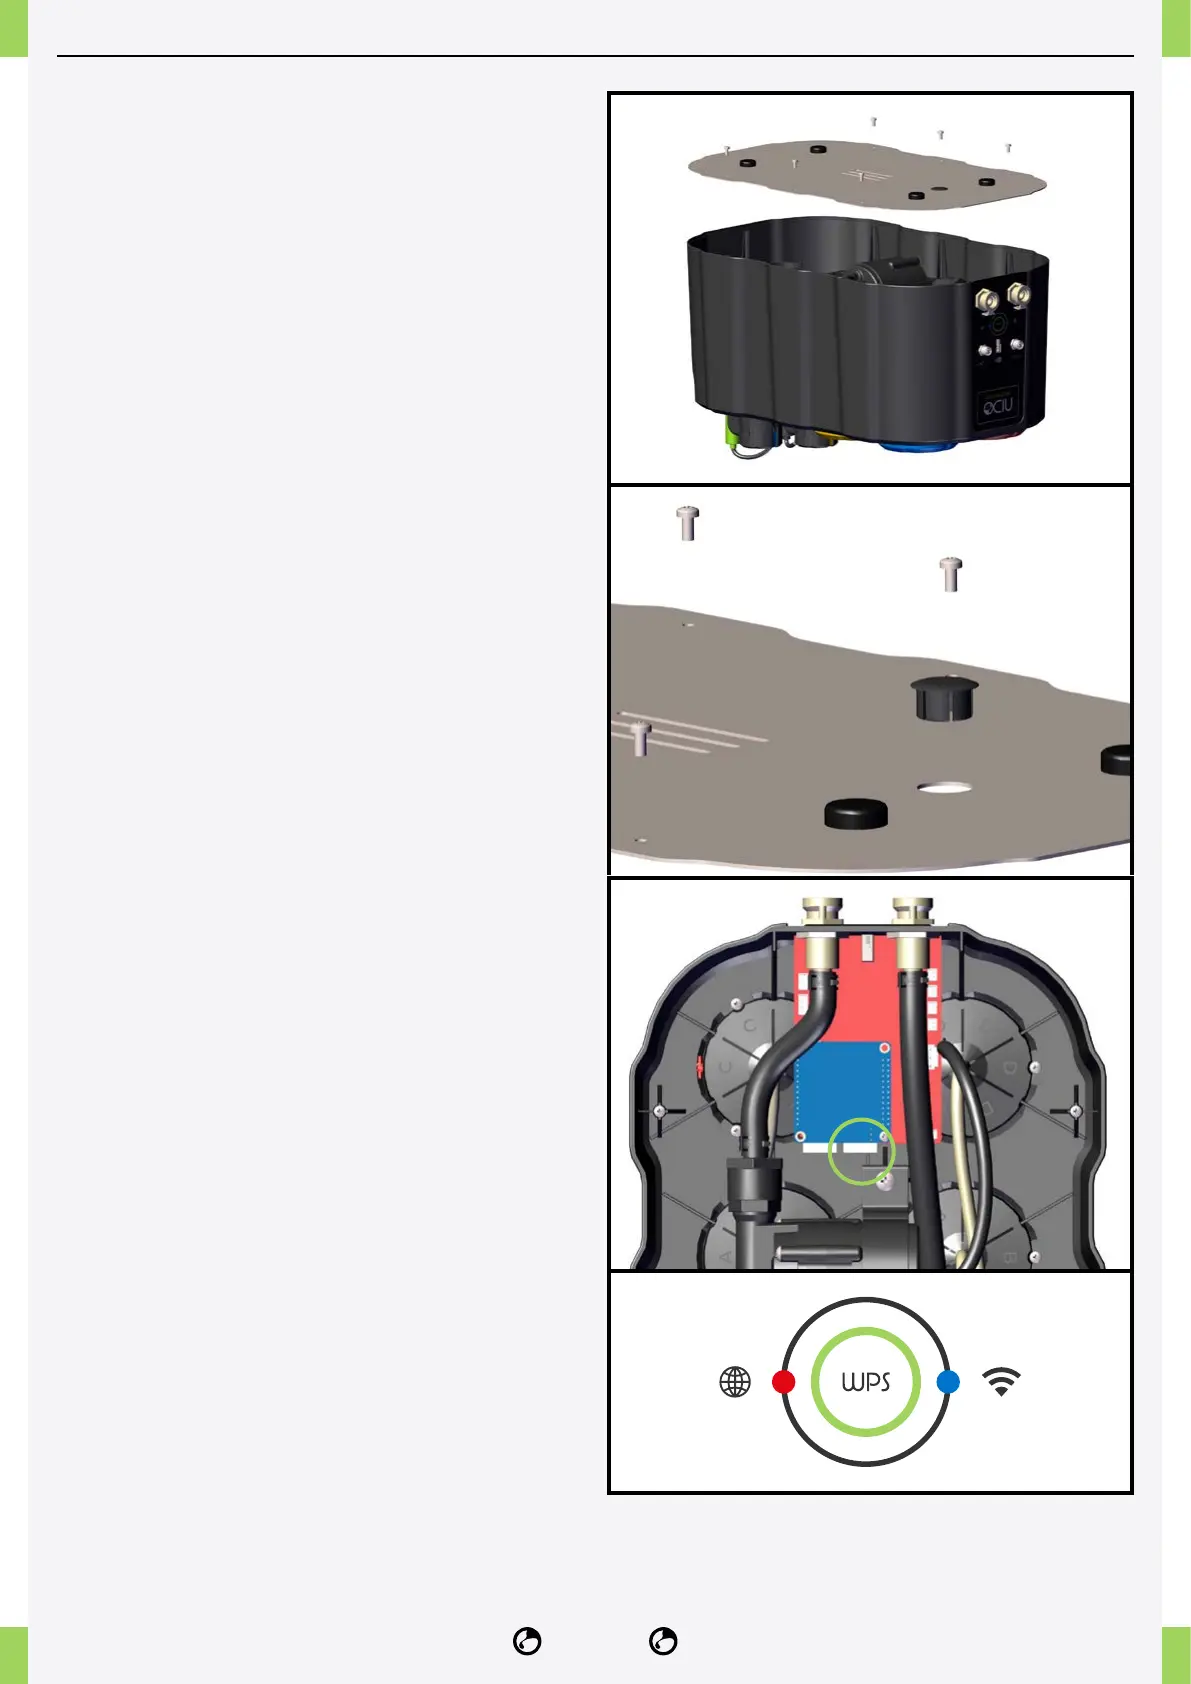
CONNECTION OF NETWORK CABLE
If you are experiencing interference due to the
presence of several Wi-Fi networks or other signals
that affect the proper functioning of Wi-Fi, you can
avoid using the supplied access point and connect
the NIDO ONE V2 directly to the RJ45 network cable.
Here is how to proceed.
1� Remove the steel cover of the device by
unscrewing the six xing screws.
2� Remove the black cap located on the steel plate
and use the resulting opening to pass the RJ45
network cable through.
3� Inside the device, you will nd a blue electronic
board equipped with one or two RJ452 network ports.
4� Connect the network cable to the available port on
the blue circuit board. For the NIDO ONE V2 model,
you must connect the cable to the RJ45 socket
located on the right.
5� Close the device cover and tighten the fastening
screws.
After restarting the device, the lights on the side panel
should remain lit as follows: red light on the left and
blue light on the right.
If the blue light is ashing, it indicates no internet
connection. In this case, it is necessary to check the
router for rewall blockages.