23
1
2
3
DOSING PUMPS
The dosing pumps accurately dispense fertilisers and
pH correctors. They have a unique and innovative
design that allows high standards of precision and
quick maintenance.
The dosing pumps are designed exclusively
for pumping liquids, do not dismantle or
modify the pump except as described in this
manual.
Never operate the dosing pumps in
vain (without fertilisers or pH correctors
and active formula on the NidoPro app
calendar), otherwise the life of the pump will
be irreparably compromised.
Never leave hazardous liquids in the pump
and tubes of NIDO ONE V2 during storage.
To remove hazardous liquids (fertiliser, pH
corrector) from the NIDO ONE V2, perform
the cleaning of the product at the end of each growing
cycle in the Settings > Device cleaning menu.
Remove any residual fertiliser or pH
corrector from the NIDO ONE V2 before
switching from one solution to another by
manually dispensing at least 20 ml from the
Home > Control > Fertiliser menu.
The dosing pump may deteriorate under
certain conditions of use, it is essential
to carry out the preventive maintenance
listed in the NidoPro app to ensure the best
operating efciency of the NIDO ONE V2.
Always run the cleaning cycle from the
“Settings > Device Cleaning” menu
BEFORE performing any maintenance, this
will ensure that all hazardous chemicals
are removed from the pump, preventing accidental
damage and injury.
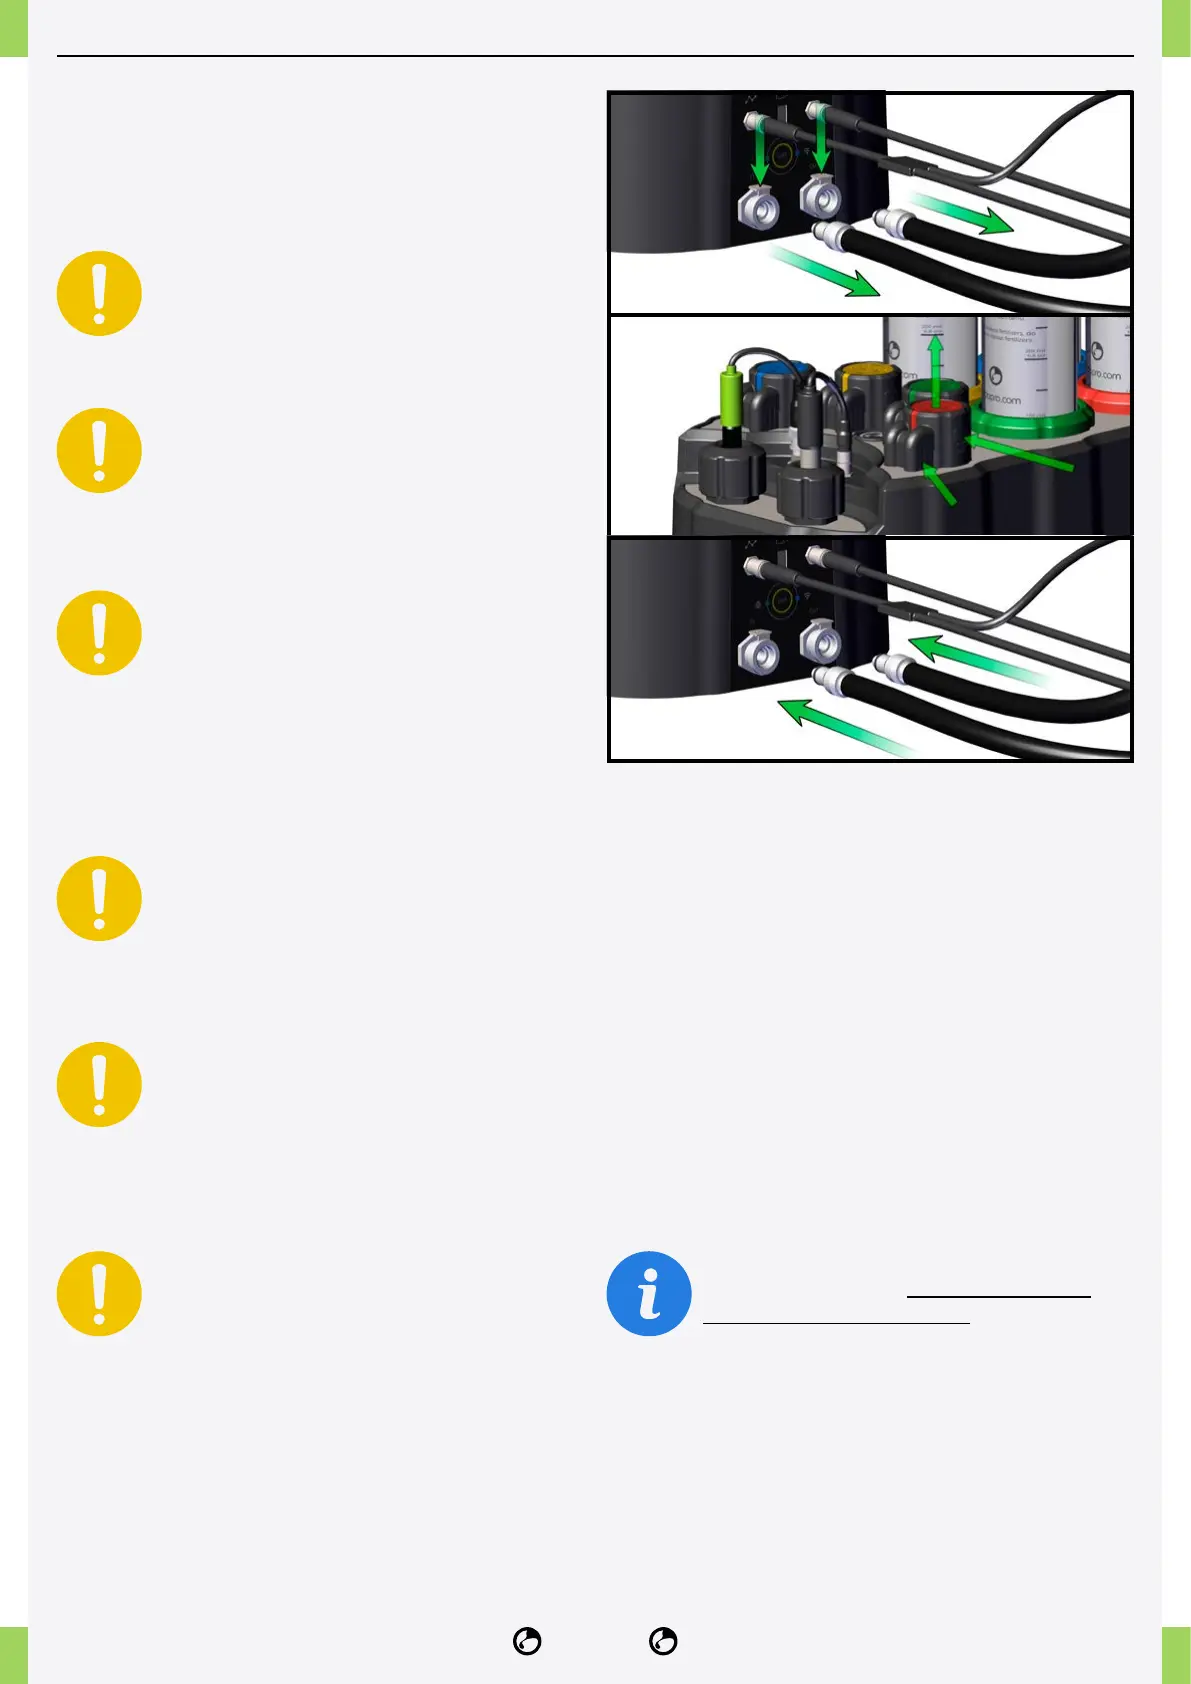
REPLACING THE DOSING PUMP
1� Disconnect the NIDO ONE V2 from the water
reservoir and remove the cartridages or the
connection kit connected to the pump to be replaced.
2� Remove the dosing pump by pressing the side
buttons and pulling upwards, grasping the pump head
in the knurled parts.
3� Reconnect the NIDO ONE V2 to the water
reservoir and insert the cartridge or the connecion kit.
For a detailed guide on how to remove the
dosing pump heads, you can watch the
following video on YouTube.