I
Read the “Safety Precations” in this manual before assembling the microscope. Be sure to follow
the instructions written therein. Also, make sure that the power switch is off (turned to {)
before assembly to prevent electrical shock.
Tools Required for Assembly
Hexagonal wrench (two hexagonal wrenches are provided with the microscope), flatblade
screwdriver
1
Assembly
1
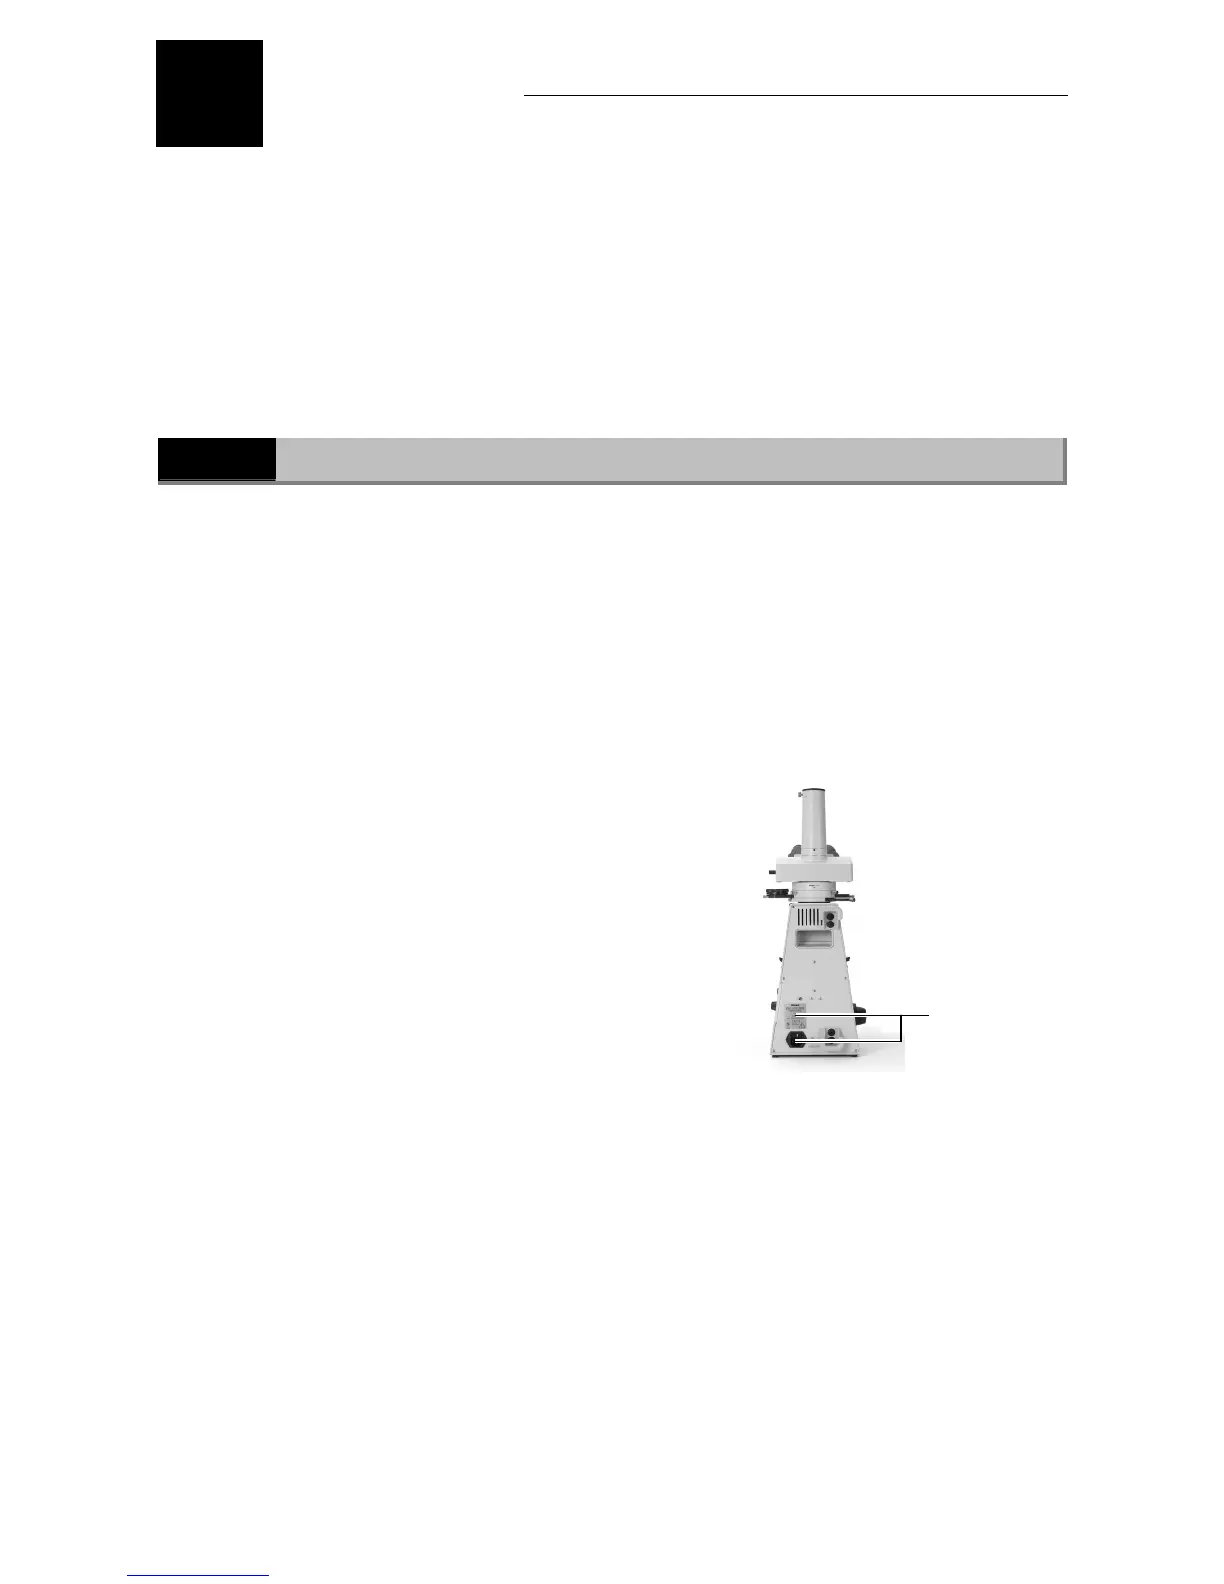
Input Voltage Check
The input voltage is indicated in two places at the rear of the microscope: on the nameplate and
above the AC inlet. Confirm that these input voltage indications correspond to the voltage
provided in your region. If not, follow one of the instructions below. The use of microscopes with
the different input voltage indications will cause overcurrent and overheating, which may result
in fire or severe damage to the microscope.
If the voltage indication on the nameplate
differs:
Do not plug in the microscope. Contact your
nearest Nikon representative.
If the voltage indication above the AC inlet
differs:
Change the input voltage setting before turning
on the power switch.
• For the microscope with the nameplate
showing [100/110/120 V ~]:
The voltage can be set to: AC 100 V, 110 V or
120 V.
• For the microscope with the nameplate
showing [220/230/240 V ~]:
The voltage can be set to: AC 220 V, 230 V or
240 V.
Input voltage
indications