VI Assembly
2 Replacement of Consumable Materials
41
VI
2
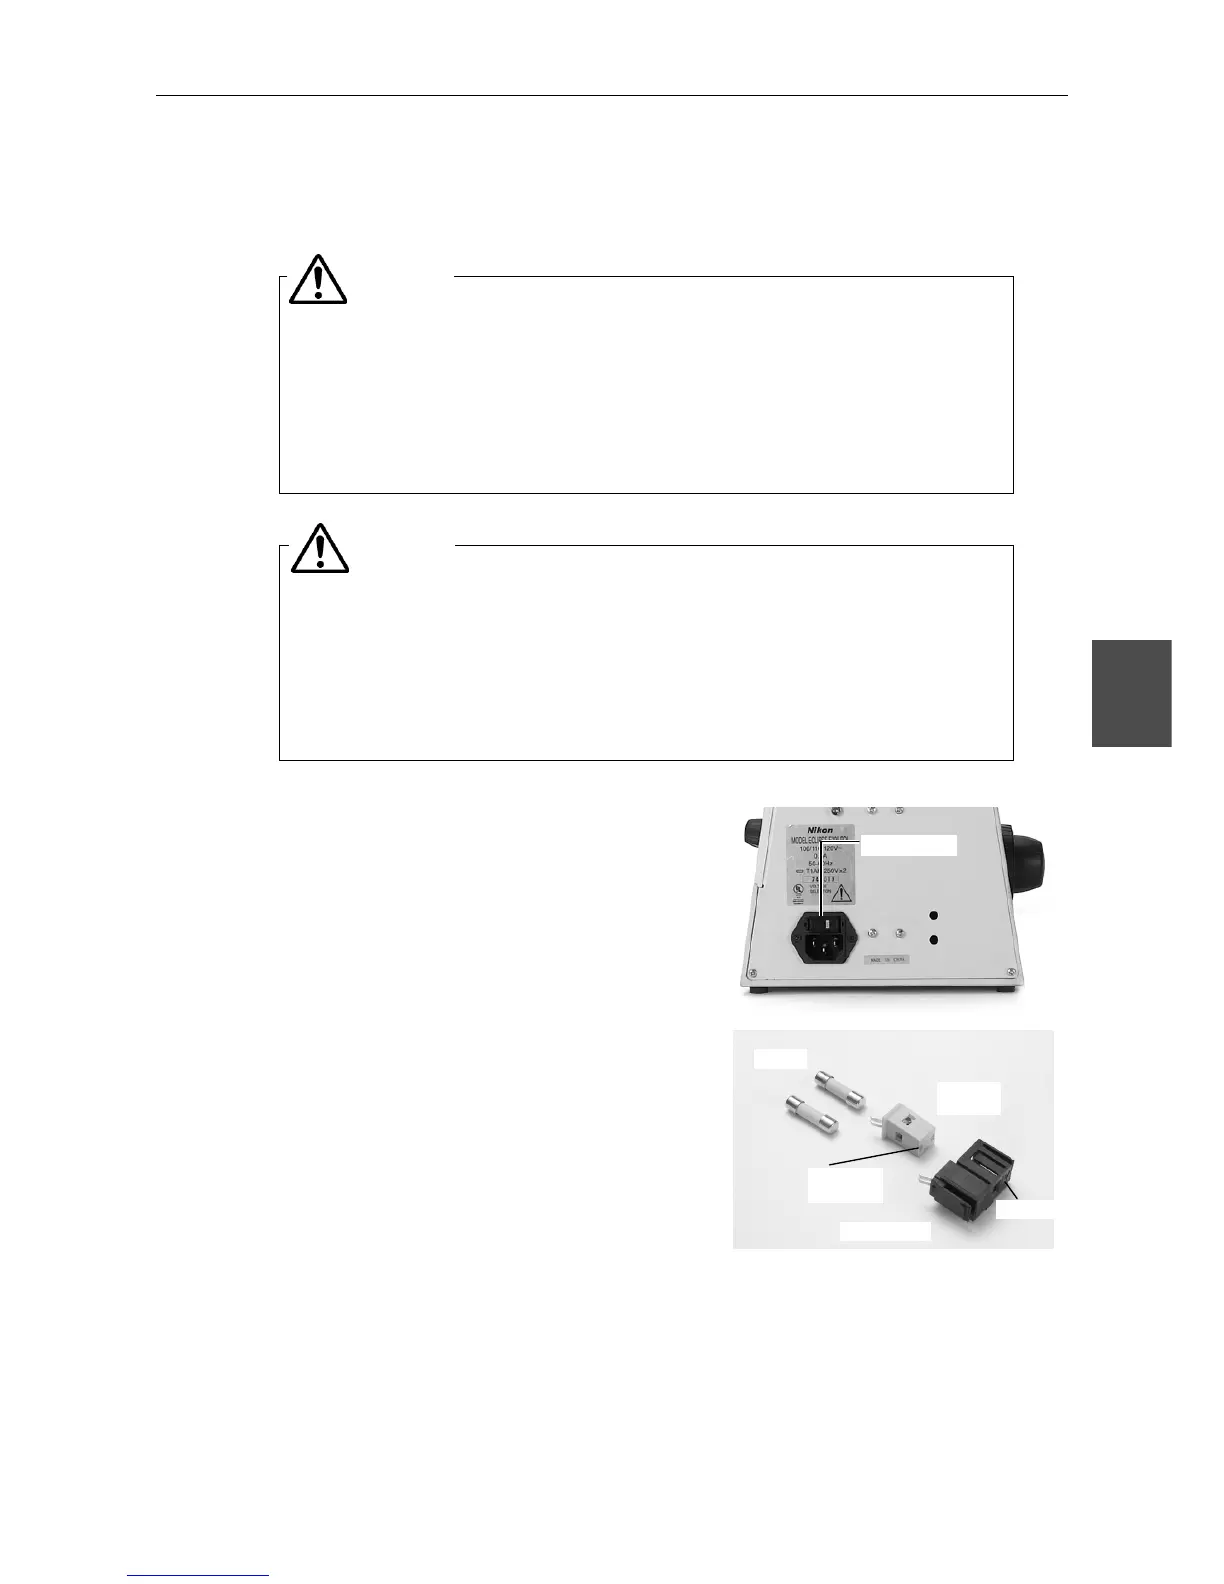
Replacing the Fuse
• To avoid electrical shock or damage to the instrument, turn off the
power switch (turn to {) and unplug the power cord before replacing
the fuse.
• Use the specified fuse. Using a different fuse may damage the
instrument or cause a fire hazard.
Specified Fuse: 250 V 1 A, time-lag, low-breaking type, 5x20
miniature fuse x2
• Make sure that the contact of the fuse is not damaged before installing
a new fuse. If the contact is damaged, a malfunction or overheating
may result.
• Attach the fuse to the fuse holder securely. If not, the fuse may come
loose or a contact failure may occur, resulting in overheating or smoke.
• Put back the fuse holder securely to its original position.
Changing the Voltage Setting
(1) Turn off the power switch (turn to {) and
unplug the power cord.
(2) Remove the fuse holder using the flatblade
precision screwdriver. (Use the tip of the
screwdriver to push the two lock plates
toward the center of the fuse holder. The fuse
folder pops out from the AC inlet.)
(3) Wear gloves and remove two fuses and the
voltage selector from the fuse holder.
(4) Attach the voltage selector to the fuse holder
so that the indication of the voltage provided
in your region appears in the window of the
fuse holder.
(5) Put the fuses and the fuse holder back in
place. Be sure to push both sides of the fuse
holder firmly till it clicks into place.
WARNING
CAUTION
Fuse holder
Fuses
Voltage
selector
Voltage
indication
Fuse holder
Window