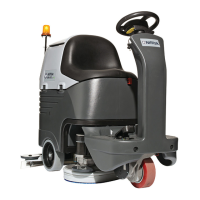
Service Manual: SC750, SC800, SC 750 ST, SC800 ST
Form Number 56043150 Page 28
• 4 blinks = On-board charger with GEL EXIDE 25A baeries
• 5 blinks = On-board charger with GEL-AGM 25A baeries
• 6 blinks = On-board charger with WET 15A baeries
• 7 blinks = On-board charger with GEL-AGM 15A baeries
Additional Program Options
The following opons can be used by the technician or to set user preferences.
Low Voltage Cut Out Selecon –The purpose of the low baery voltage cutout funcon is to help prolong baery life.
The scrub deck will be raised and the brush motors, vacuum motor, and soluon solenoid valve will turn OFF automa-
cally and cease to funcon when the baeries discharge to the selected cutout level. The cutout level is adjustable
between two sengs. The standard seng (wet cell/lead acid) is 20.55 volts and alternate seng (AGM) is 21.75 volts.
To check or change the seng:
1. While pressing and holding the vacuum and scrub switches backward, turn the key switch
on.
2. Wait about 3 seconds unl all of the LEDs light up and then go o. Release the switches.
The yellow Baery Indicator will remain on and the fault indicator will be ashing a numeric value that represents the
current seng. To change the seng, press the soluon switch forward to increase the value or backwards to decrease
the value. To save the seng, press the scrub switch forward (All LEDs will turn on) then turn o the key switch.
• 1 blink = Wet Baery 80%, 20.55V
• 2 blinks = Maintenance Free Baery 70%, 21.75V
Lock Out Brush Pressure - It is possible to lock out either brush pressure seng: Low or High. During normal operaon,
the brush pressure that is locked out will not be able to be selected.
To check or change the seng:
1. While pressing and holding the vacuum and soluon switches backward, turn the key
switch on.
2. Wait about 3 seconds unl all of the LEDs light up and then go o. Release the switches.
The green Baery Indicator will remain on and the fault indicator will be ashing a numeric value that represents the cur-
rent seng. To change the seng, press the soluon switch forward to increase the value or backwards to decrease the
value. To save the seng, press the scrub switch forward (All LEDs will turn on) then turn o the key switch.
• 1 blink = No pressure seng locked out.
• 2 blinks = Low pressure seng locked out.
• 3 blinks = High pressure seng locked out.

 Loading...

