After Sales
Technical Documentation
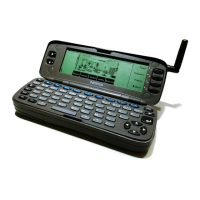
RAE/RAK–1N
Faultfinding/Disassembly
Page 8 – 4
Original, 05/97
Disassembly Procedure
LCD / UI Module Disassembly (see fig.1)
1. Remove 4 stick–on screw caps (A) and 4 Torx screws (B).
2. Gently remove the module sub–assy by pushing the keypad
down.
Note: The right lower screw tower is the most difficult one to release.
3. Disconnect flexi connectors (D) then (C) by releasing
connector clips. Connector C will open by lifting the clip up.
4. Unplug the coaxial antenna wire. (E).
5. Remove EMC flex (not shown) from the reverse side of the UI
module card and then remove the module assembly. (F).
6. Remove PDA LCD module assy. (H)
7. Unclip screen frame (G) from the LCD module.
Note: LCD module is attached to the frame by double sided tape.
8. Re–assemble in reverse order ensuring the following:
correct orientation of PCB in frame, i.e. connector D should
be in line with the scroll keymat.
Coaxial antenna cable (E) does not go under
the UI module
or it will disable the function keys.
 Loading...