Nokia WiFi Gateway 3 Product Guide Install a Gateway 3 (G-240W-E)
Issue: 01 3FE-47464-AAAA-TCZZA 49
6.6 Procedure
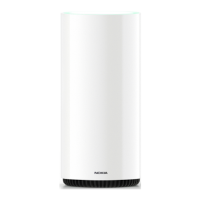
Use this procedure to install a Gateway 3 (G-240W-E).
1 Place the unit on a flat surface, such as a desk or shelf.
2 Connect the fiber optic cable with the SC/APC adapter into the SC/APC connector.
Note — The Gateway 3 (G-240W-E) cannot be stacked with another or
with other equipment. The installation requirements are:
• allow a minimum 100 mm clearance above the top cover
• allow a minimum 50 mm clearance from the side vents
• do not place any heat source directly above the top cover or below the
bottom cover
Danger — Fiber cables transmit invisible laser light. To avoid eye
damage or blindness, never look directly into fibers, connectors, or
adapters.
Warning — Be careful to maintain a bend radius of no less than 1.5 in.
(3.8 cm) when connecting the fiber optic cable. Too small of a bend radius
in the cable can result in damage to the optic fiber.