Installation, Configuration, and Programming
28 PN 15842:K 7/23/2002
4.3 Mount the Cabinet or Backbox
Select an appropriate knockout on the
enclosure for your wiring to run through and
snap it out. Fasten the cabinet or backbox to
the wall. Ground the enclosure to a solid
metallic ground, such as a grounded cold
water pipe. Pull all annunciator wiring into the
enclosure as illustrated in Figure 4-5. Connect
annunciator wiring to the removable terminal
blocks at this time as specified in Section 4.5
“EIA-485 Circuit Connections”.
4.4 Mount Annunciators and Expanders
Set the address and DIP switches for the module. (Rotary dials and DIP
switches may not be fully accessible after mounting device.) Label modules and
dress plates as described in Section 4.10. If using an annunciator key switch or
phone jack, install as described in Section 4.11.
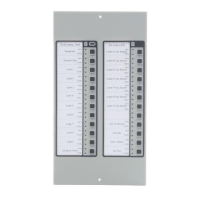
ACM-24AT/ACM-48A. Connect annunciators to their expanders as shown in
Figure 4-7. Press stacker-connectors together firmly. Position the set of
annunciators over the threaded studs on the labeled dress plate and secure with
two nuts and lock washers provided, as shown in Figure 4-6.
ACM-16AT/ACM-32A. Position the annunciator over the threaded studs on the
labelled dress plate and secure with two nuts and lock washers provided, as
shown in Figure 4-6. Connect ACM-16AT and ACM-32A to their expanders
using ribbon cable as shown in Figure 4-8.
Note: Multiple ACM/AEM combinations may be installed in the same dress
plate. This configuration can hide the correct location for the ELR, double-
check that it is installed or enabled on the last annunciator on the circuit.
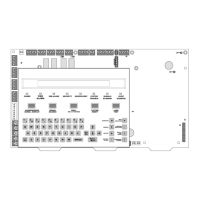
Figure 4-5 Pull Wiring
into Enclosure
AnWir_in.tif
 Loading...