40
Instructions for the installer
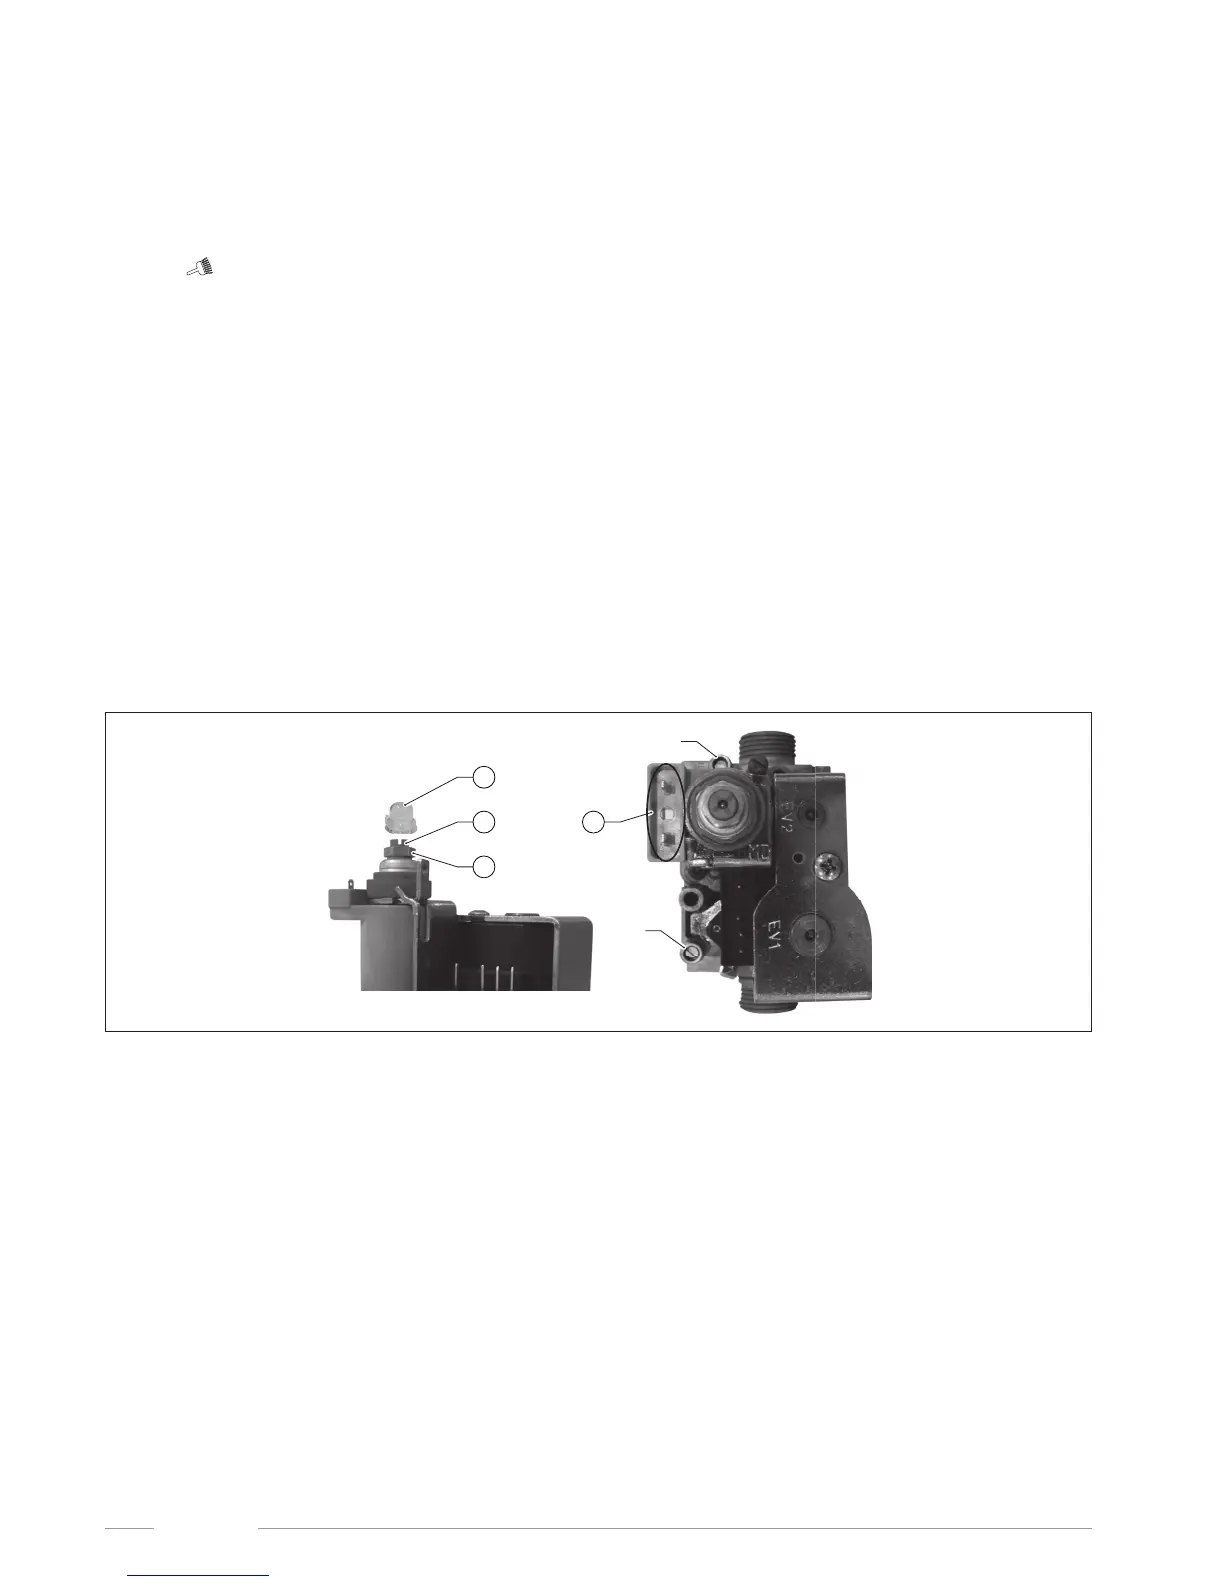
3.17.1 Gas valve setting
Maximum heating output adjustment
• Check the ow pressure value (see Operating data on page 21);
• Remove the plastic cover A at the top of the modulator coil, protecting the pressure regulator adjuster screws;
• Connect a pressure gauge to the pressure measurement point IN to check the input OUT and the output pressure;
• Select boiler operating mode "WINTER" or "CH ONLY" by pressing the "Operating mode" button © on the control panel.
• To activate the ue cleaning function, press and hold the buttons “info” and “Reset” simultaneously for 3 seconds. The CH ow temperature
and the
symbol are shown on the LCD display;
• Turn the brass maximum pressure adjuster nut B CLOCKWISE to increase the pressure at the nozzles, turn ANTICLOCKWISE to reduce the
pressure at the nozzles;
• For LPG operation, turn brass nut B fully CLOCKWISE.
Minimum heating output adjustment
• Electrically disconnect the modulator coil D;
• Switch on the burner and check that the "MINIMUM" pressure value matches the value indicated (see Operating data on page 21);
• To adjust the pressure, hold the brass nut B in place using a 10mm spanner (g. 23, g. 24 or g. 25) and turn the plastic screw C CLOCKWISE
to increase the pressure, or ANTICLOCKWISE to reduce it;
• Re-connect the electrical wiring to modulation coil.
Final settings
• turn the boiler on and check its correct operation;
• measure the minimum and maximum gas valve pressures again;
• adjust as necessary.
• Install protective plastic cap A on to the screws;
• close gas pressure test points;
• check for gas leaks.
OUT
D
IN
A
C
B
Fig. 12 SIT 845