- 11 -
MOUNTING INSTALLATION
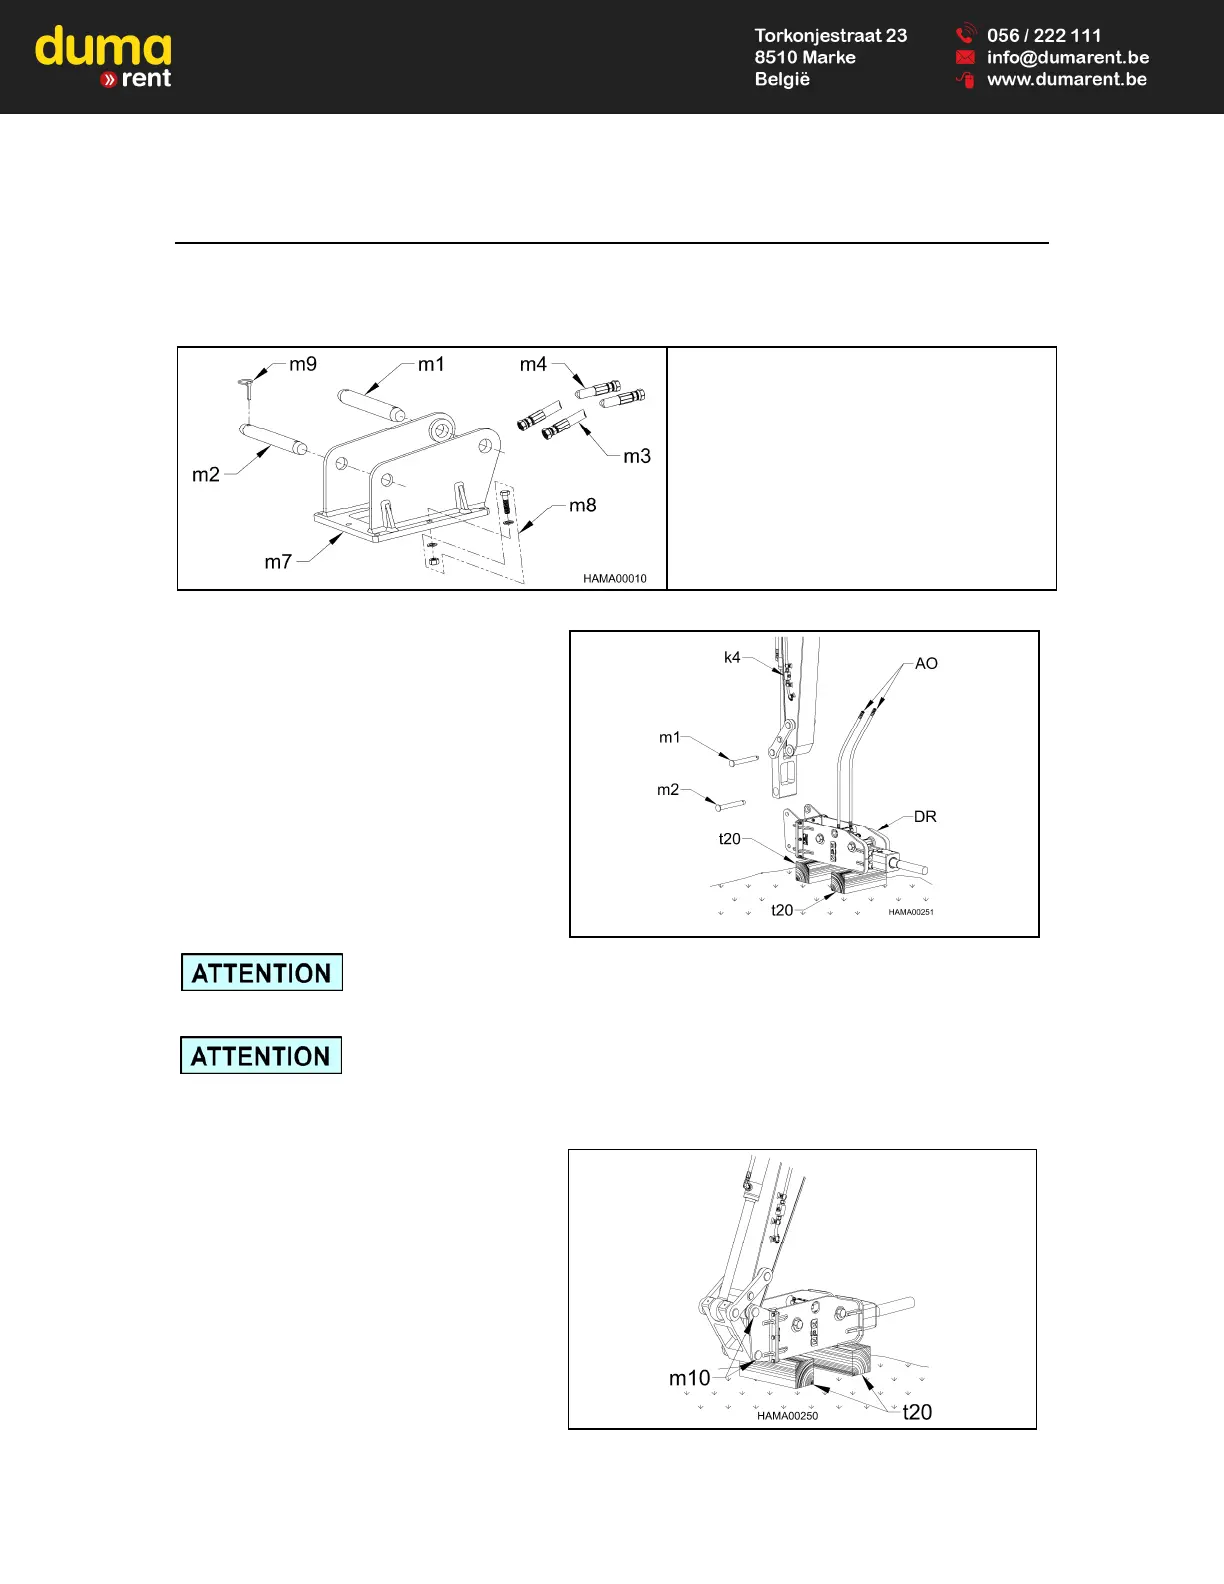
NPK Mounting Installation Kits include the parts required to adapt the NPK HYDRAULIC
HAMMER to the carrier. NPK mounting kits include the hammer mounting bracket,
flow control valve (if required), and hoses to connect to the carrier hydraulic system.
m1 Stick Pin (If Required)
m2 Link Pin (If Required)
m3 Pressure Hose
m4 Return Hose
m7 Top Bracket
m8 Hammer Bolt Package
m9 Klik Pin
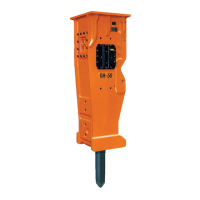
REMOVAL FROM THE CARRIER
1. Close pressure and return line
shut-off valves (k4).
2. Disconnect hydraulic hoses (AO)
before laying the hammer down.
3. Cap the pressure and return lines
on the carrier and connect the
hammer whip hoses.
4. Position the hammer (DR)
horizontal on wood blocks (t20)
and remove boom pins (m1 and
m2).
The hydraulic lines must be handled carefully and sealed to
prevent contamination from entering the hammer or the
carrier hydraulic system.
The tool end of the hammer should be set lower than the
head end to prevent moisture from entering the hammer
through the tool area.
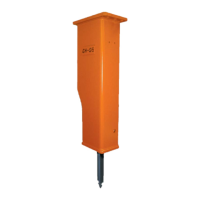
MOUNTING TO THE CARRIER
1. Place the hammer horizontal on
wood blocks (t20), as shown.
2. Align the boom pin holes (m10).
Install the stick pin before the
cylinder link pin.
3. Connect hydraulic hoses.
PRESSURE is on left, RETURN is
on right.
4. Open shut-off valves.