30
Operation of SMH/HMH Series
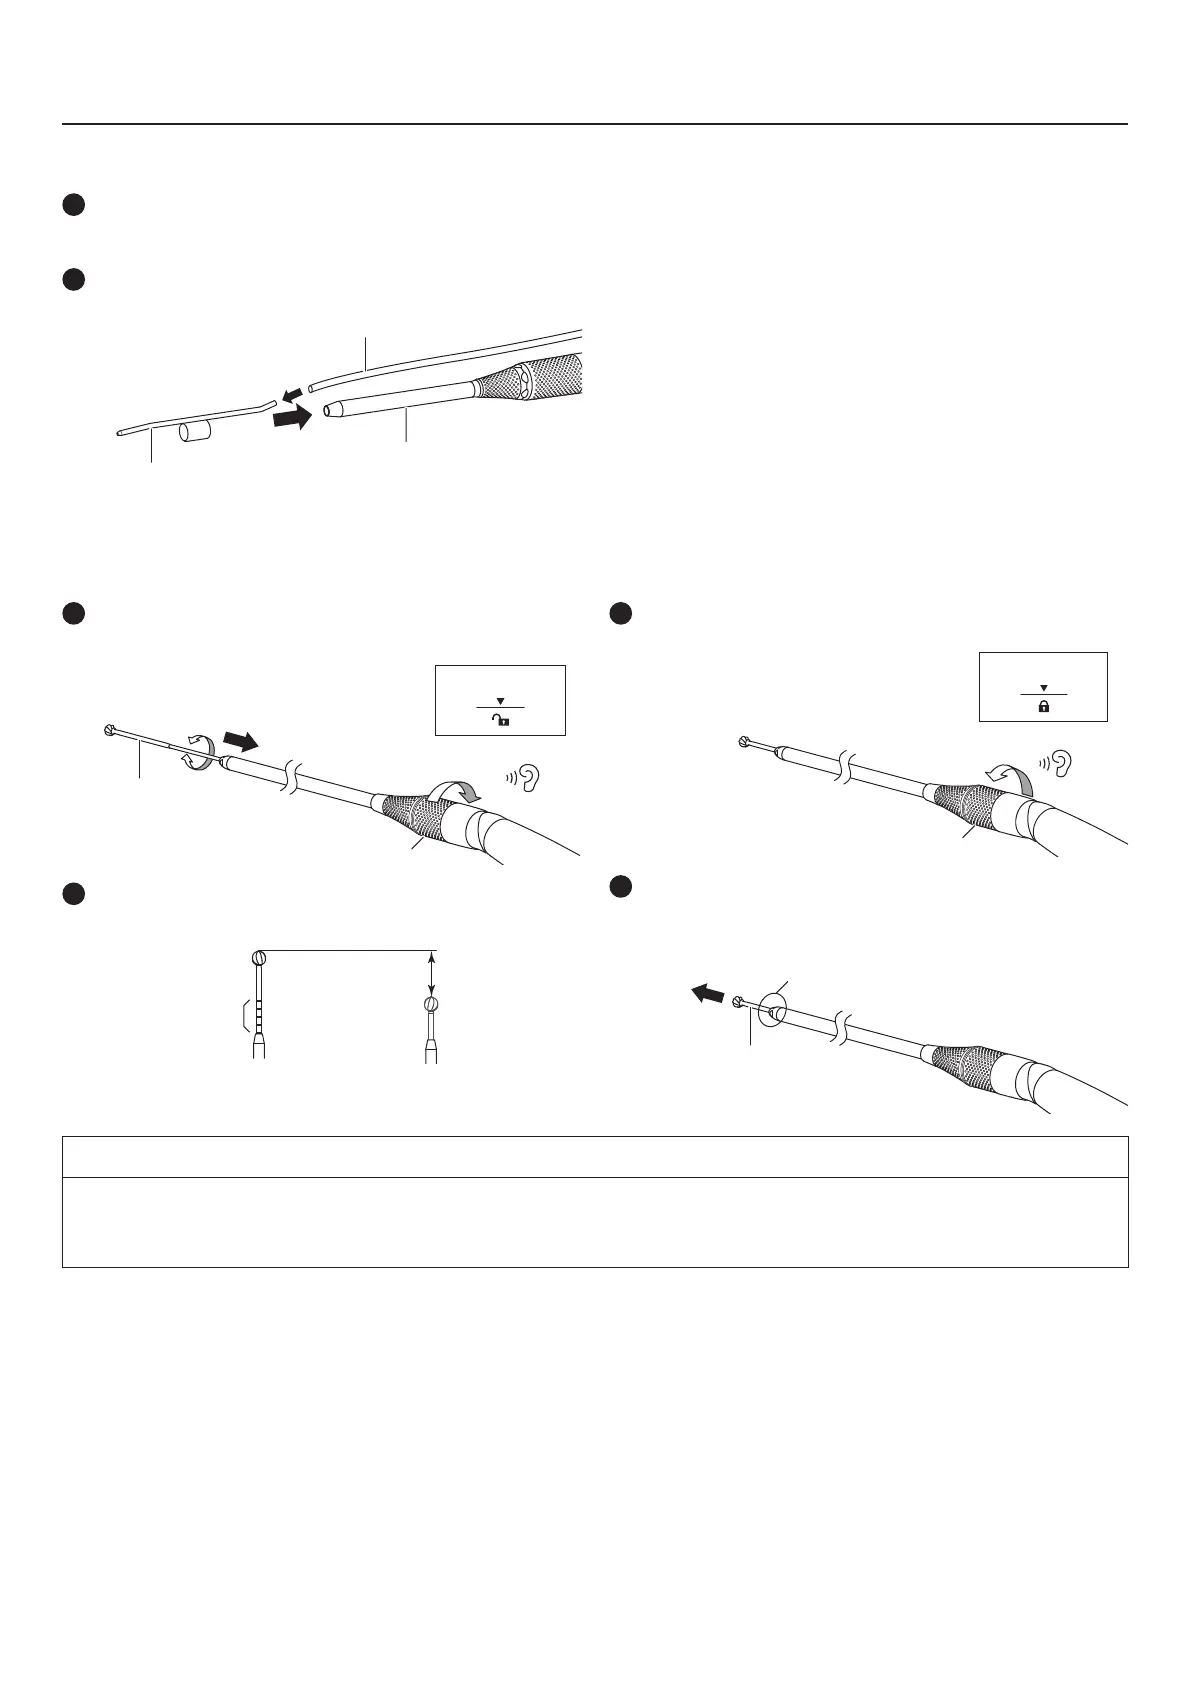
Mounting the Irrigation Nozzle (Optional)
_ Mounting
1
Insert the Irrigation Nozzle Ⓐ onto the Bur Guard Ⓑ of the
Attachment, making sure that the correct end of the Irrigation
Nozzle goes in.
2
Insert the Irrigation Tube Ⓒ into the Irrigation Nozzle Ⓐ.
Ⓐ
Ⓑ
Ⓒ
_ Removing
Perform steps 1 and 2 of the mounting procedure in the reverse
order.
* For the related connection and the setting on the Control Unit, refer to OM-SE0021E Primado2 OPERATION MANUAL Control Unit and Foot
Controls.
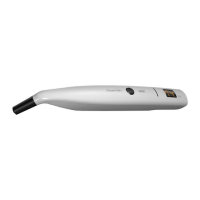
Mounting and Removing the Cutting Accessories (Optional)
_ Mounting
1
Rotate the Twist Collet Ⓐ in the direction of Ⓑ until it clicks.
Insert the Cutting Accessory Ⓒ all the way while twisting it.
Ⓑ
Ⓐ
Ⓒ
Chuck Open
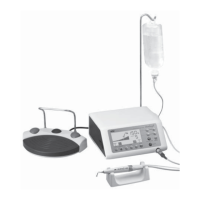
2
Push or pull the Cutting Accessory to adjust the exposure length
as required (when using Slim Attachment 300).
Ring Marks
Adjustable range
10.0 mm
(2.0mm interval)
3
Rotate the Twist Collet Ⓐ in the direction of Ⓓ until it clicks.
Ⓓ
Ⓐ
Chuck Close
4
Pull the Cutting Accessory Ⓒ lightly to confirm that it is
securely connected to the Attachment.
Ⓒ
Securely
_ Removing
Perform steps 1 through 3 of the mounting procedure in the reverse order.
NOTICE
● For Slim Attachment 300 applicable Cutting Accessory, the exposure length of its tip can be adjusted within the chucking range by
changing the chucking position.
● The exposure variable range of the Cutting Accessory is 10mm.